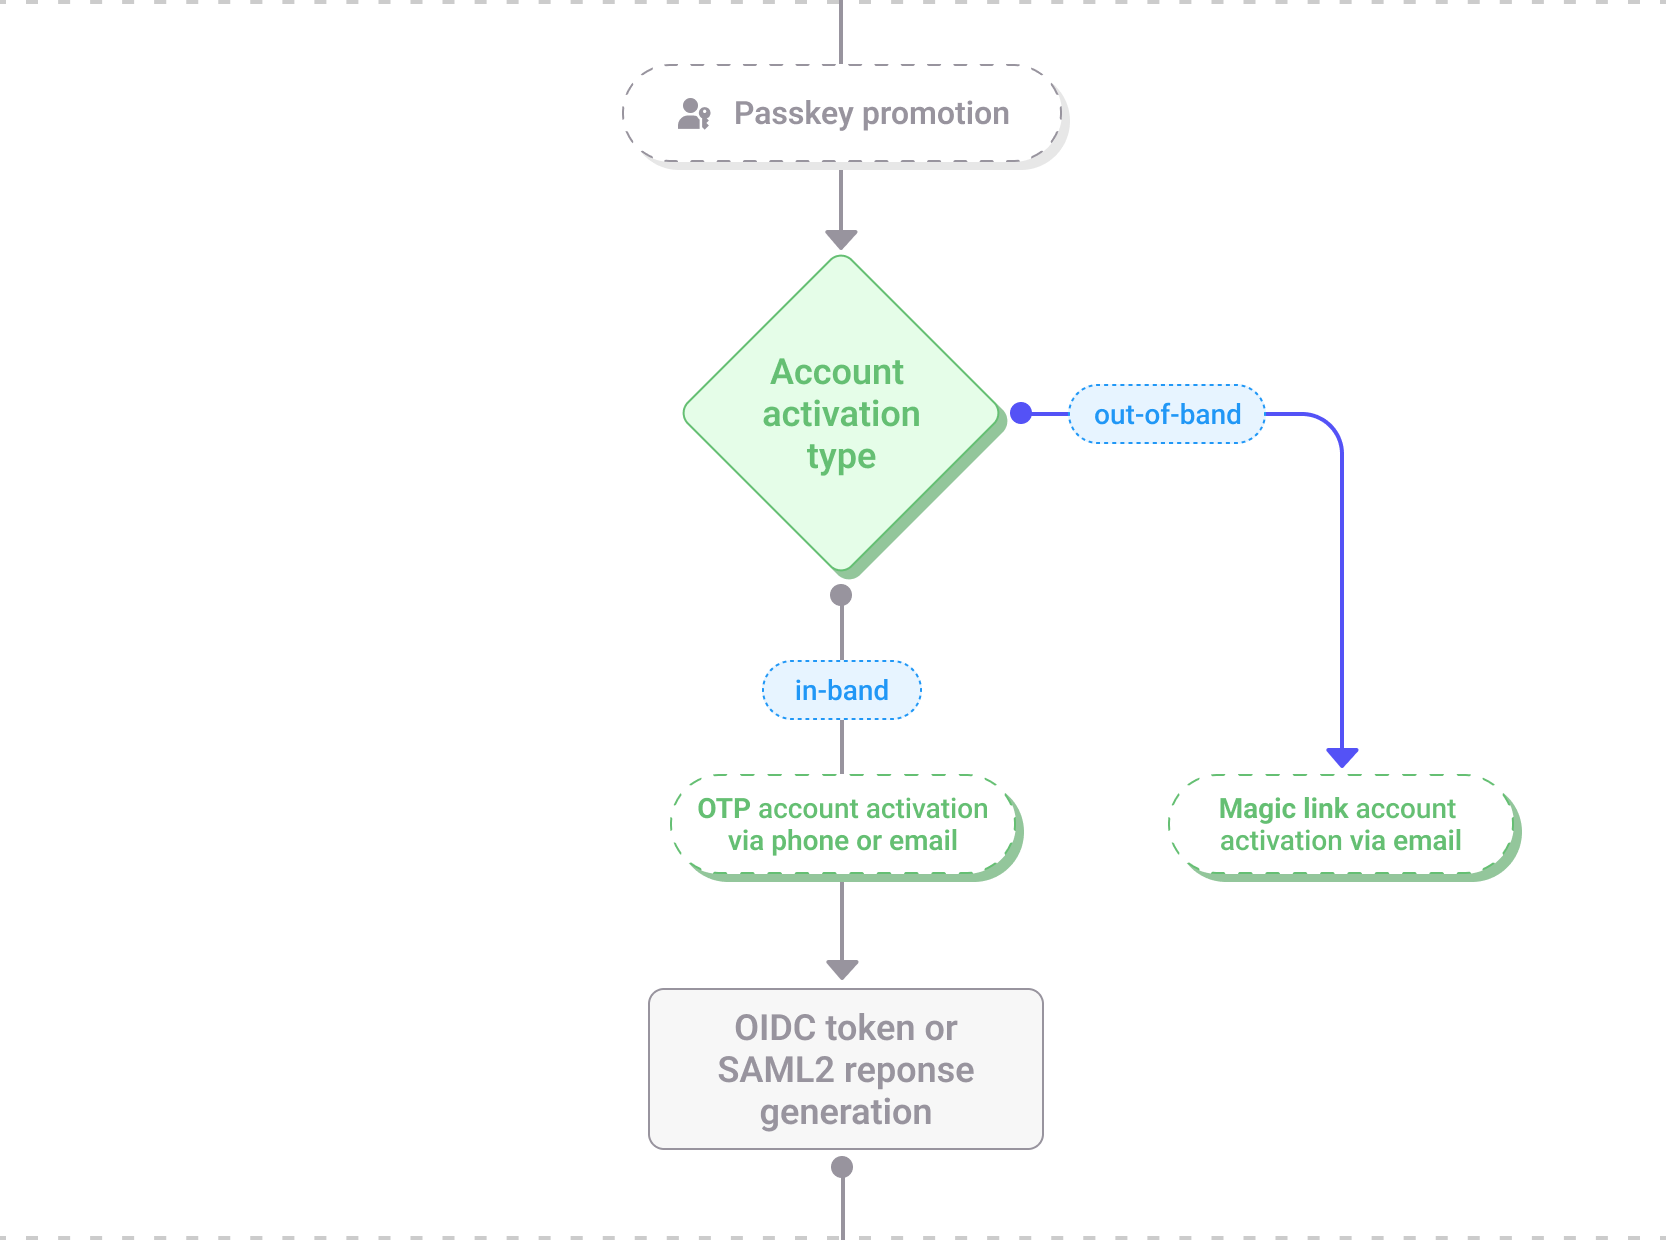
Account activation step
The account activation step is used to validate a customer's ownership of their email address and/or phone number identifier. Once verified, these identifiers can be used for account recovery processes such as username reminders or password resets.
The Account activation step within the registration journey
This step occurs at the end of the registration journey and ensures that customers can be reliably contacted and authenticated in the future.
Depending on the type of identifier, the customer sees different flows:
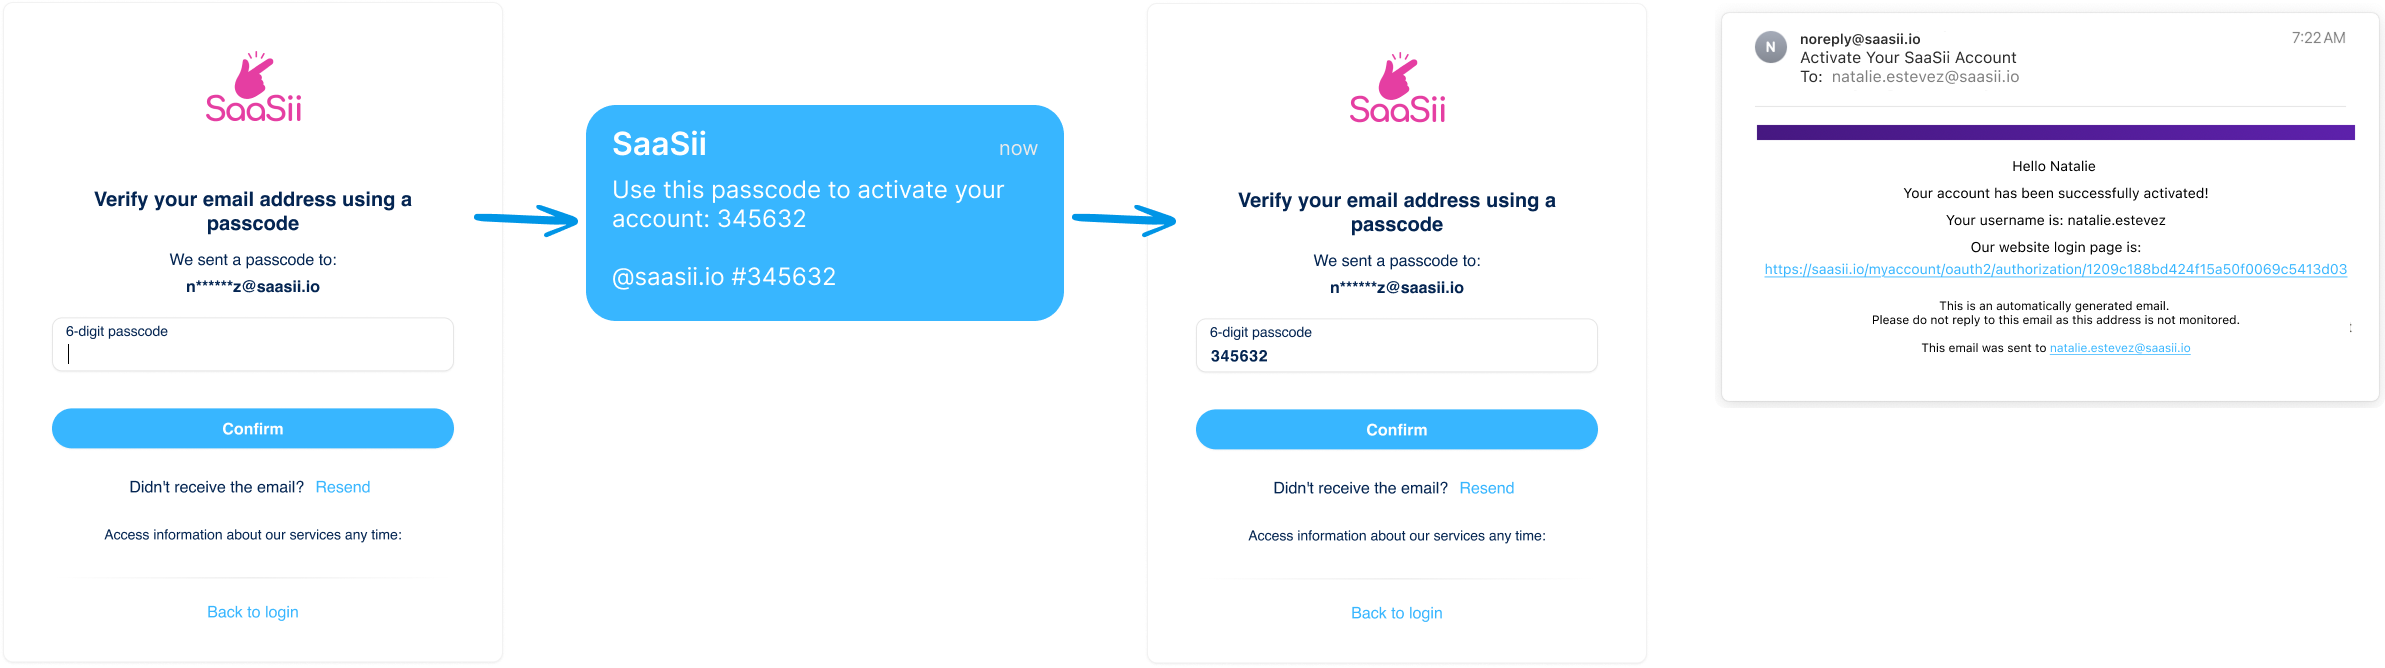
In-band email activation
- Strivacity shows a “Verify your email address” screen and sends an activation message to the email address the customer enters.
- The email contains a six-digit passcode.
- The customer activates their account by entering the passcode on the screen.
- Upon success, Strivacity confirms activation (both on-screen and via email) and proceeds to the next step in the journey.

Account activation through a passcode sent via email
In-band phone activation
- Strivacity displays a “Verify your phone number” screen and sends an SMS to the phone number the customer enters.
- The message contains a six-digit passcode.
- The customer activates their account by entering the passcode on the screen.
- When the code is accepted, Strivacity marks the account as activated and automatically advances the registration journey.
Account activation through a passcode sent via SMS
Out-of-band email activation
- When a customer tries to sign in before activating their new account, Strivacity shows a “Your account is not yet activated” screen and instructs them to check their email.
- The customer receives an email containing a single-use magic link.
- Selecting the magic link opens an activation confirmation page; the customer simply selects Activate.
- Strivacity displays a success screen, and the customer can proceed to sign in.
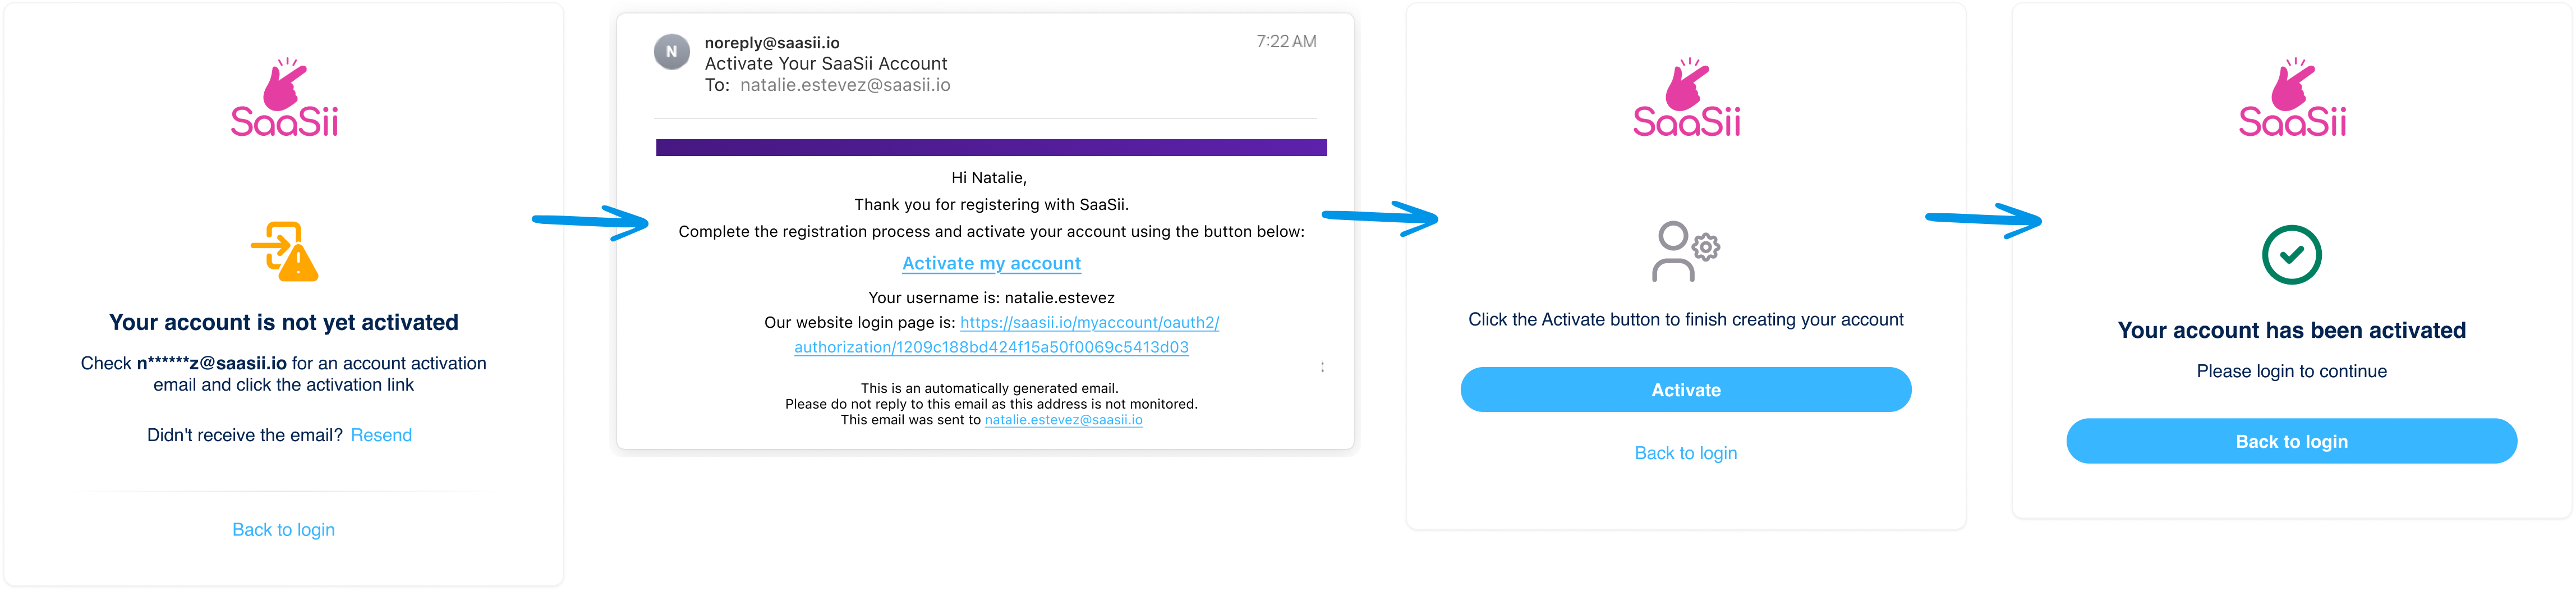
Out-of-band account activation through a magic link via email
Settings that affect this step
Several configuration elements determine when and how this step appears:
- Identity store: Must include email and/or phone identifiers.
- Self-service policy: Must have account activation enabled, and specify the activation method—either magic link after registration or passcode during registration.
- Notification policy: Controls the content of the activation messages sent by email or SMS. Brands can customize these templates to reflect their tone and required variables.
- Branding policy: Affects the design and text of the activation screens.
What happens next
Once the identifier has been verified, the customer proceeds to the final step of registration, token generation, which completes the registration journey and logs them in.
Updated 4 months ago