Checkbox type
Checkboxes allow a customer to select a value from a small set of options, often binary.
Settings
Example configuration in the Admin Console:
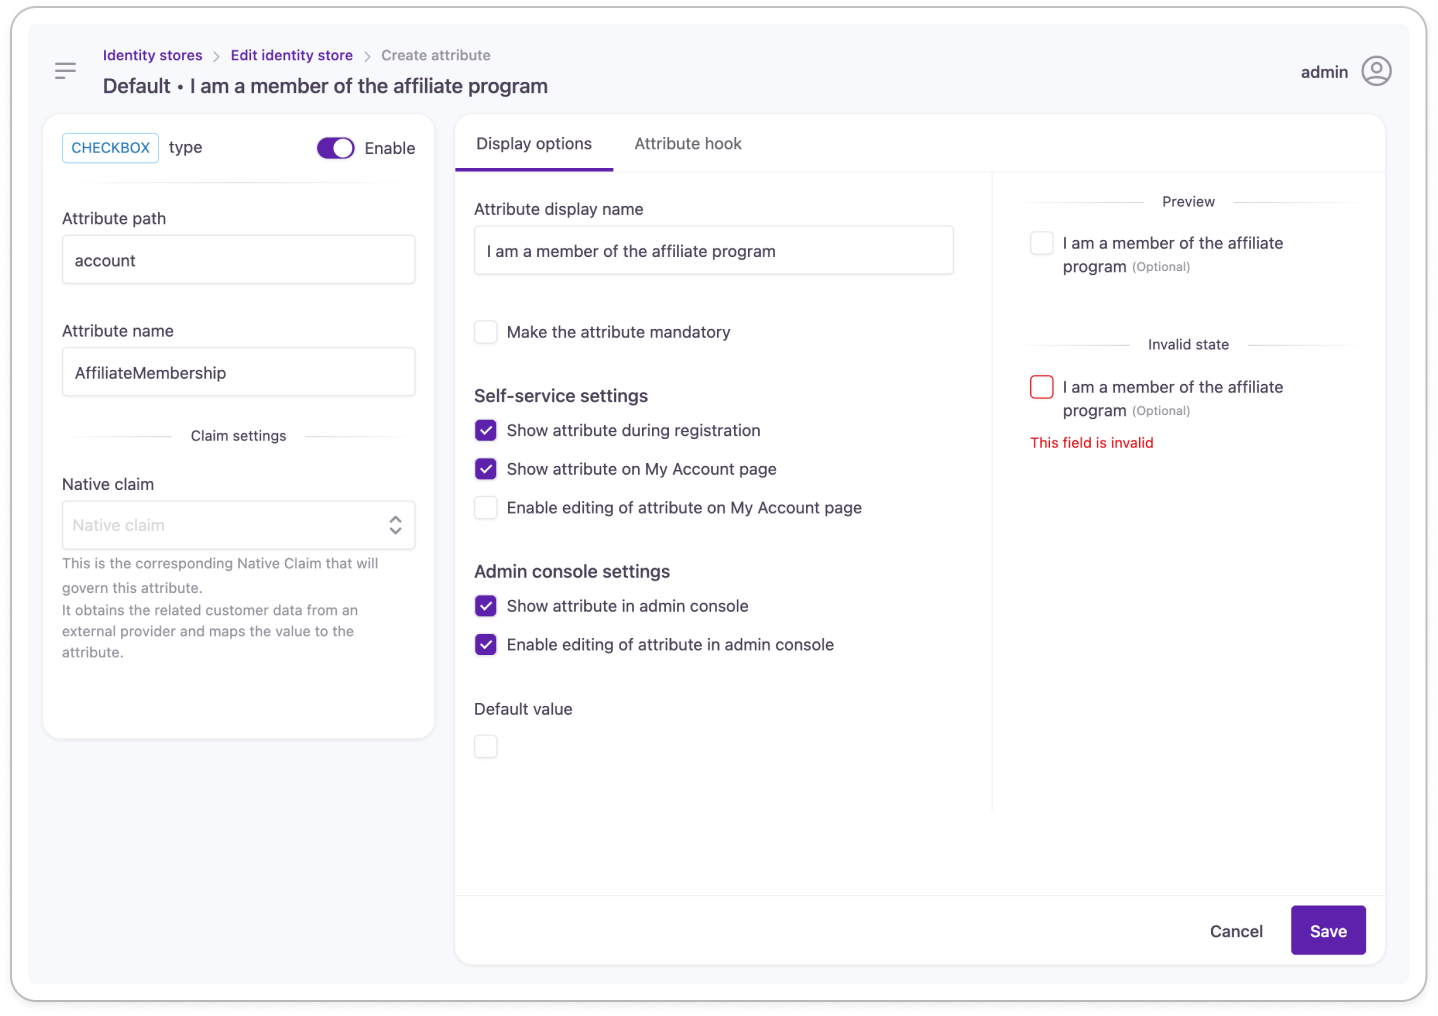
Checkbox attribute setting
In the customer journey:

Configure when creating the attribute
The following settings can only be changed until the attribute is added (saved for the first time) to the identity store. You will find these settings disabled when you return to edit existing attributes.
Attribute type: Defined when selecting the attribute type before any further settings are displayed.
Attribute path: The storage path that's created for the attribute in the Identity Store. Used in combination with the Attribute name to lead Lifecycle Event Hooks to the right place.
Attribute name: The name of the attribute in the Identity Store. Used in combination with the Attribute path to provide access for Lifecycle Event Hooks.
Configure any time (with caution)
We advise caution when managing account attributes: editing the identity store schema can have adverse effects on your customer experience.
Enable attribute: Switch the attribute on or off: if disabled,
- it will be hidden from self-service and the Admin Console
- it will not appear in the customer journey at a Pre-Progressive Pofiling event
- customer data will not be mapped from social profiles
- customer data will not be available for Lifecycle Event Hooks
Claim settings
Name claim: This is the corresponding Native Claim that will govern this attribute.
Display options
Attribute display name: The text of the checkbox displayed for customers.
Make the attribute mandatory: Choose whether to make this attribute mandatory or not. If made mandatory, a customer has to enter a value at self-service registration or the next login.
A progressive profiling step is inserted into the login workflow to display new mandatory fields to customers.
Adapt the default progressive profiling experience to your needs with the new Pre-Progressive Profiling event we've added to supported lifecycle events.
Self-service settings
Show attribute during registration: Choose whether to display this attribute during self-service registration or not.
Show attribute in My Account: Choose whether to show this attribute in a customer's self-service account or an admin user's My Account portal.
Enable editing of attribute on My Account page: You can enable or disable the editing of the personal data contained in the attribute in self-service settings.
Admin Console settings
Show attribute in Admin Console: Choose whether to display this attribute for the customer account at administrative account handling.
Enable editing of attribute in Admin Console: You can enable or disable the editing of the customer data contained in the attribute for administrative users.
Default value: Specify in what state should the attribute appear for customers. For a checkbox, this is either checked or unchecked.
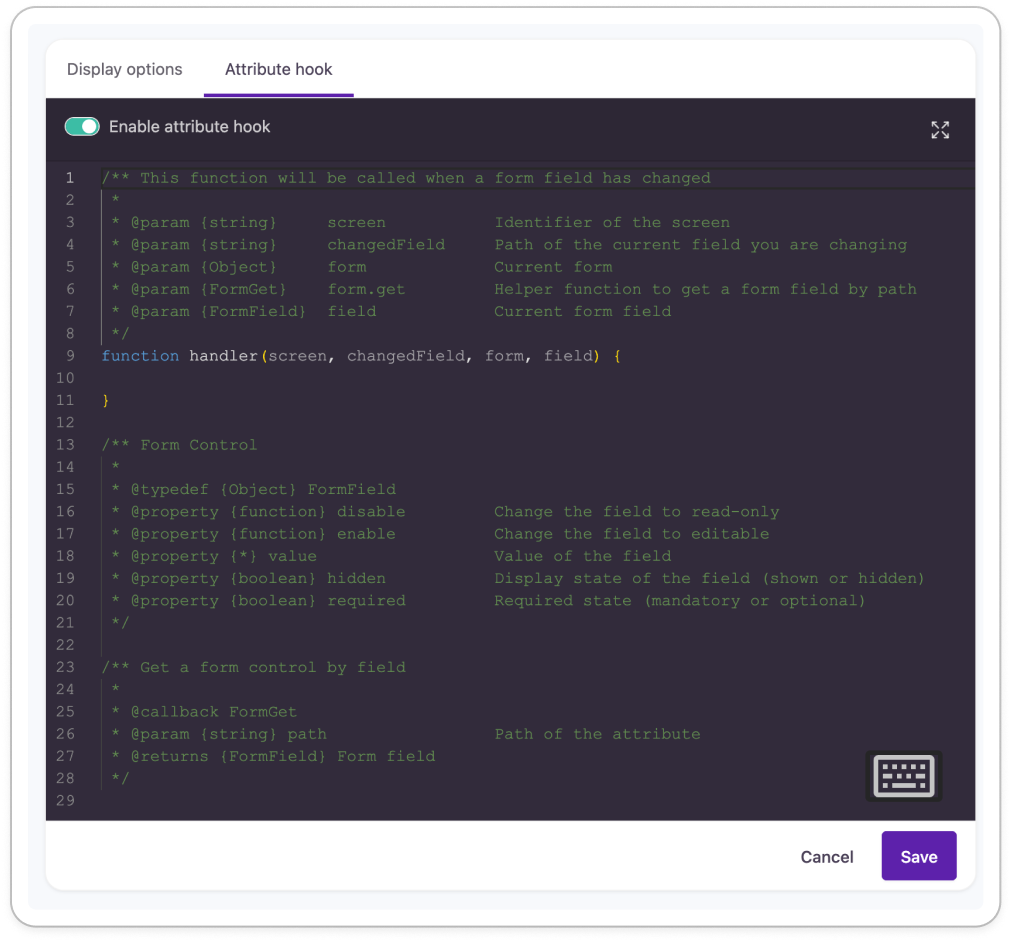
Enable attribute hooks
This feature allows you to build dynamic customer forms by applying JavaScript to attributes. With our customizable code snippets, you can make attribute behavior conditional to the state or value of other attribute fields. You can specify which customer interaction will modify the visibility, selectability, default value, etc. of the attribute using the available JS parameters.
Updated 3 months ago