Local identity
The local identity in the Identify step enables customers to authenticate against the Strivacity identity store, a on-premisese-connected identity store, or a 3rd party data store integrated via orchestration. Its key components include the identity input and account chooser screens, which streamline the login experience.
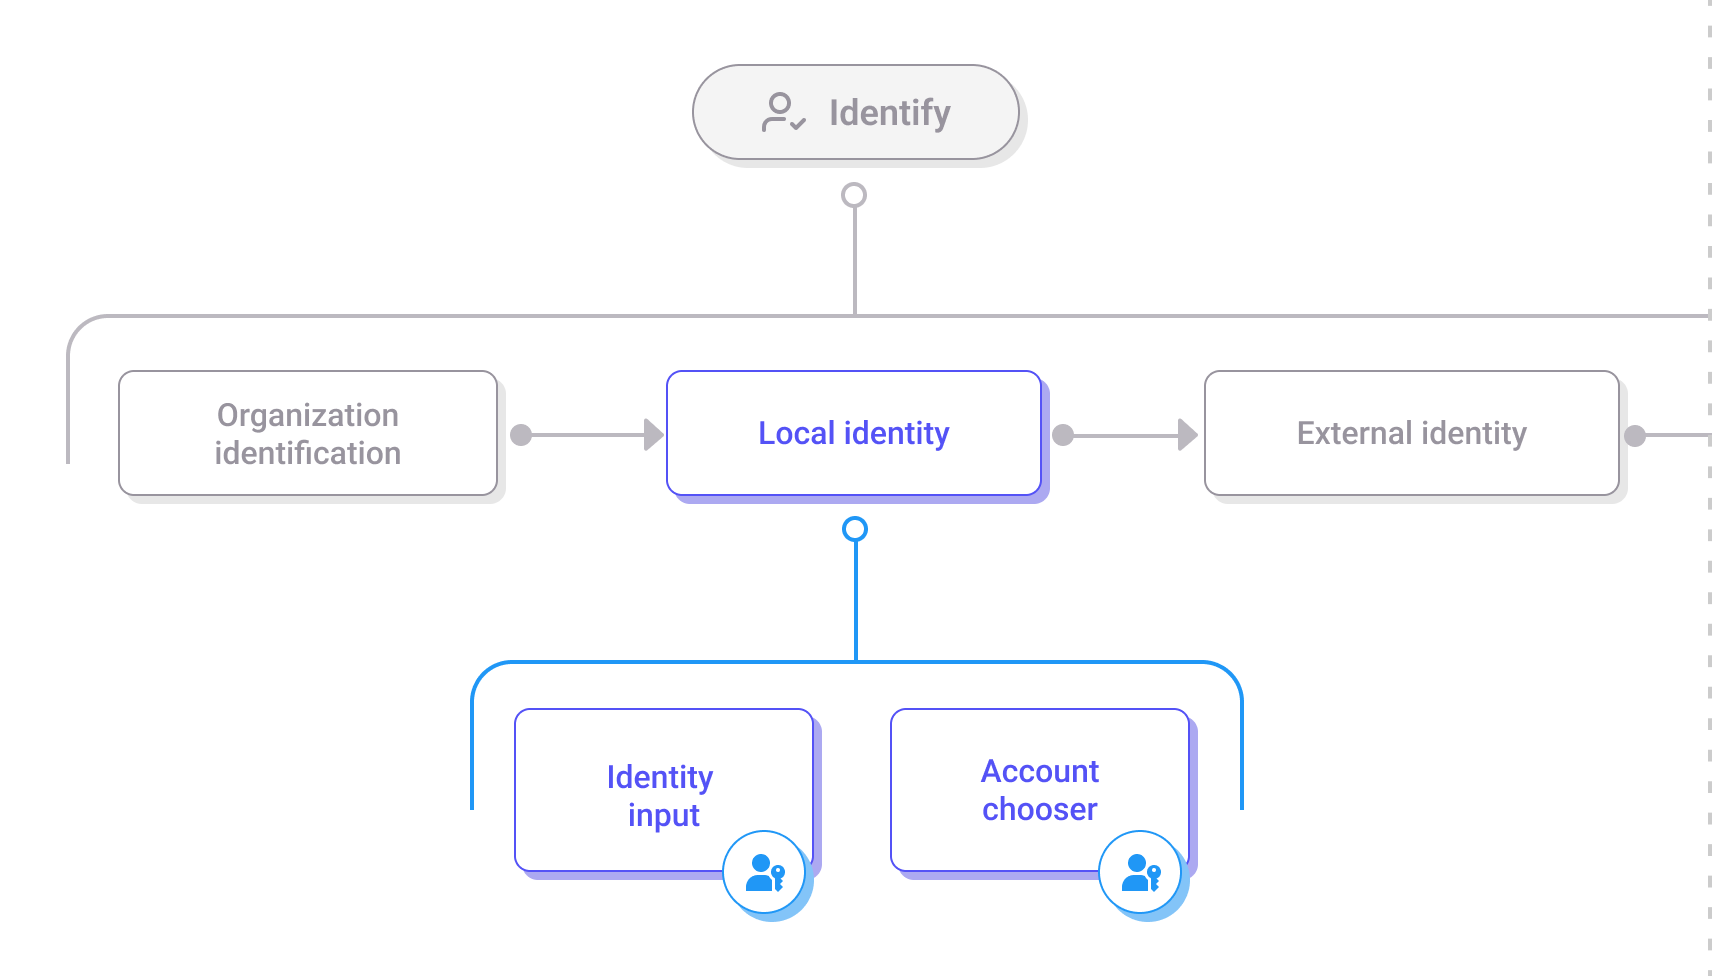
Local identity within the Identify step
Identity input screen
The identity input screen is where customers provide their primary identifier, such as an email address, phone number, or username, to begin the authentication process. This screen serves as the starting point for identifying the customer within the system and can be customized to align with your branding.
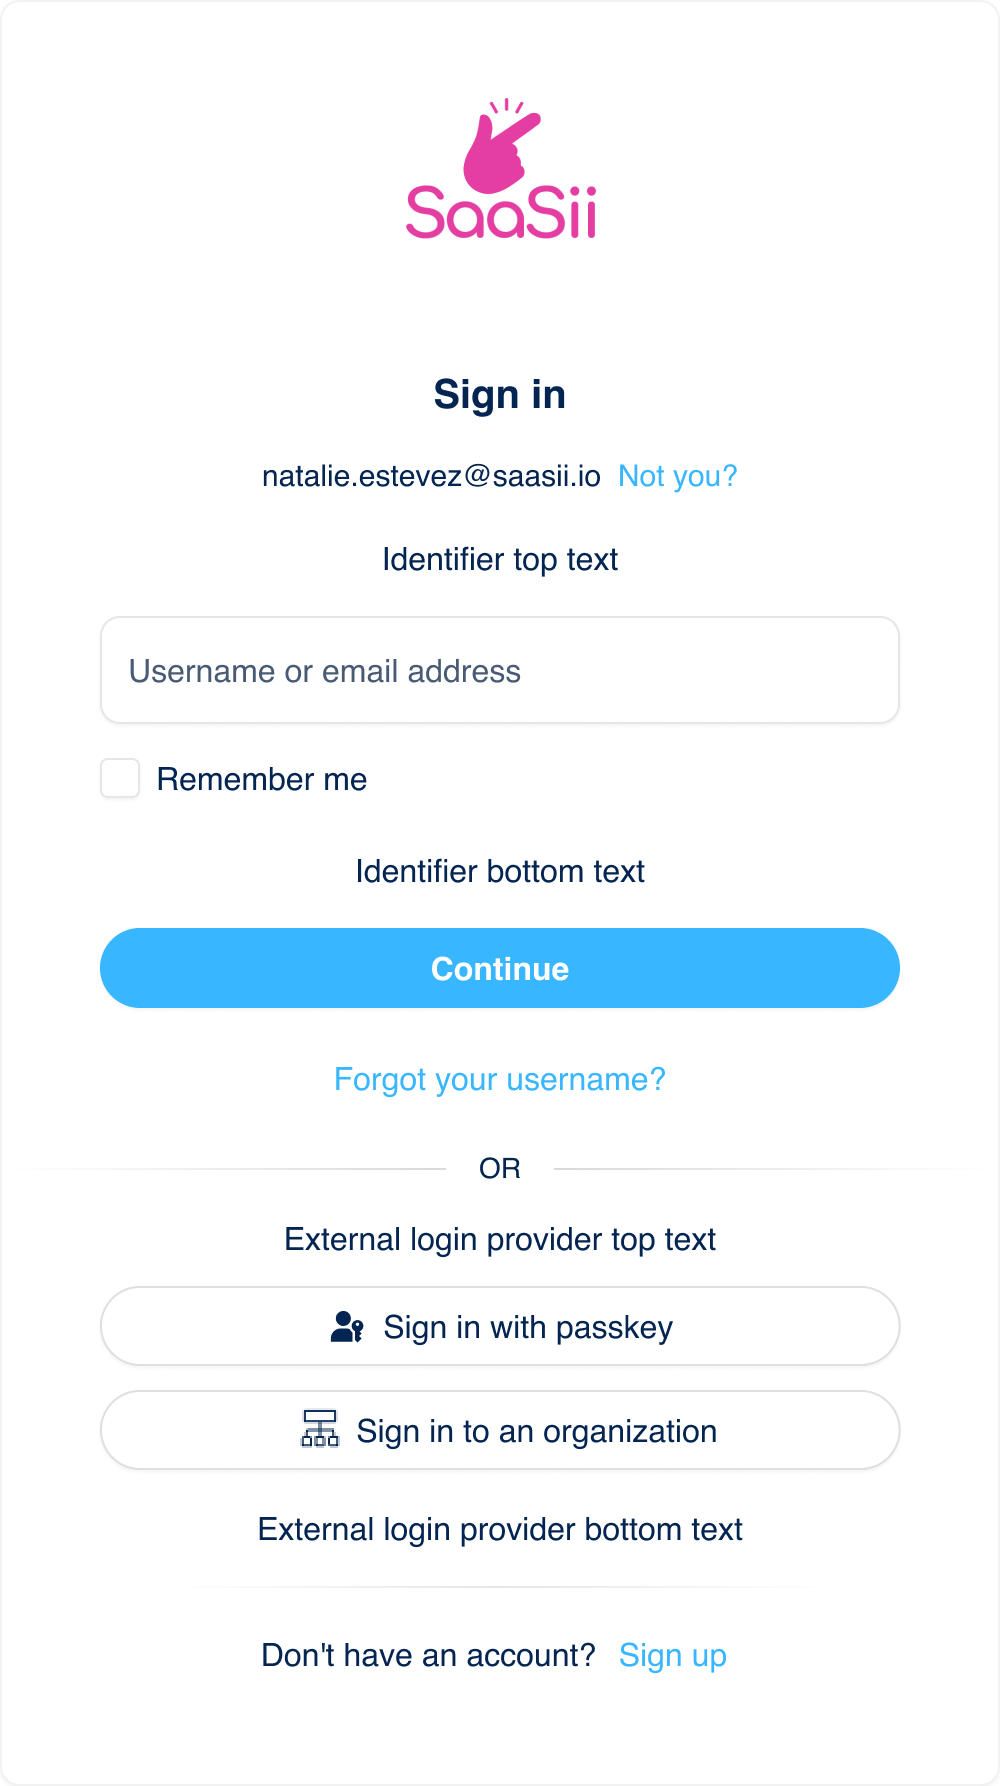
Identity input screen
Elements and configuration of the identity input screen
- Logo: Defined in the Branding policy.
- Screen title: Fixed by default but can be overridden in the Branding policy.
- Custom content:
- Positioned as follows:
- Above the identifier input (identifier top text).
- Below the "Remember me" option (identifier bottom text).
- Below "Sign in with passkey" (external login provider top text).
- Above "Continue with Google" and below "Continue with Office 365" (external login provider bottom text).
- Defined in the Branding policy and can be customized for this screen.
- Positioned as follows:
- Identifier input: Responsible for gathering input from customers based on the identifiers configured for the application in the Identity store. These identifiers can be username, email, or phone identifiers.
- The configuration for these identifiers can be found under Identities > Identity stores > Username/Email identifier/Phone identifier.
- When an identifier is remembered, it appears prefilled on this screen along with a Not you? link. Selecting this link clears the remembered identifier and returns the customer to a blank input field, allowing them to enter a different identifier.
- Remember Me: This feature determines whether the customer’s identifier is remembered after their session ends. This can either trigger a fastpath to the authentication step or trigger the account chooser screen if more than one identifier has been remembered.
- The configuration for this can be found under Applications > Session management > Remember account identifiers after session ends.
- Continue button: Proceeds to the next screen in the login workflow.
- Forgot username: For customers using username identifiers, there is an option to recover their username via a confirmed email or phone number.
- This feature is configured in the Identity store, where the username identifier is enabled, and in the self-service policy, where the Allow self-service username reminders option is set to true.
- Passkeys: Customers have the option to sign in using passkeys directly from the identifier screen or the account chooser screen. If a saved passkey is available, it may appear in the identifier input field automatically. Otherwise, customers can select the Sign in with passkey button to initiate passkey authentication manually.
- Passkeys are configured via Policies > Adaptive access > Tab: Multi-factor methods > Passkey.
- Registration/login to an organization: This step also handles scenarios where customers need to log in to their organization or register for an account, depending on the journey configuration.
- This button appears when self-service registration is enabled for an organization for the identity store (Identities > Identity stores> Tab: Configuration), and enabled for the individual organization or the hierarchy of organizations (Organizations > Section: Self-service).
- Sign up: This allows B2C customers to register new accounts.
- It is enabled via the self-service policy (Policies > Self-service> Section: Self-service registration).
Account chooser screen
The account chooser screen appears when more than one account has been remembered from a previous session. If only one account is remembered, the customer is automatically moved to the authentication step, bypassing the account chooser. However, if multiple accounts have been remembered from prior sessions, the account chooser will be displayed, allowing customers to select which account they want to log in with.
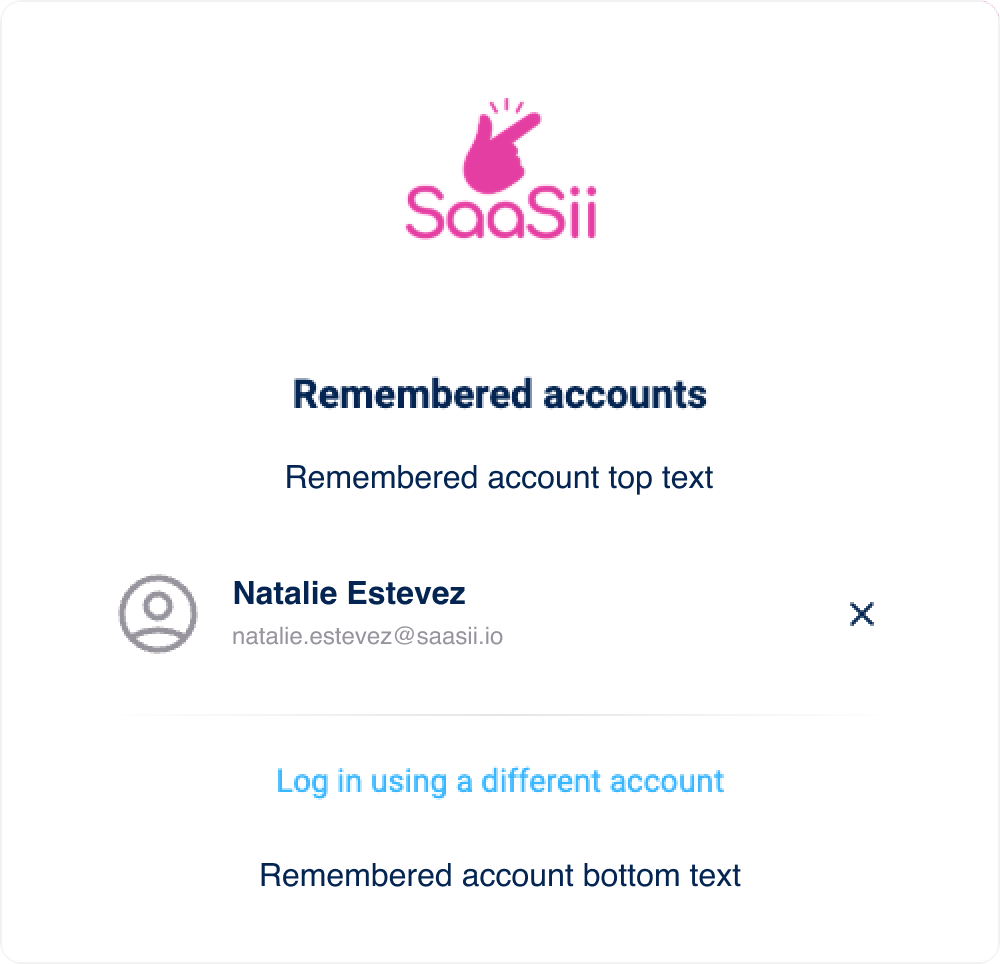
Account chooser screen
The account chooser also appears when a customer clicks "Not you?". In this case, the user will be directed to the account chooser screen, even if only one account has been remembered.
The account chooser is only displayed when a customer’s account has been remembered.
- Whether an account is remembered is controlled by a combination of the application settings under Applications > Tab: General > Section: Session management > Remember account identifiers after the session ends, and whether the Remember me checkbox is selected during login.
Updated 5 months ago