Account registration step
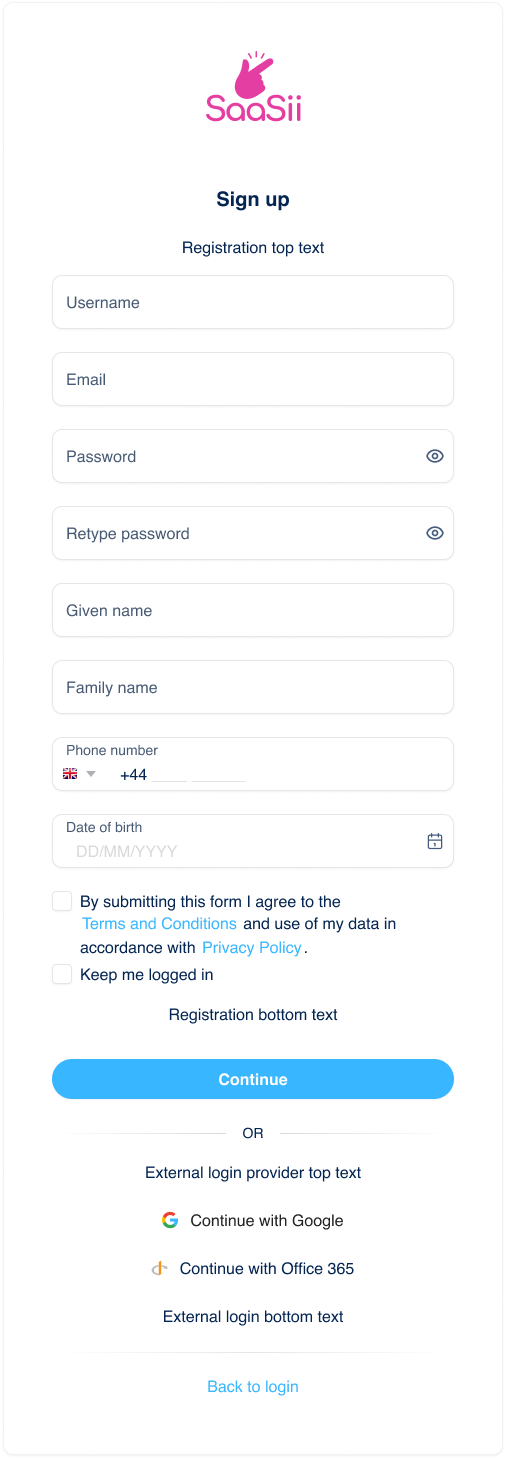
The Account registration step is the default step where customers create their account credentials and provide mandatory and optional personal information. This step collects the key information needed to create the customer’s account. It also handles consents and login-related settings, depending on how the registration flow is configured.
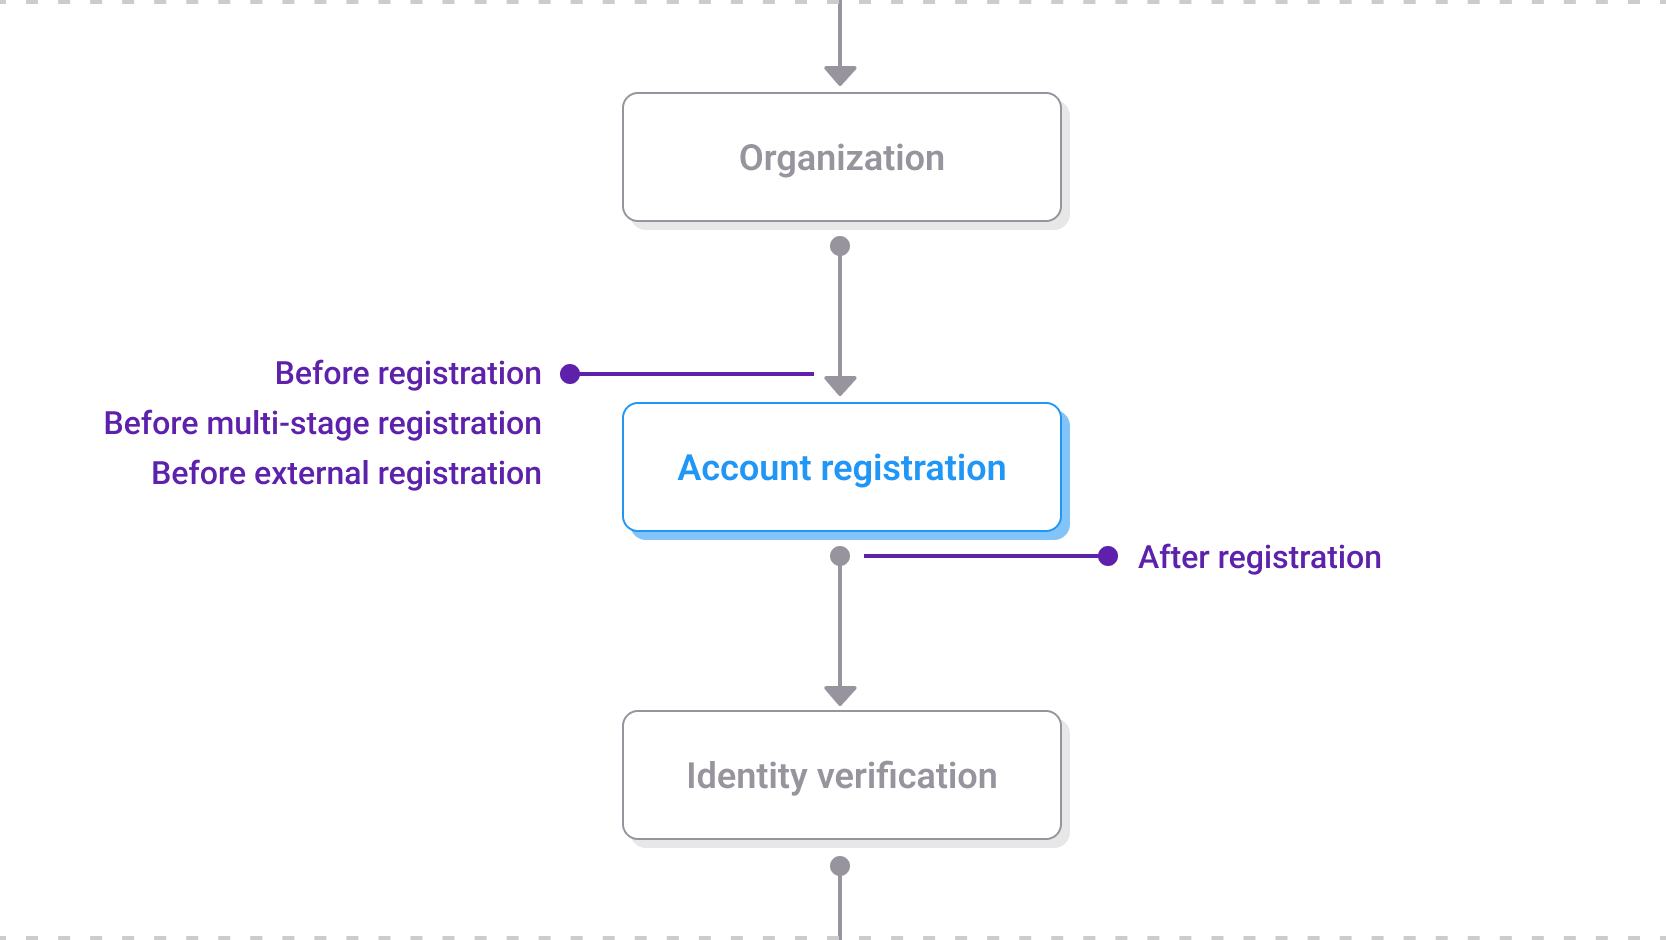
The Account registration step within the registration journey
The step typically includes:
- Logo: Defined in the Branding policy.
- Screen title: Fixed by default but can be overridden in the Branding policy.
- Custom content:
- Positioned as follows:
- Above the identifier input (registration top text).
- Below the consents and "Keep me logged in" option (registration bottom text).
- Above the external registration options (external login providers top text).
- Below the external registration options (external login providers bottom text).
- Custom content is defined in the Branding policy and can be customized for this screen.
- Positioned as follows:
- Identifier input: Depending on identity store configuration.
- Password and Re-type password: Unless deferred or part of a passwordless flow.
- Optional fields: Additional inputs such as “Given name” and “Family name” that can be configured based on identity store settings.
- Consent checkboxes: Controlled through Consent management and used to collect required agreements during registration. These can include:
- Terms of service or digital agreements.
- Electronic information delivery (for example, E-Sign Consent).
- Keep me logged in: Visible if the option is enabled in the application.
- Continue button: Proceeds to the next screen in the registration workflow.
- External login options: Displayed if external identity providers are configured for registration. These may include enterprise identity providers (such as Azure AD) or social login providers (such as Google or Amazon). When enabled, these options appear below the form and allow customers to register using an existing account from the configured provider.
- Back to login: A navigation link is shown at the bottom of the screen that allows customers to return to the login journey if they arrive at registration by mistake. For this link to appear, the login URL must be configured in the associated application client settings.
Customers must complete any required fields and consents before they can proceed.
Account registration step
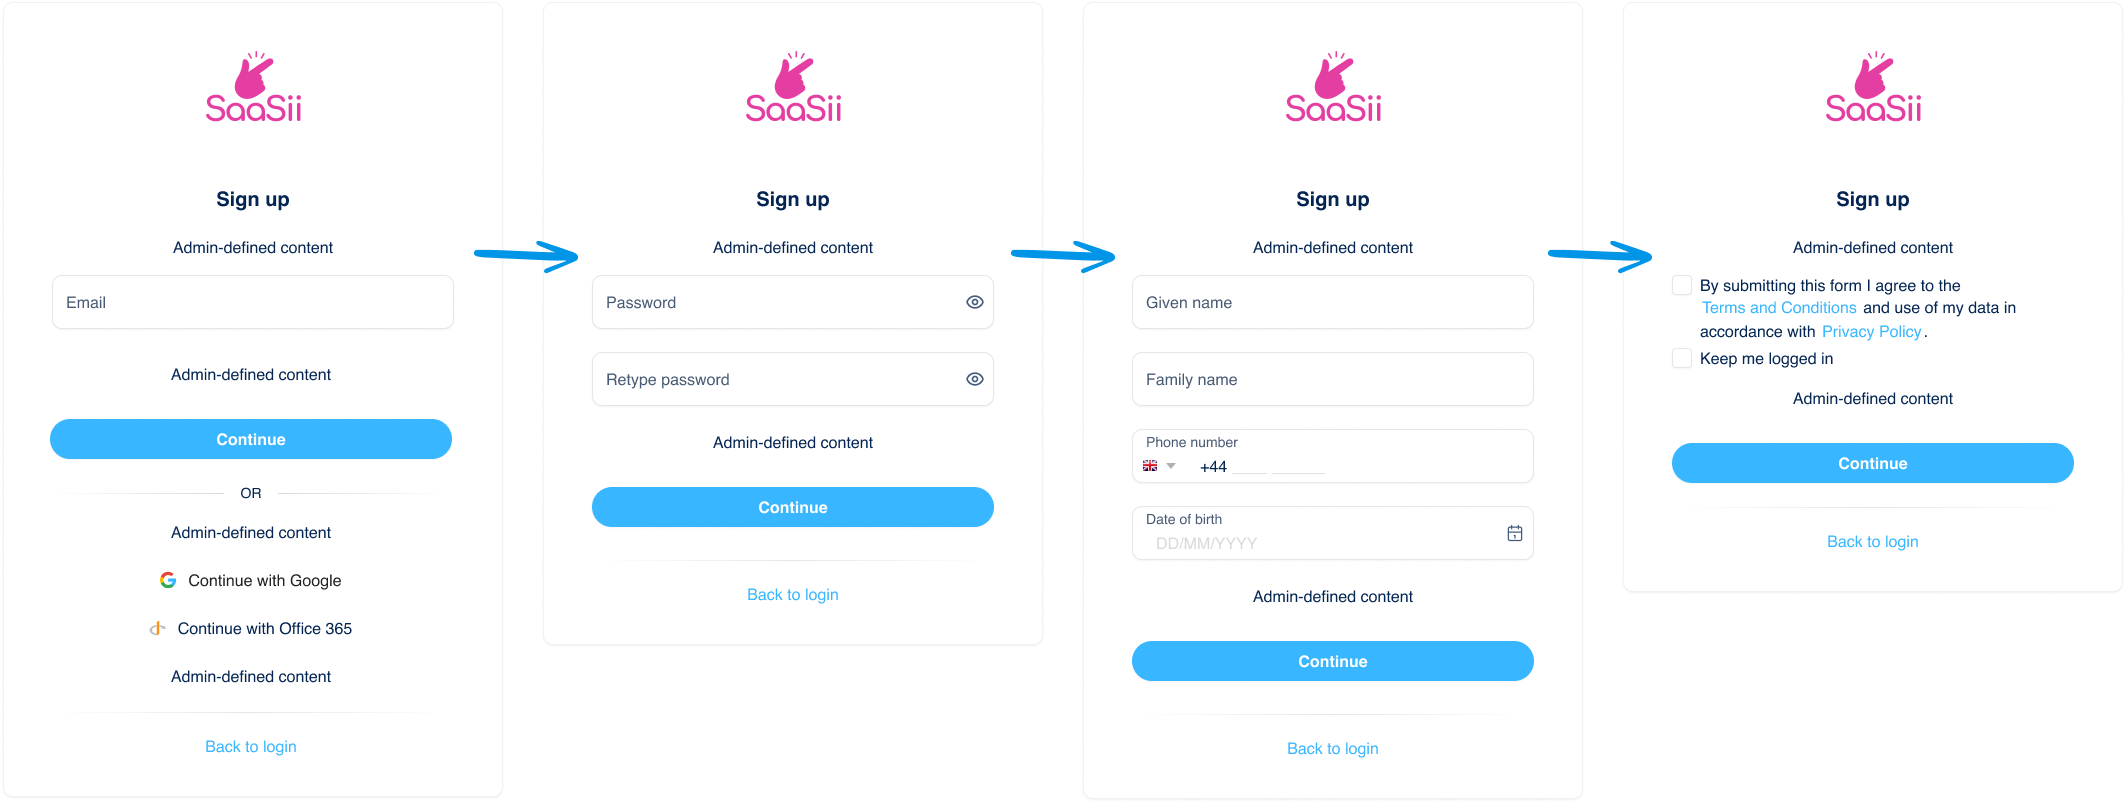
Multi-stage registration
By default, all registration elements—such as identifier input, password creation, optional fields, consents, and external login options—appear together on a single screen. However, when additional customization or a streamlined experience is required, these elements can be distributed across multiple screens.
This approach is called multi-stage registration. It allows you to guide customers through the process step-by-step, minimizing cognitive load and making it easier to collect and validate information progressively.
You can break the registration step into multiple stages using any of the following configuration tools:
- Journey builder: Insert logic and screen transitions directly into the registration journey.
- Multi-stage registration hook: Controls how the registration form is split into steps by specifying which identifiers, attributes, and consents appear at each stage.
- Defer password setting: Configure the registration flow so that password creation happens later (set in the Self-service policy).
This method is particularly useful for long forms or when you want to separate account creation from authentication setup.
Multi-stage registration
Settings that affect this step
The appearance and behavior of this step are governed by multiple configuration areas:
- Identity store:
Defines what identifiers (username, email, phone) are available and what attributes are collected. - Self-service policy:
Determines whether customers create a password in this step or later. - Adaptive access policy:
Allows for passwordless registration flows. - Consent management:
Displays configured consents. - Application configuration:
Controls visibility of options like "Keep me logged in". - Multi-stage registration hook/journeys:
This allows for the account registration step to be broken up into multiple screens. - Branding policy:
Controls the appearance and text shown on the account registration screen.
What happens next
After this step, customers proceed to the next step in the journey, such as identity verification, if configured.
Extensibility points
Before and after the Account registration step, the following extensibility points are available:
Before registration: This hook can be used to modify the collected data, add extra attributes, discard data, change the customer's organization, or add phone or email MFA methods by fetching data from an external system so they can be used in the customer's account during the registration process. Synchronous hook.
Before multi-stage registration: This hook allows you to break down the registration form into smaller chunks and present the parts in a multi-step manner. In the hook, you can include attributes that are displayed at registration, consents assigned to the application in use, identifiers supported by the identity store, password, or static content. It can be decided on a screen-by-screen basis where the external login providers will be displayed. A summary screen at the end of the registration flow will automatically display all the information that wasn't used in this hook but is part of the flow. The hook can be configured to skip the summary screen if only optional fields or consents remain at the end. Synchronous hook.
Before external registration: This hook allows control over what happens after a new account is authenticated through an external provider. It allows you to suppress and silently accept confirmation screens and it also provides ways to link to other, already existing accounts in addition to what the default linking target would be. Synchronous hook.
After registration: This hook initiates once the customer completes account registration, launching an external event, or fetching/updating data with an external system, affecting the flow if needed. Synchronous hook.
Updated 4 months ago