Inviting administrative accounts
This page explains how to invite members of your customer support team to create an administrative account for themselves.
Overview
You can start onboarding your administrative and customer support crew to the Admin Console by sending account invitations. Invitations will direct invitees to a sign-up form that lets them create an account for themselves.
You can fill in beforehand the invitee’s profile information to simplify account creation for them.
At the same time, you can also control the level of access you give to invitees by assigning them a specific admin role.
Administrative invitation
-
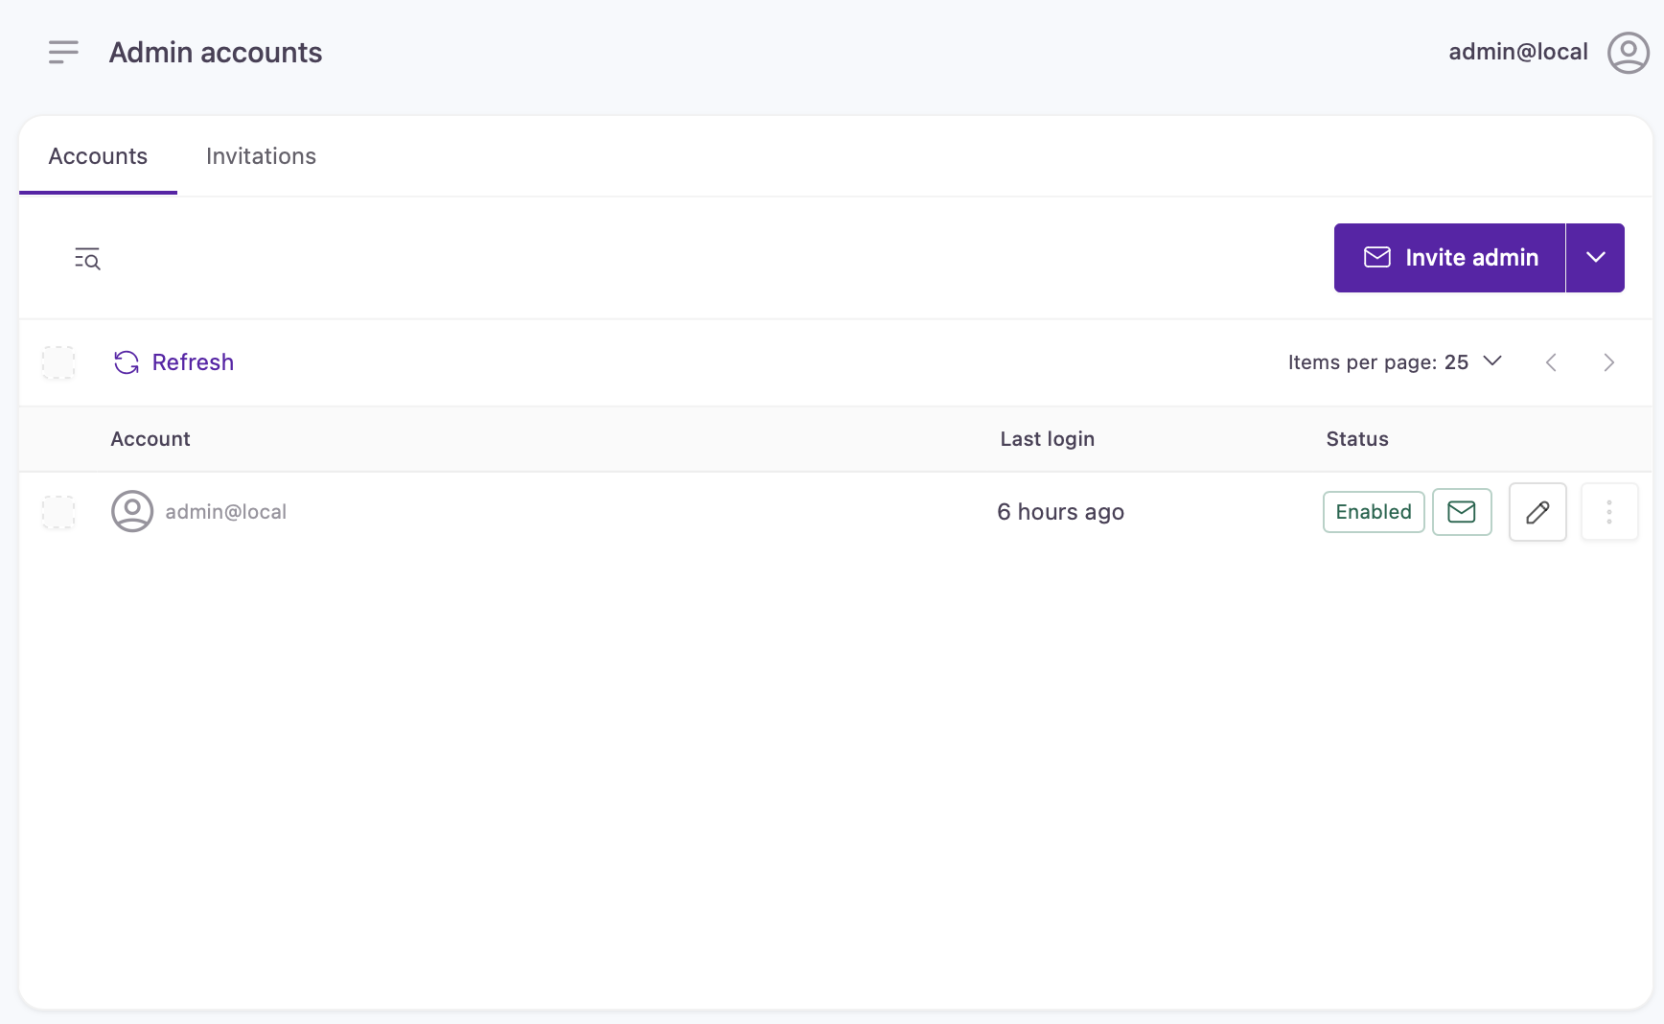
Navigate to Instance Configuration > Admin Accounts
-
Click the 'Invite Admin' button on the right.

Invite Admin button on the admin accounts page
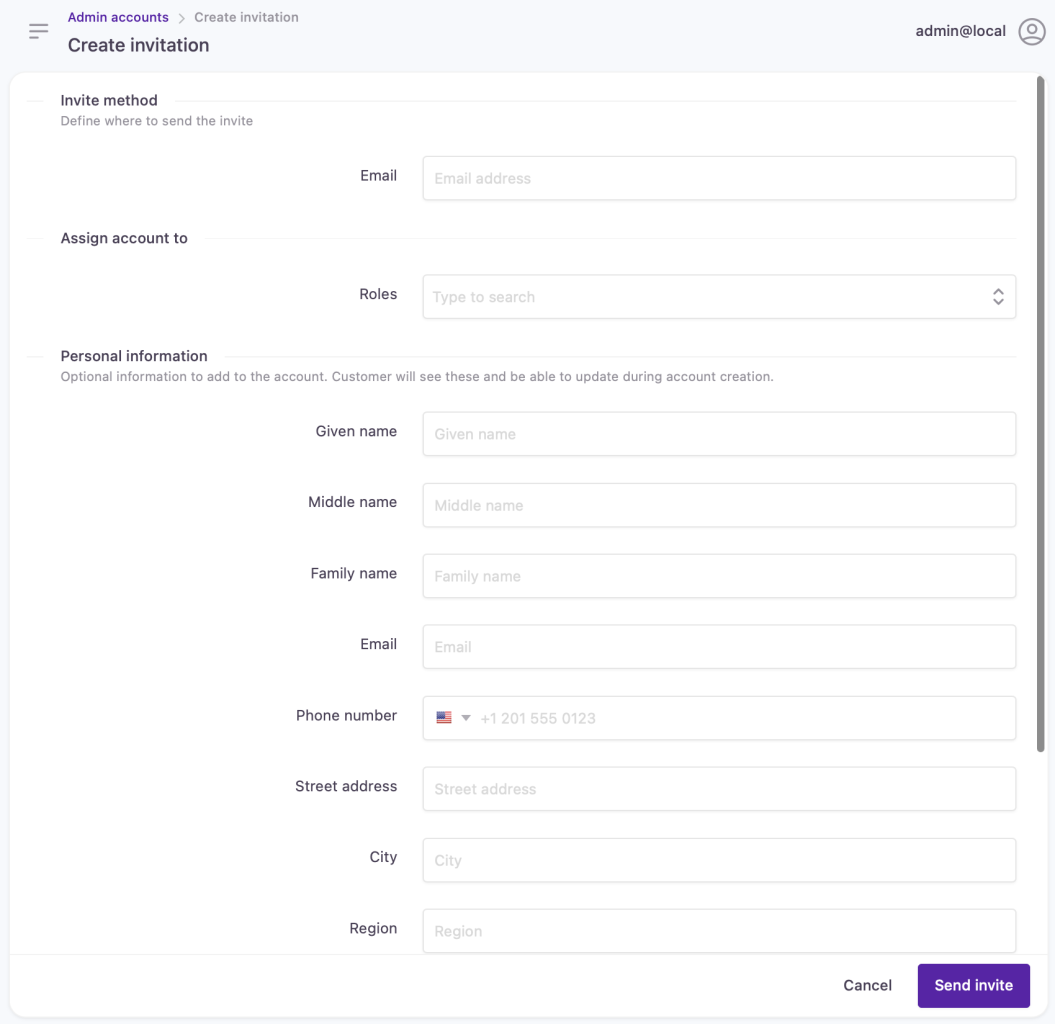
You will be directed to an account invitation form where you can fill in information for the new administrative identity.

Account invitation form
Account invitation form
- At 'Invite Method', add the email address where the invitation will be sent.
The email address will be displayed in a read-only field in the invitation's sign-up form. Users invited to administrative accounts are not able to change their email identifiers at sign-up.
- Assign an access level of choice to the account by selecting a 'Role':
Learn more about default roles, creating custom roles, and how to manage permissions.
- Under 'Basic Information', fill in the profile information for the new administrative account.
When accepting the invitation, invitees can double-check the information that goes in their profiles before accounts are created.
- Click 'Send invite' once you've filled out the invitation form.
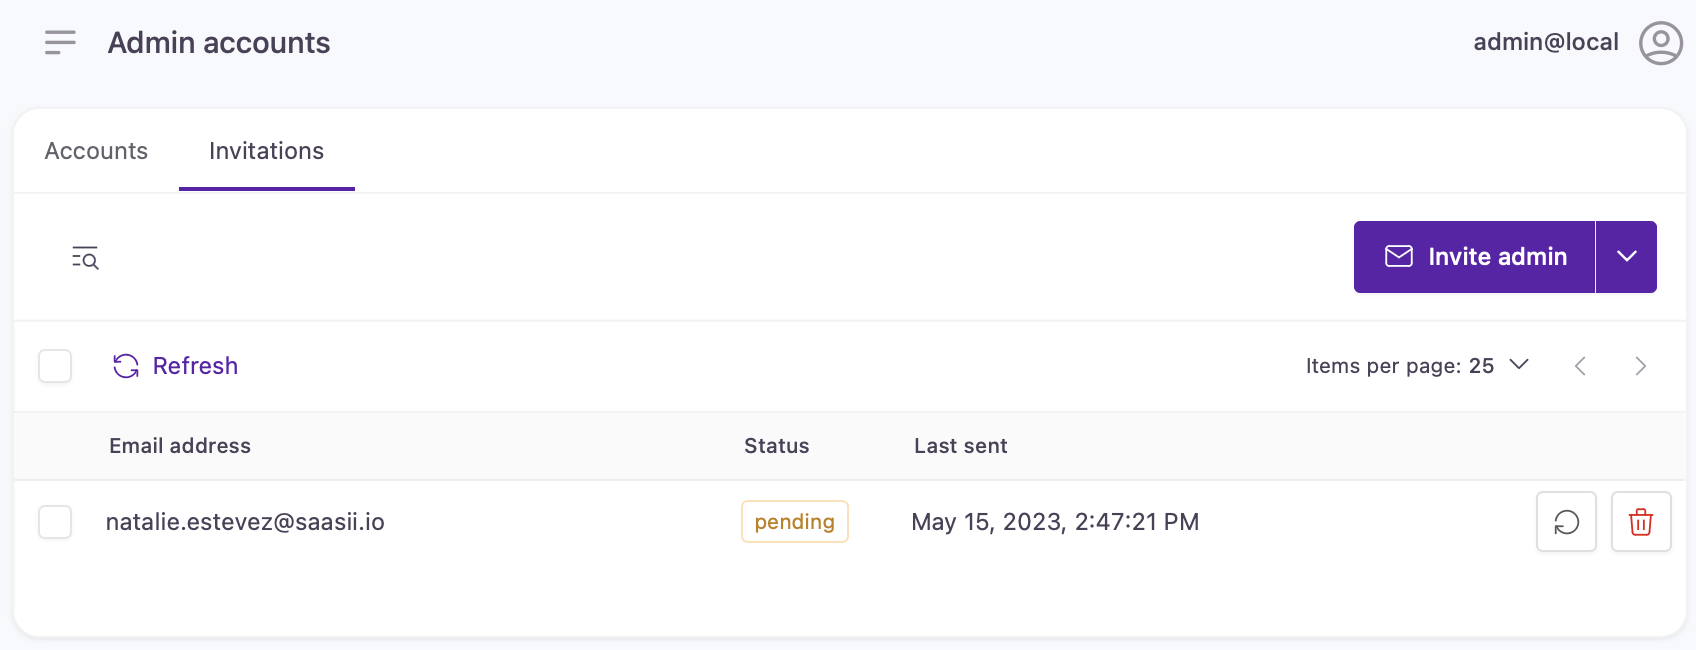
There will be an entry created for the invited administrative identity in the Invitations tab:

Pending administrative account invitation
If the invitee accepts the invitation and completes sign-up, the invitation's status will change from 'Pending' to 'Done', and the account will be listed in the 'Accounts' tab.
While waiting for the invitee to respond, you can:
- Resend the invitation
- View the details of the invitation
- Revoke the invitation
Revoked invitations are removed from the 'Invitations' list permanently.
Updated over 1 year ago
