Application launcher
Here, you can learn how to add quick access tiles to your customer's self-service accounts that allow them to launch other applications.
You can allow customers to launch multiple applications from the convenience of their self-service accounts. After completing this guide, you will unlock a hidden menu named 'Your applications' in the self-service portal, where customers can access their available quick-access links.

Application launcher page in self-service
Application launcher setup
To display quick access tiles in an application's self-service portal, you first have to enable the application launcher capability in the application.
After the application launcher capability is enabled, every application that has a quick access tile configured and is accessible to the customer by group membership will automatically populate.
- Navigate to Self-services policies in the Admin Console.
- Create or open a self-service policy for editing.
- Switch on or make sure 'Enable Application Launcher' is turned on
- Save your settings before continuing.
- Navigate to Applications.
- Select an application where you'd like to enable the application launcher.
- Add the self-service policy that enables the feature.

Self-service policy assignment
- Click Save.
Quick access setup
You can configure applications to appear as quick-access links in related applications' self-service portals.
Only applications that share the same identity store can appear in each other's application launcher menu.
- Enter the application.
- Switch to the Clients tab.
- Select a client you want to configure a shortcut for.
- In the client, go to the Application launcher tab.
- Toggle the Enabled switch to activate the feature.
- Add a display name for the application shortcut.
- Add a URL for the shortcut's logo.
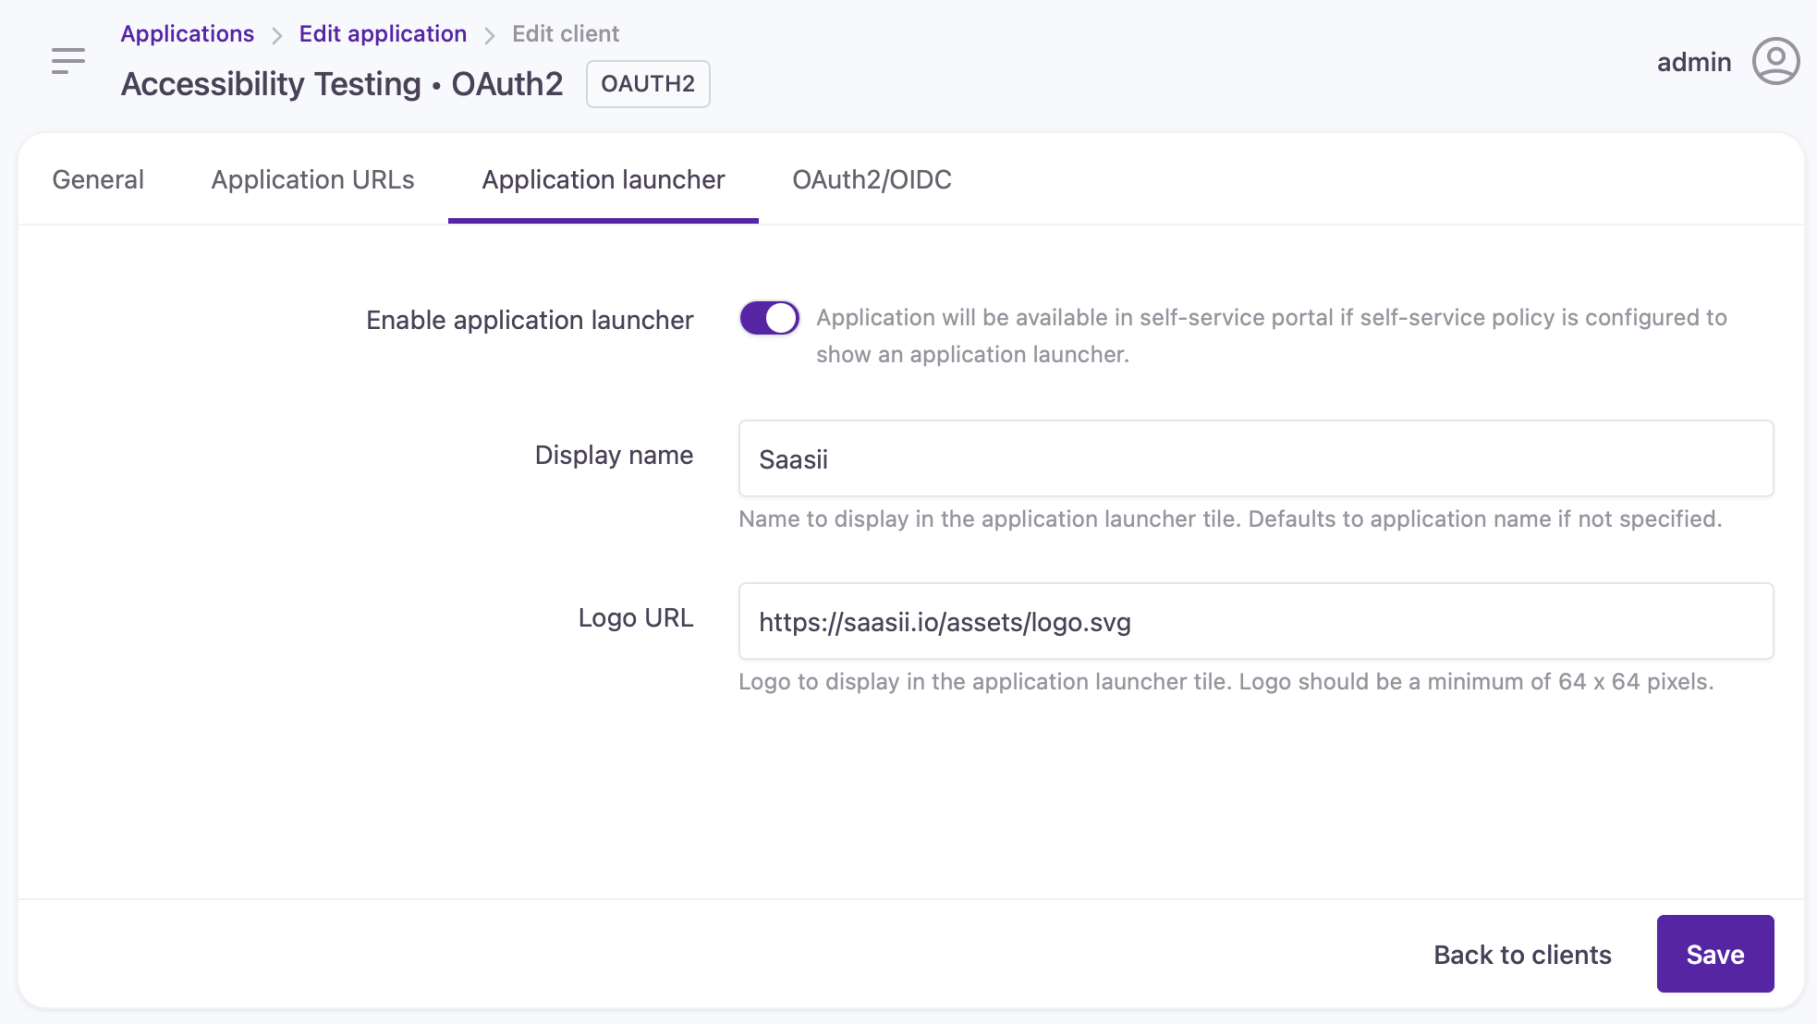
Application launcher section in Application > Clients settings
This example quick access tile will look like this in the self-service portal:
Example application quick access
- Switch to the Application URLs tab.
- In the Login URL field, insert a URL for your brand application that
- automatically initiates a login and redirects to the specific client authorization endpoint
- in case of OAuth2/OIDC, it passes the received acr_values and login_hint GET parameter to the login.
Customers will be redirected to this URL when launching the application. If they've activated 'Keep me logged in', they will skip identification and password entry when accessing the new application.
- Save your changes.
The quick access tile of the application will show up in the self-service account of the application where the application launcher capability was enabled:
You can repeat the quick access setup steps for other applications to include more quick access short cuts.
Updated 3 months ago