Edit attributes
Editing the identity store schema can have adverse effects on your customer experience. By design, new attributes cannot be deleted (they can be disabled and hidden). While this helps avoid accidental data destruction we advise caution when managing account attributes.
- Open an Identity Store for editing.
- Select the attribute you want to view or edit. In this example, we're going to view/edit the Email attribute.
Email attribute settings
General settings
- Attribute type: Indicates the data type of the attribute, such as checkbox, string, select, phone, and date. This determines how the attribute is processed and stored.
- Enable: Toggles whether the attribute is active in the identity store.
- Attribute path: The structured path of the attribute in the identity store schema. This is read-only.
- Attribute searchability: Defines whether the attribute can be used in searches within the identity store. Options include:
- Native claim: Specifies the predefined claim that controls how this attribute is populated. It retrieves customer data from an external provider and assigns the corresponding value to the attribute.
- Remote path: Defines how the attribute maps to data in an external system. This can be a dot-separated path within the customer's metadata or a JSONPath expression that extracts a single value, such as
$.attribute.value. This mapping is used when a remote connector is configured.
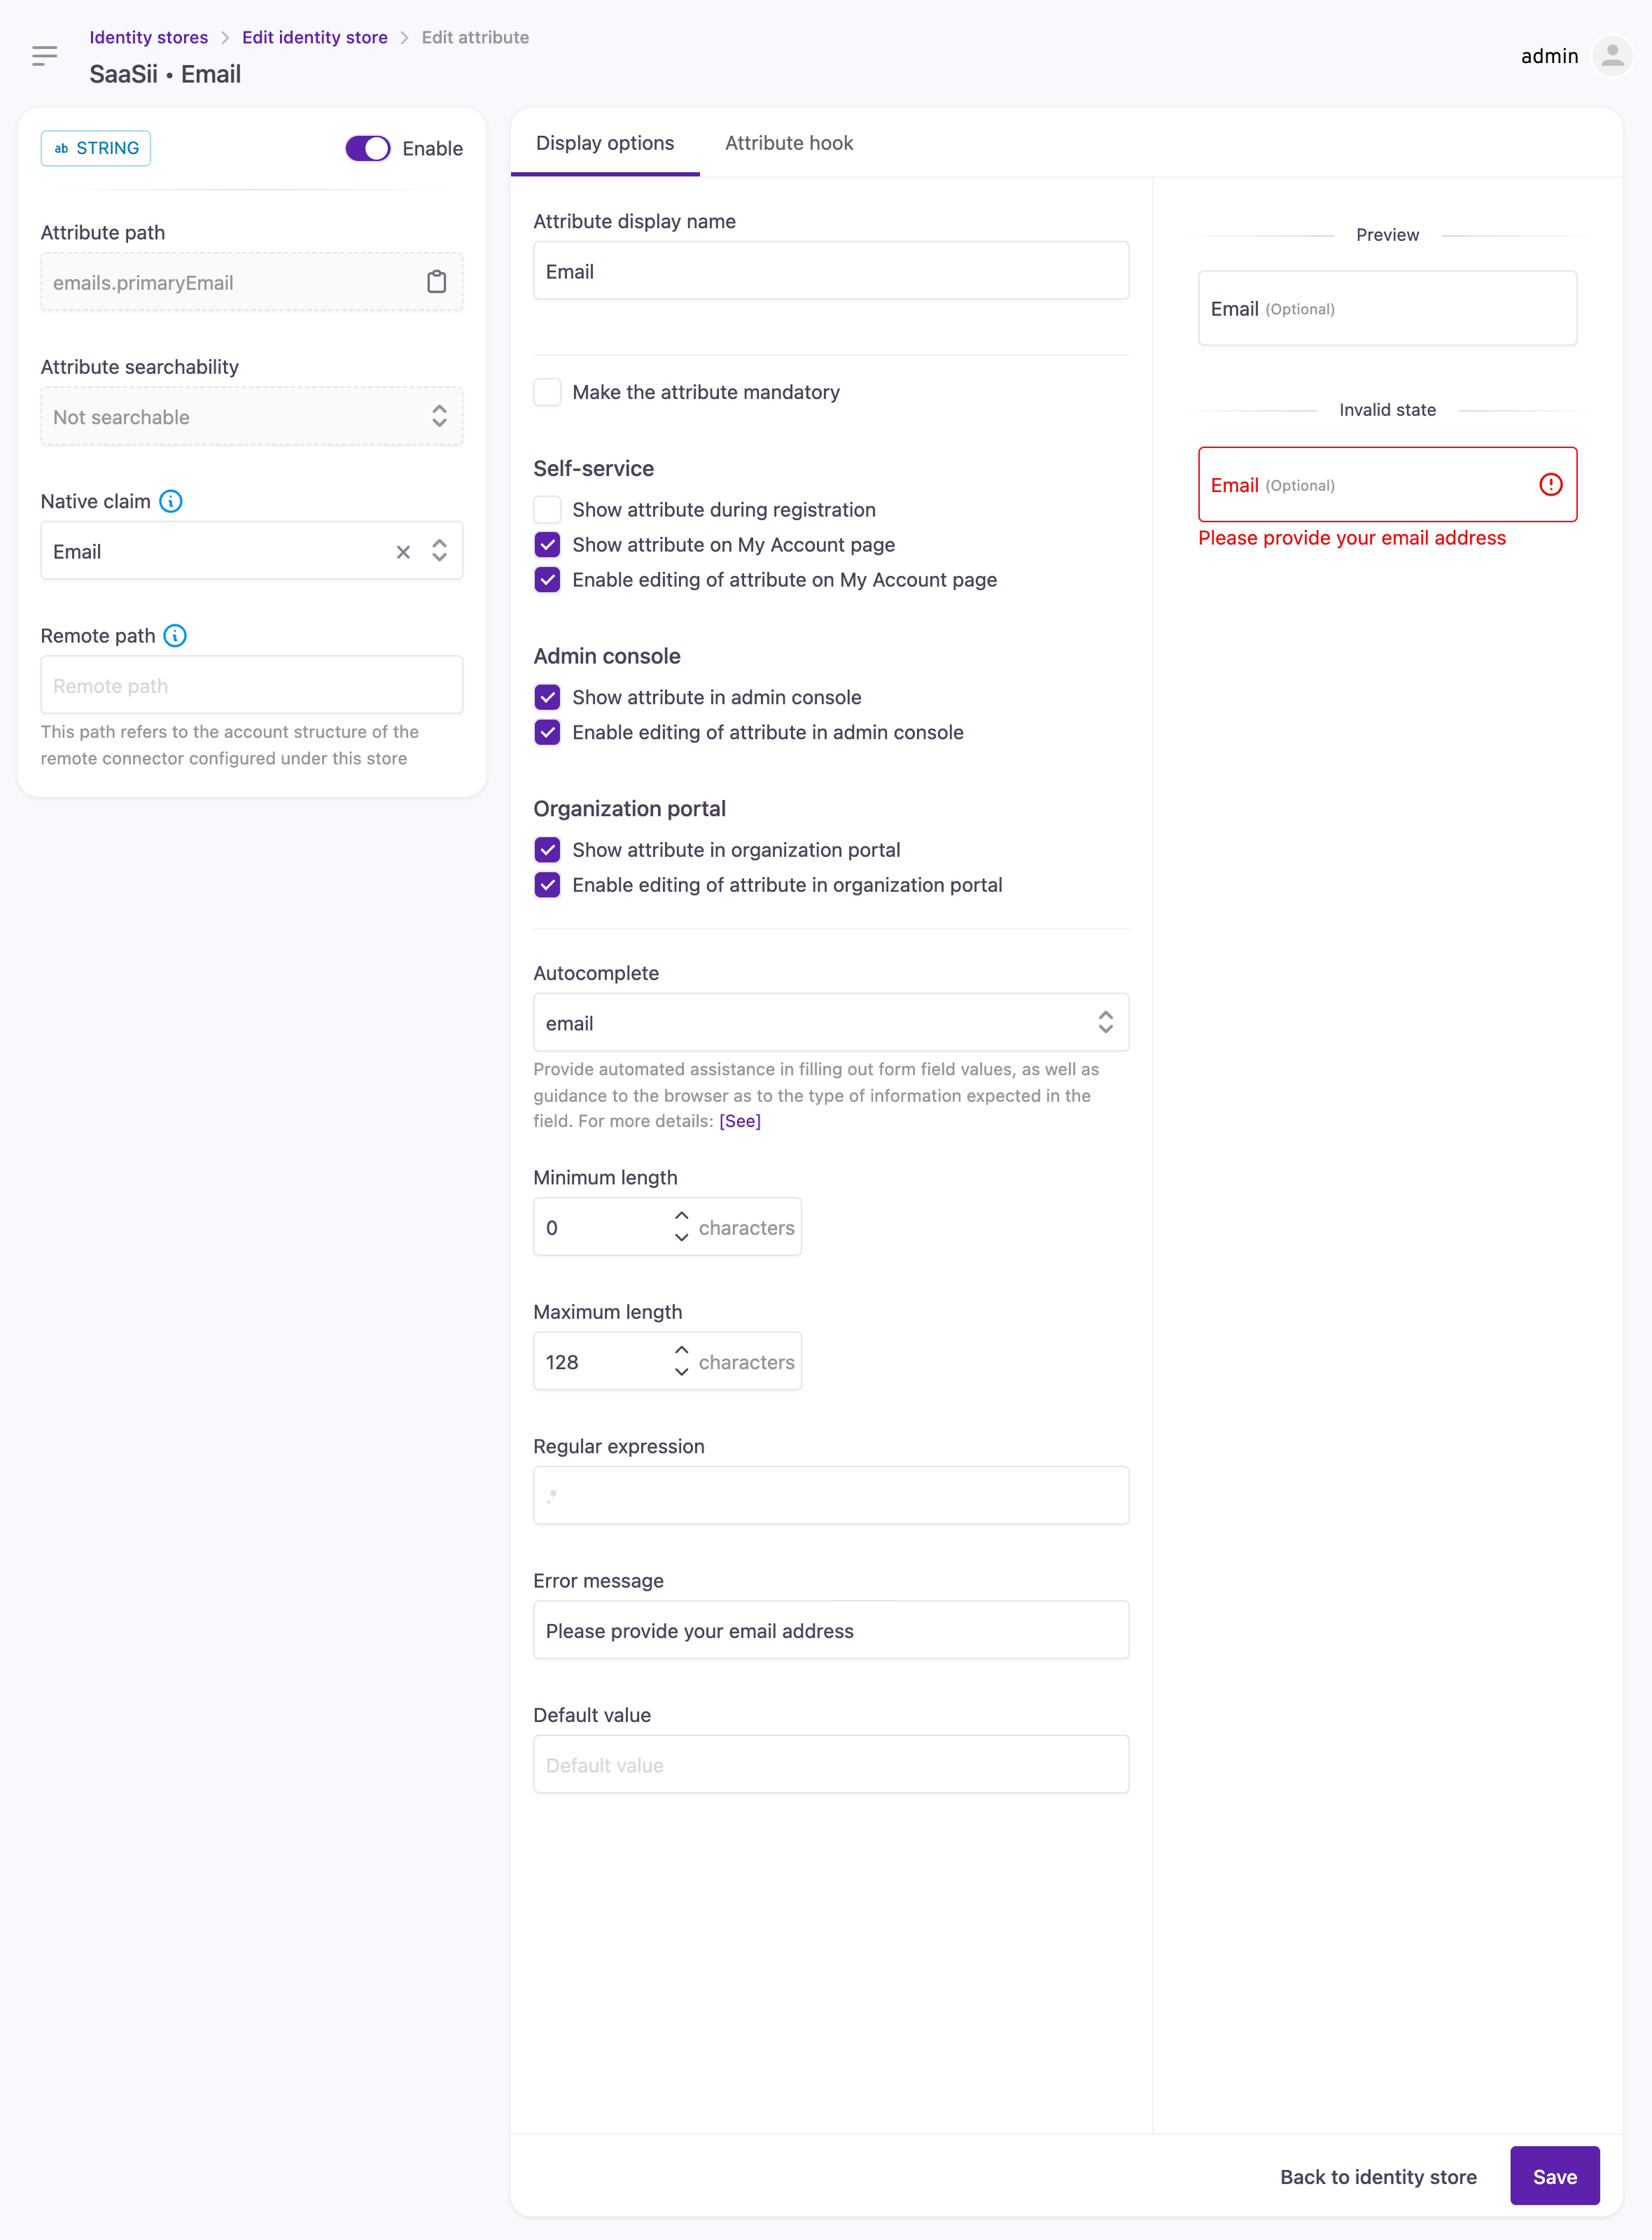
Display options
The Display options section allows administrators to configure how the attribute is presented, required, and managed.
- Attribute display name: The name shown for this attribute in user-facing interfaces, such as self-service pages and admin tools.
- Make the attribute mandatory: Requires customers to provide a value for this attribute during registration.
- Autocomplete: Provides hints to the browser about the expected input type, improving autofill suggestions.
- Minimum length: Defines the minimum number of characters required for this attribute.
- Maximum length: Sets the maximum character limit for the attribute.
- Regular expression: Specifies a validation pattern that the attribute value must match.
- Error message: The message displayed if the input does not meet validation requirements.
- Default value: A pre-filled value shown when no input is provided.
- Preview: Shows how this attribute appears in forms, including its label, optional status, and any default values.
- Invalid state: Displays how it appears when the attribute value does not meet validation requirements.
Self-service
Controls how the attribute appears in customer-facing self-service interfaces.
- Show attribute during registration: Displays this attribute as a field during account registration.
- Show attribute on My Account page: Makes the attribute visible on the customer's My Account profile.
- Enable editing of attribute on My Account page: Allows customers to update this attribute on their My Account profile.
Admin Console
Determines how the attribute is managed in the admin interface.
- Show attribute in Admin Console: Displays this attribute in the admin view of customer accounts.
- Enable editing of attribute in Admin Console: Allows administrators to modify the attribute value.
Organization Portal
Manages visibility and editability in organization-managed accounts.
- Show attribute in Organization Portal: Makes the attribute visible in organization-level account views.
- Enable editing of attribute in Organization Portal: Allows organization administrators to edit this attribute.
Attribute hook
The Attribute hook tab allows you to define custom logic that runs when a form field changes. This is useful for dynamically modifying field behavior based on user input.
- Enable attribute hook: Toggles the attribute hook functionality on or off.
- Handler function: The script editor provides a JavaScript function template where you can define how form fields should behave dynamically. The function receives the following parameters:
screen(string): Identifier of the screen where the form is displayed.changedField(string): The path of the field that has been modified.form(object): Represents the current form, including helper functions.form.get(FormGet function): Retrieves a form field by its path.field(FormField object): The current field that has been changed.
FormField properties
Each form field has several properties that can be modified within the attribute hook:
disable(): Sets the field to read-only.enable(): Makes the field editable.value: Holds the current value of the field.hidden(boolean): Determines whether the field is visible or hidden.required(boolean): Specifies whether the field is mandatory or optional.
Retrieving a form control
The form.get (path) function is a callback function that allows you to retrieve a specific form field based on its attribute path.
- @callback FormGet: Indicates that
form.getis a function. - @param {string} path: The path of the attribute within the form structure.
- @returns {FormField}: Returns a
FormFieldobject, which contains properties and methods for interacting with the field (such as enabling, disabling, setting a value, or changing visibility).
This means that form.get(path) is used to look up a field dynamically so that you can apply logic to it in response to other changes in the form.
Attribute availability
Lifecycle Event Hook context
Once enabled, attributes are available in the Lifecycle Event Hook context, even if they're not set to mandatory or do not appear in the self-service experiences or the Admin Console (the attribute's visibility and availability switches are not checked at all).
API context
If an attribute is set to show in the Admin Console, 'Show attribute in admin console', it becomes visible in the APIs, but not editable. To make it also editable via APIs, editing of the attribute also has to be enabled in the Admin Console, 'Enable editing of the admin console'.
Updated 3 months ago