Input step

A step in the Journey Builder is a component used to configure and customize a login, registration, or self-service workflow.
The input step allows you to collect necessary information from a customer, map local variables to native claims to ensure they’re handled consistently throughout the authentication process, and display custom HTML to provide instructions or additional information.
Capabilities
- Specify registration fields to include in a registration or self-service step.
- Map local variables to native claims.
- Display custom HTML content.
Sample use cases
- Create a multi-step registration process.
- Collect information to tailor the registration flow to different customers based on, for example, country or account type.
- Display instructional text or custom error messages.
Configuration
To add an input step to your journey, follow the steps below.
- Select the Journey Builder in the left-hand menu on the admin console.
- To create a new journey, select +Create journey or select an existing journey to edit.
- In the journey builder, select the + icon in the upper left-hand corner to add a new step to the journey. Choose Input from the available options.
- After placing it in the Journey Builder, connect the module to other steps, depending on how it interacts with them. It is important to configure where a success or a failure outcome will take the customer within the workflow.
- By selecting the step module and the pencil icon, you can edit what kind of input will be collected. Optionally, you can also name the step here.
- Native claim: adds an input field corresponding to one of the native claims defined in the identity store.
- Local variable: adds an input field with a new local variable unique to the current journey. This local variable can be mapped to the existing native claims or used in the Condition step.
- Static text as HTML: adds custom text to the input step. HTML text format is supported.
You can either add multiple input fields to a single input step or create separate input steps to distribute the fields across multiple screens.
You can mark the input field as sensitive, which will redact input values in account events.
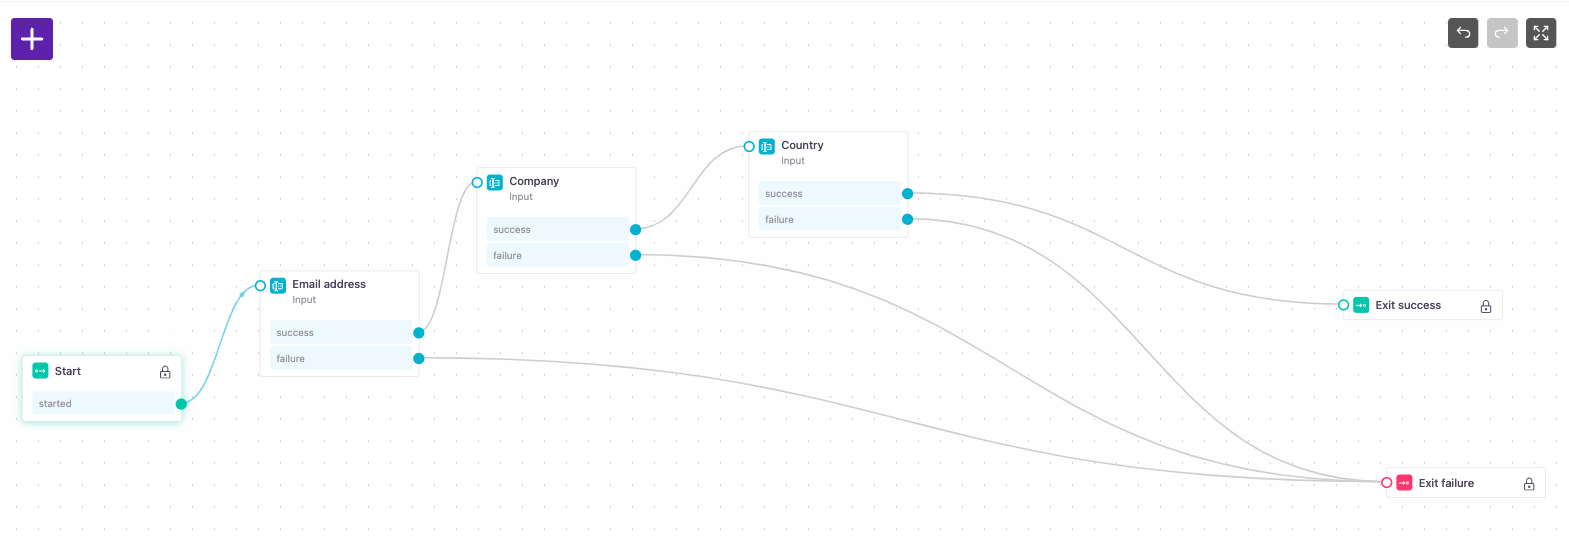
A sample use case for a multi-step registration flow.