Microsoft login setup

Microsoft requires a number of prerequisite steps to be completed before you can use Microsoft as a login provider. We have attempted to help explain the steps required in this process to make it easier to onboard Microsoft Login. References to the Microsoft documentation are also provided.
This process can be achieved in four steps:
Step 1: Create an Azure account with an active subscription
You can skip this step if you already have an Azure account.
Step 2: Create an Azure AD B2C Tenant
You can skip this step if you already have an Azure AD B2C Tenant.
Step 3: Register an application with the Microsoft Identity Platform
Here, you configure Microsoft Login and choose the account types, for example, a social (personal) Microsoft account, or an account from Azure AD.
Step 4: Configuring Strivacity with Microsoft Login
Once you’ve completed Steps 1, 2, and 3 in Azure, you can configure Microsoft Login in Strivacity.
Step 1: Create an Azure Account
If you do not have an existing Azure account with an active subscription, the first step to setting up Microsoft Login is to set up an Azure account.
You can sign up for an Azure account here: https://azure.microsoft.com/en-us/free/
Once you have successfully registered an account, you can proceed below to Step 2: Create an Azure AD B2C Tenant.
Step 2: Create an Azure AD B2C Tenant
The full Microsoft tutorial and instructions on how to create an Azure B2C Tenant, along with guidance on troubleshooting the process can be found here:
https://docs.microsoft.com/en-us/azure/active-directory-b2c/tutorial-create-tenant
Here is an abridged version of the steps required. If you are doing this for the first time, you may want to consult the Microsoft documentation.
-
Sign in to the Azure Portal: https://portal.azure.com/ using an Azure account that has at least the Contributor role for the subscription that you're using.
-
Select the directory that contains your subscription using the Directory + Subscription toolbar button to select the directory that contains your active subscription, as shown below. Once the correct directory has been selected, click the + Create a resource button:
-
Next, search for Azure Active Directory B2C as shown below:
.png)
- Next, click the Create button for Azure Active Directory B2C, as shown below:
.png)
- Now choose whether you want to create a new Azure AD B2C Tenant, or link this subscription to any existing Azure AD B2C Tenant. In this case, we are going to create a new Azure B2C Tenant:
.png)
- Next, provide the information required to create a tenant as shown below. Once created, a confirmation screen will be shown.
.png)
- Once the tenant has been created, you can move on to Step 3: Register an application with the Microsoft Identity Platform.
Step 3: Register an application with the Microsoft Identity Platform
The full Microsoft tutorial and instructions on how to register an application with the Microsoft Identity Platform can be found here.
-
If you are not currently logged in to Azure, proceed to log into Microsoft Azure here: https://portal.azure.com using your Azure account (from Step 1, above).
-
From the hamburger navigation menu, select All services from the menu, as shown below:
.png)
- Next, select Identity, and then App registrations, as shown below:
.png)
- Next, select + New registration from the App registrations page as shown below:
.png)
- Now provide a name and the scope of the supported account types, depending on how you intend to use Microsoft Login in conjunction with your application.
Within the Redirect URL, leave the drop-down box set to Web and enter the following FQDN, as shown below:
https://[Strivacity instance URL]/provider/continue
.png)
- Once completed, click the Register button at the bottom of the screen. You will then be returned to a screen showing the details of the application that you have just created which will show the Application (client) ID.
Take a note of the ClientID and store this safely until needed in Step 4: Configuring Strivacity with Microsoft Login.
- Next, still within the Strivacity application screen, click Certificates & secrets from the left hand menu under Manage, as shown below:
.png)
- Under Client secrets within the Certificates & secrets page, click + New client secret, as shown below:
.png)
- Next, enter a description and choose the expiry for the client secret as shown below:
.png)
- Once generated, make a note of the client secret and store it safely. You will need the Client Secret, along with the ClientID (from step 6 above) when configuring Strivacity.
Step 4: Configuring Strivacity with Microsoft Login
Following these steps will finalize your setup for using Microsoft Login as a social login provider with Strivacity (and your application).
-
Start by logging into the Admin Console using an admin account.
-
From the left-hand menu, select Identities, then Social Login
-
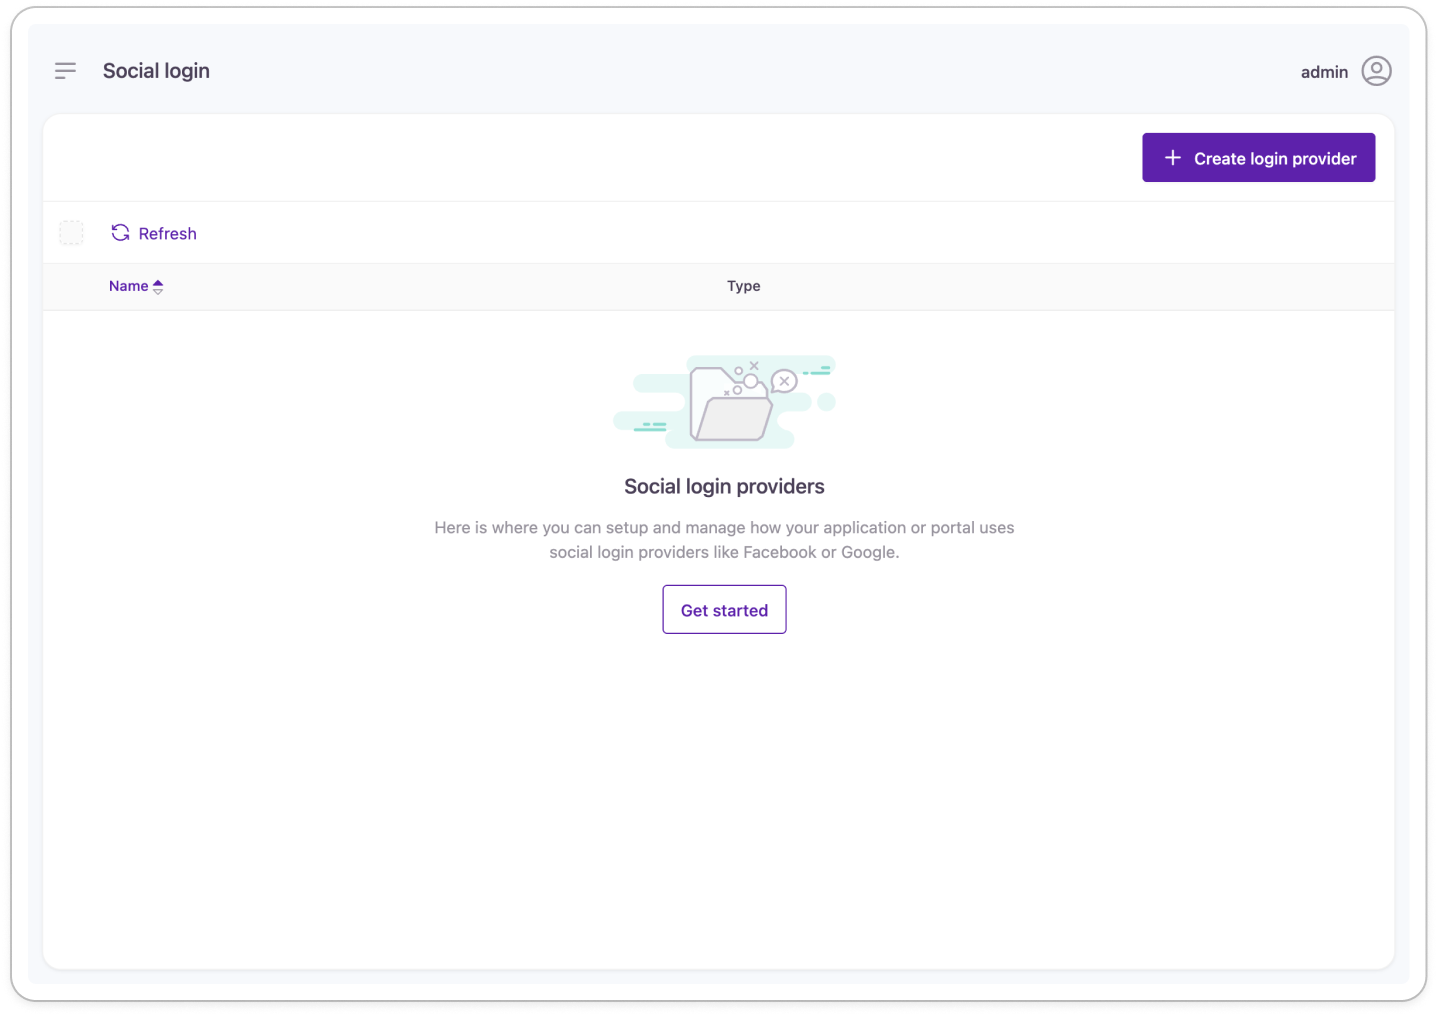
From the Social Login screen, click the + Create Provider button from the top right-hand corner as shown below:

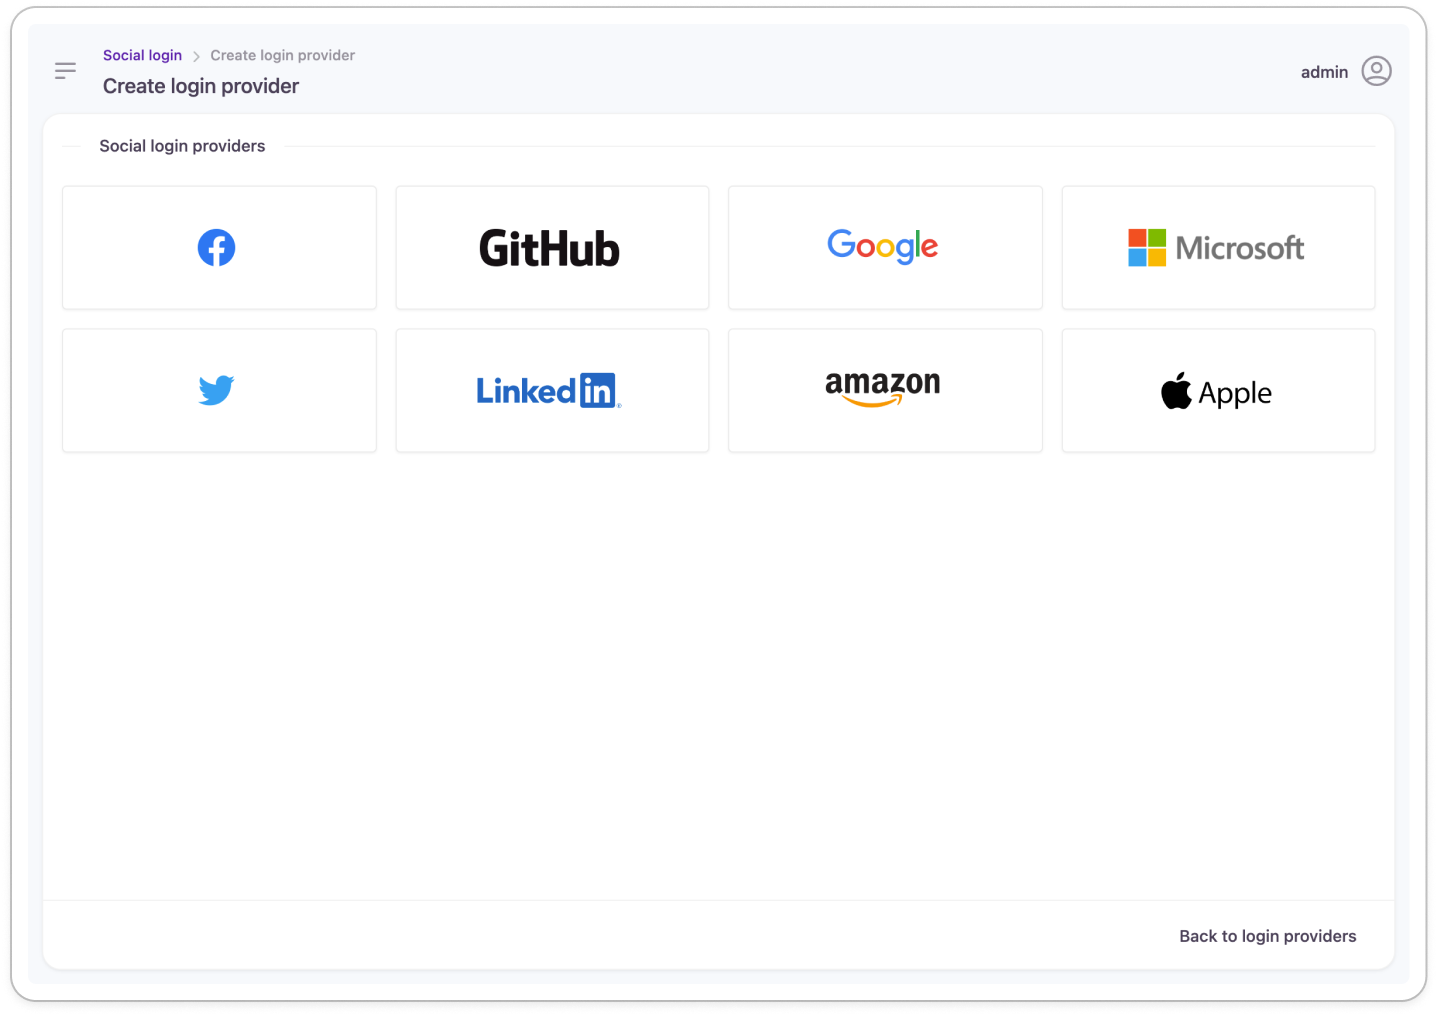
- From the Create Social Login Provider screen click the Microsoft icon as shown below:

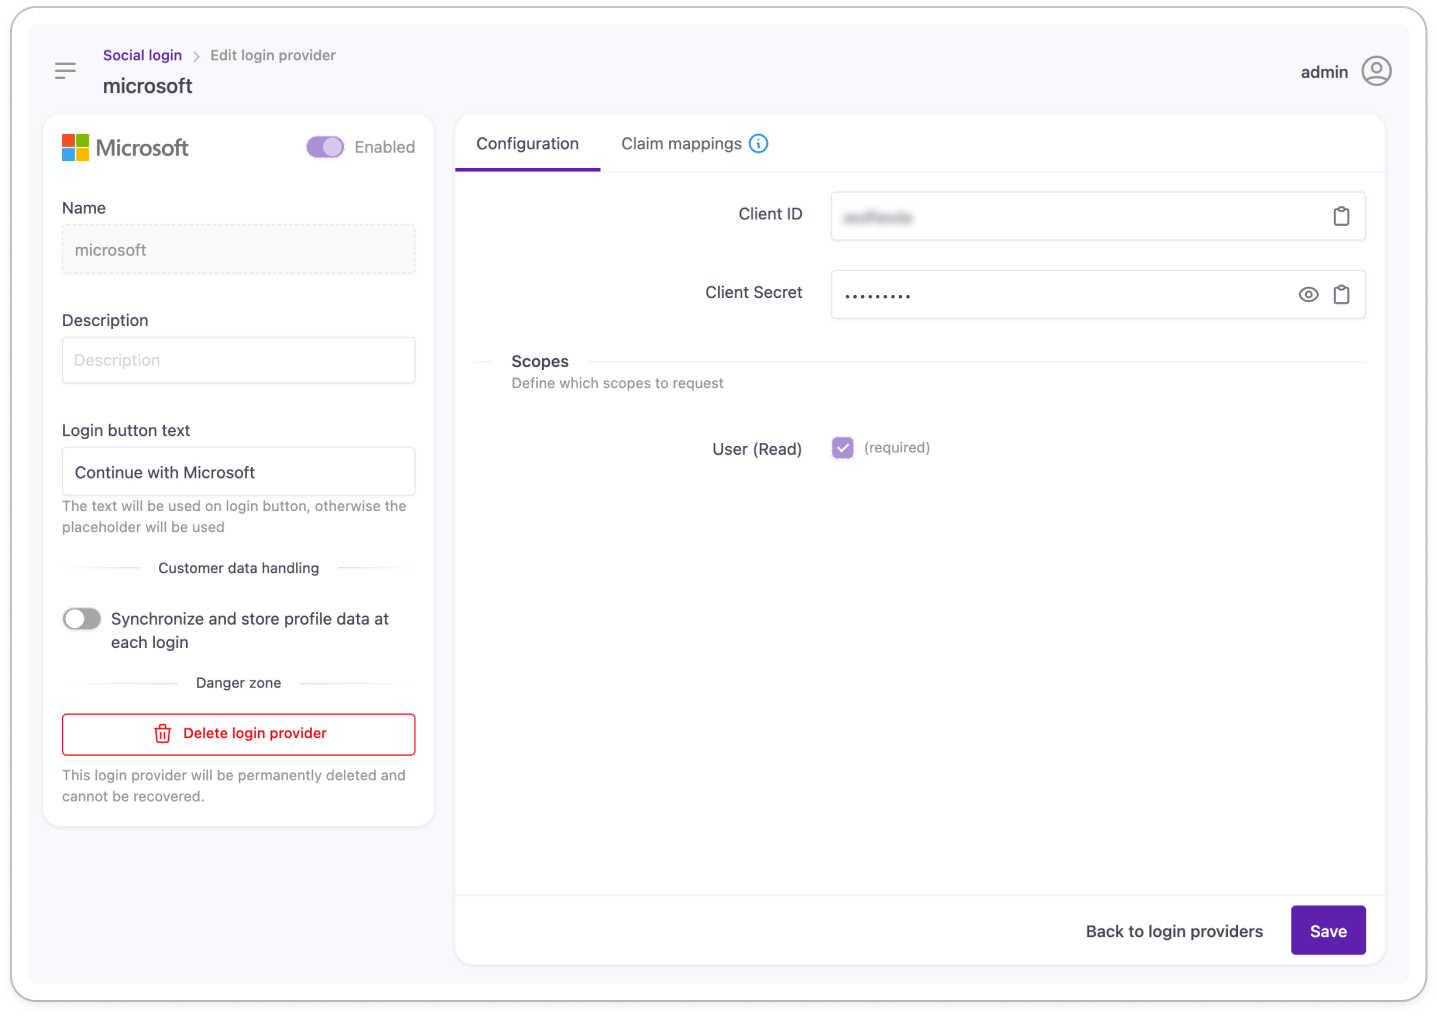
- The Create Microsoft Login Provider screen will now be displayed as shown below:

- Next, copy the ClientID and Client Secret from the Azure Portal (from Steps 6 and 10) above and paste the respective values into the ClientID and Client Secret fields. Click Save.
Strivacity will use the User (Read) attributes of the customer's profile. If you choose to synchronize and store any account profile data at each login, then Strivacity will retrieve and store this information which will be visible to the customer in the My Account page, and to any Strivacity Admins when managing the customer identity.
Updated 5 months ago
