Amazon login setup
Strivacity supports social authentication using external identity providers such as Amazon. This allows customers to log in to your application using their existing Amazon identity.
Overview
Social provider add-ons in the Admin Console come with many client-side configurations out of the box to make integration as painless as possible:
- autodiscovery URL with automatic endpoint collection
- pre-defined scopes for the essential requests
- pre-configured claim mappings to obtain and synchronize relevant social profile attributes
- continuous customer data synchronization
Prerequisites
General
- General understanding of the OIDC Authorization Code Flow grant type
- A test application where you can apply and test the Amazon social provider
To demonstrate the integration process, the test application will be Strivacity's customer self-service management utility. The process will look mostly the same for any other application.
Amazon
- Existing Amazon identity
- Amazon developer account
- New Amazon security profile
- Client ID and Secret of the security profile
Strivacity
- Up-and-running Strivacity instance
- Redirect URI where customers are redirected after successful authentication:
https://<**yourStrivacityinstanceID**>.strivacity.com/provider/continue - Test application to test the social provider
- The application's self-service URL for reference
Configuration steps
Creating an Amazon security profile for integration
-
Access Amazon's developer console.
-
Select Create a new security profile.
-
You will be redirected to the Security profile management page.
-
Fill in the required fields:
- Name your new security profile.
- Add a description of the security profile.
- Provide a URL to your brand’s Privacy Policy at Consent privacy notice URL.
- Add a logo.
-
Select Save once you’ve completed the fields.
-
You will land on the Login with Amazon Console tab inside your developer console.
Managing app settings
- Hover over the cogwheel icon and select Security profile.
- You will land on the General tab of your selected security profile.
- Switch to the Web settings tab.
- Capture the Client ID and Secret.
- Choose Edit and add a redirect URL to Allowed return URLs.
The redirect URL consists of your Strivacity Instance ID and the following endpoint:
https://<yourStrivacityinstanceID>.strivacity.com/provider/continue.
- Save your changes. You’re all set for adding Amazon's sign-in experience to your applications.
Adding Amazon as a social login provider
-
In the Strivacity Admin Console, navigate to Identities > Social login.
-
Select Create.
-
Select Amazon from the list of available social providers.
-
Paste the Client ID and Client secret you’ve previously obtained from your Amazon security profile.
-
Select the Scopes to request from Amazon. By default, Strivacity requests access to the Amazon basic profile and can optionally request the customer’s postal code. Find out more about the essential and voluntary scopes for Amazon’s sign-in service on this page.
-
Enable Synchronize and store profile data at each login to ensure customer data is kept up-to-date inside your application. If you choose to synchronize and store this social profile data at each login, Strivacity will retrieve and store this information, which will be visible to the customer on their My Account page and to any Strivacity admins when managing the customer's identity.
-
You can also define Additional parameters that are included in the authorization request sent to Amazon. These parameters allow you to control provider-specific authentication behavior. For example, some providers support parameters such as
prompt=loginto force re-authentication instead of reusing an existing session. -
Select Save to add the Amazon social provider.
Claim mappings are automatically handled for social login providers after saving.
Adding Amazon sign-in capability to your application
Follow the steps described in this guide to add a social login provider to an application.
Testing your social login provider
-
Copy the self-service URL of your application.
-
Open an incognito window or launch another browser.
-
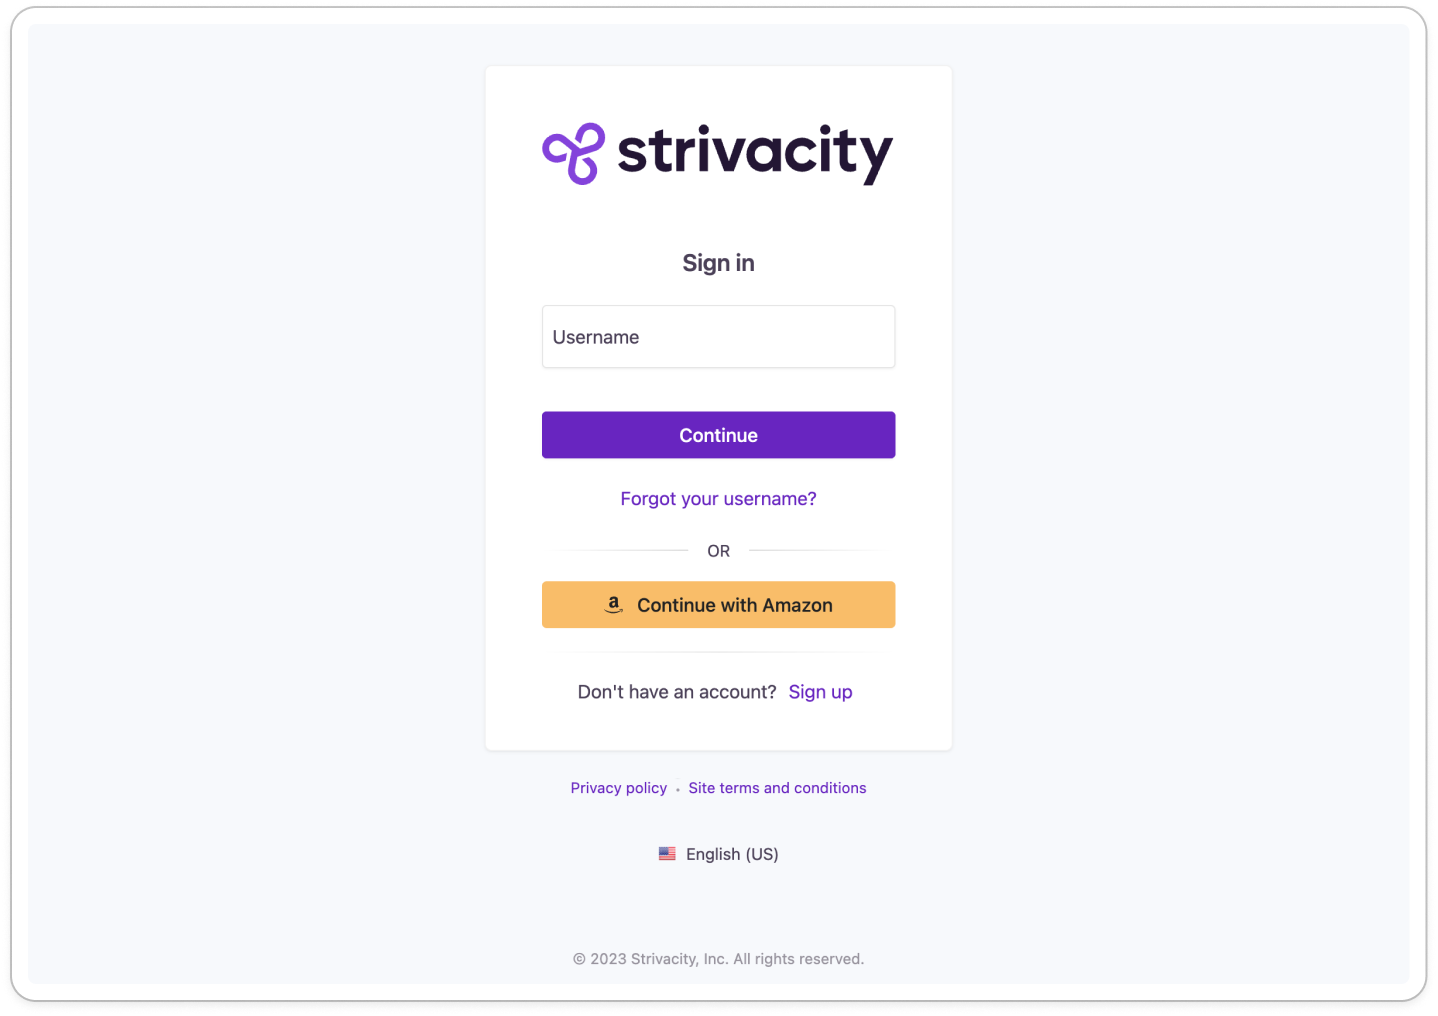
Go to the self-service login page of your application using the application’s link.
-
Select Continue with Amazon to sign in with your Amazon identity.
If the setup is successful, you will be prompted during authentication to grant access to your basic profile information (and postal code, if configured) in your Amazon account.
Testing your social login provider
Updated 2 months ago