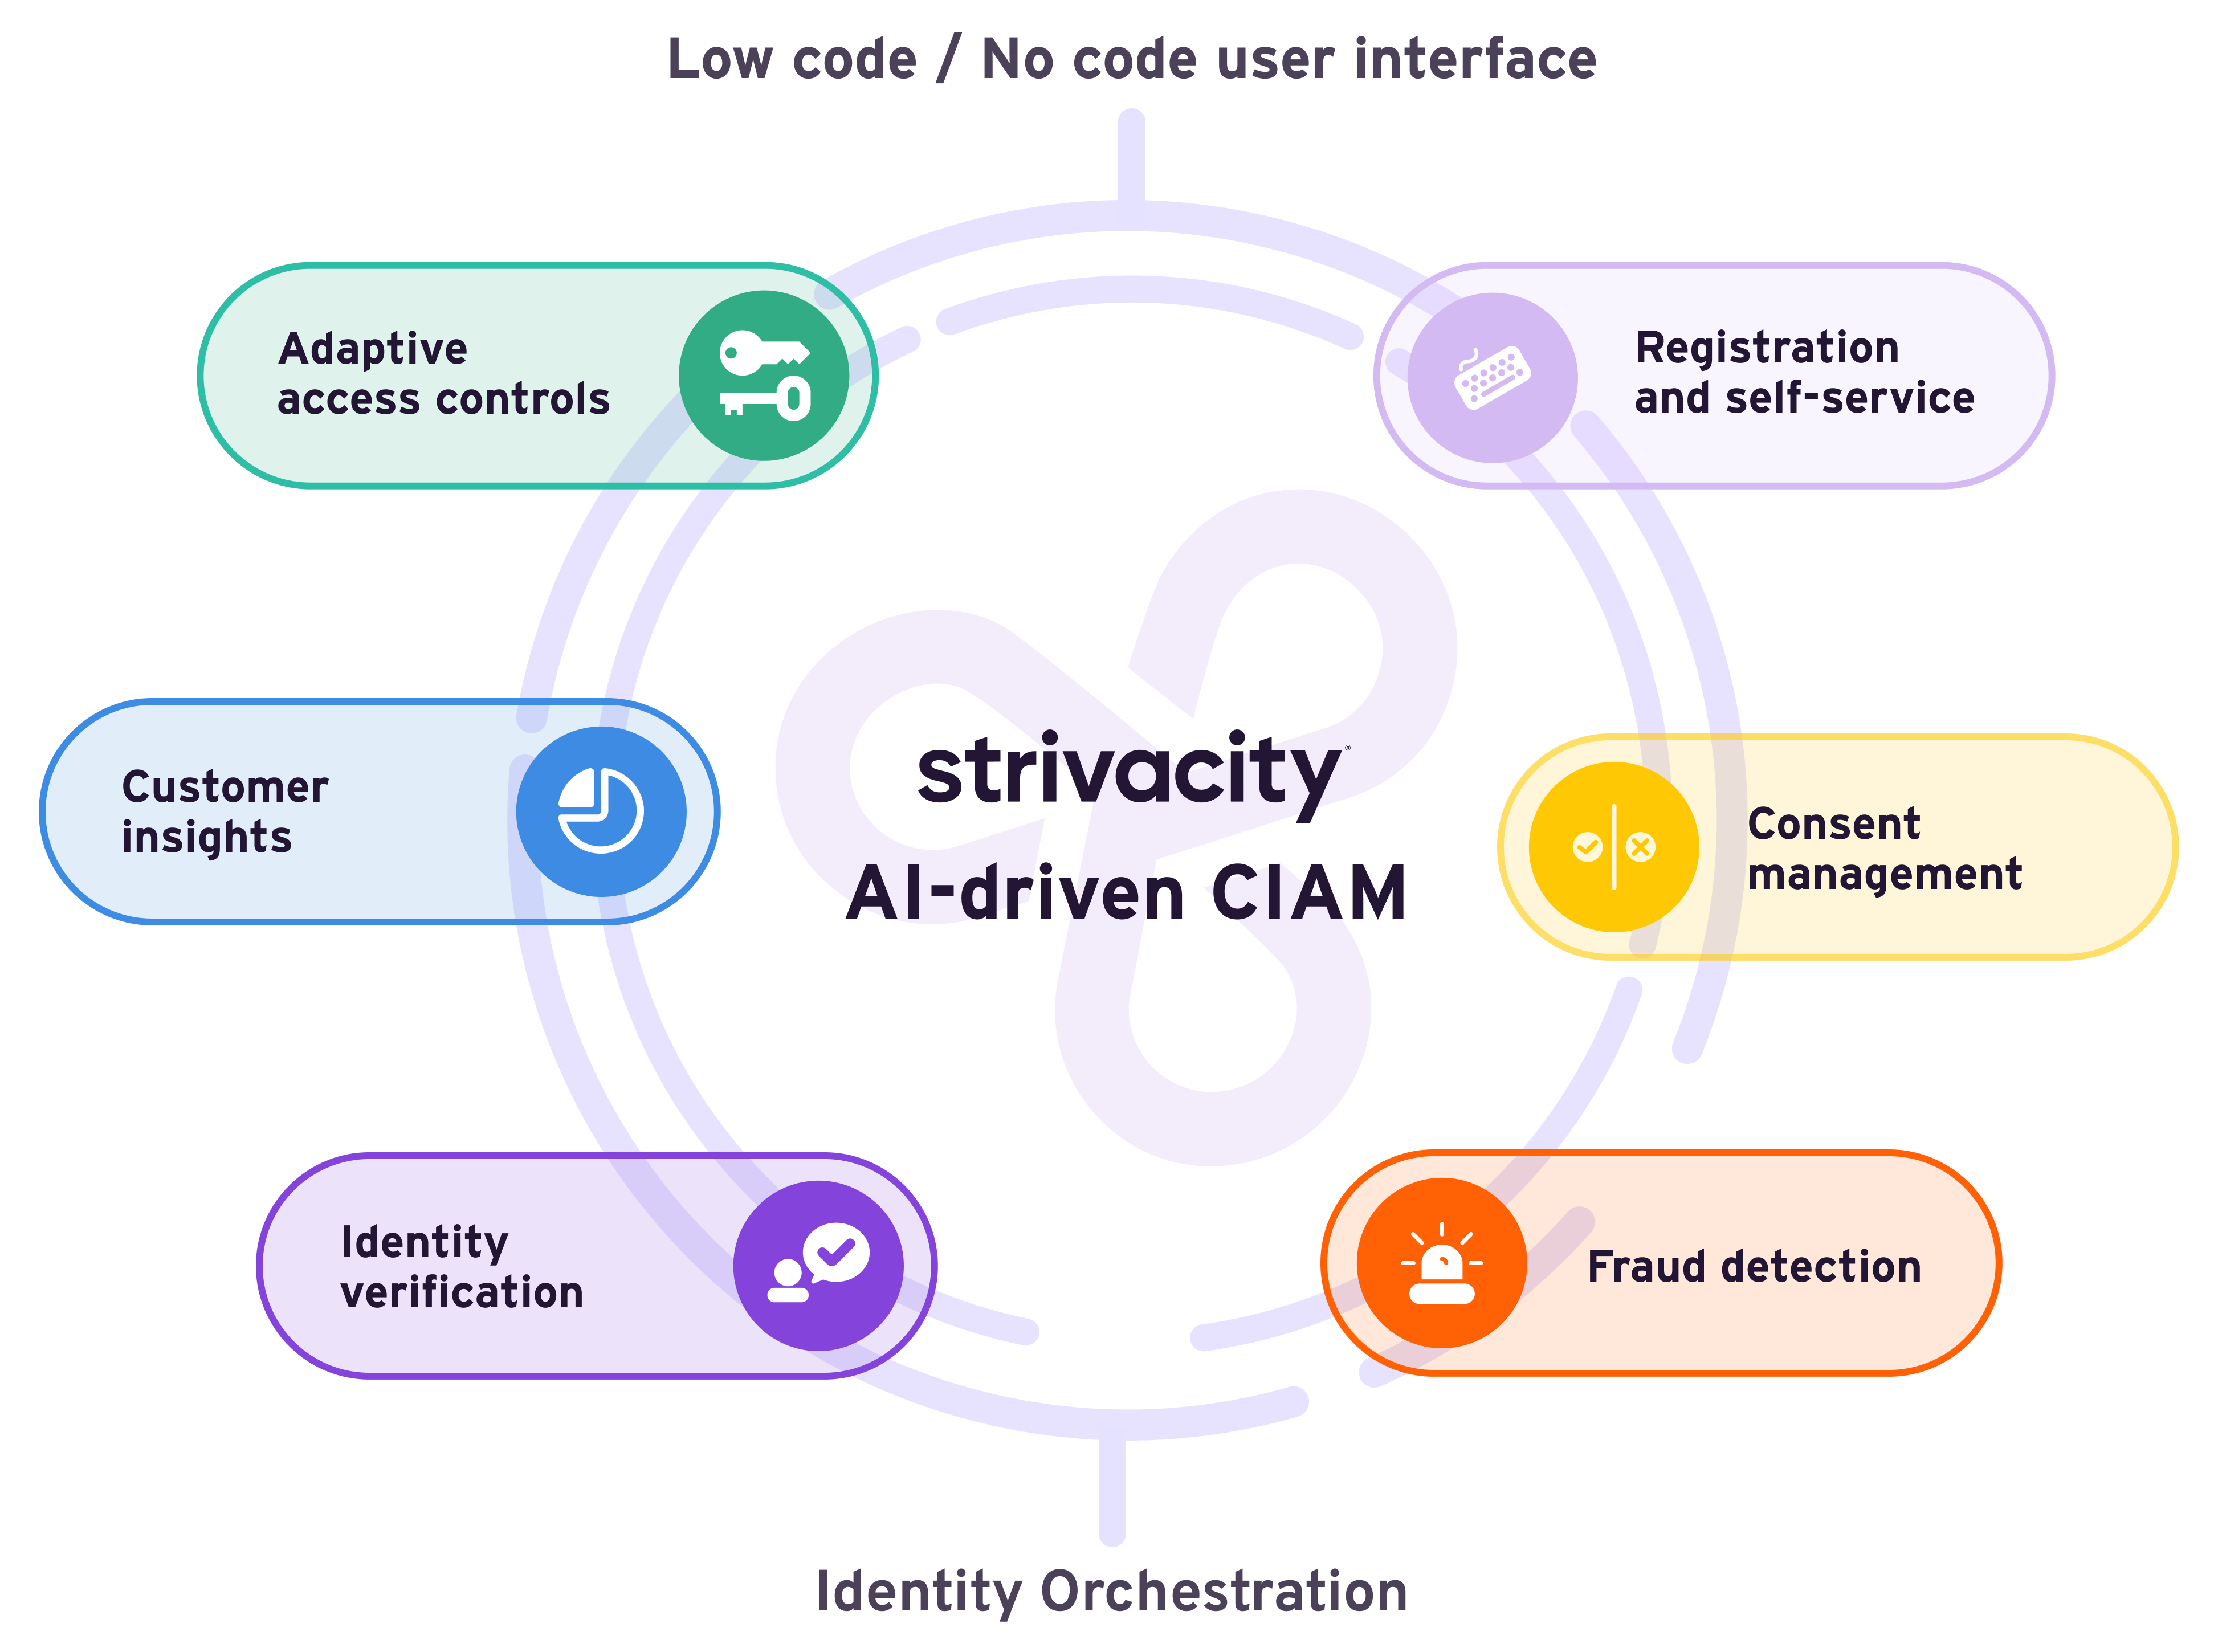
Product overview
New to Strivacity? This is the place to start. This section will get you logged into the Admin Console in under a minute and help you find your way around.
Learn How:
1) To Log in to the Admin Console for the First Time
2) Policies and Applications Work Together
Log in to the admin console for the first time
Contained with your welcome email from Strivacity you will find the following information that will enable you to get started.
The first step is logging into the Strivacity admin console:
Finding the admin console
The URL to the admin console will be in the welcome email and it will be in the format of:
[brandname].[region].strivacity.com/admin
For example, if your company is called Brandtegrity and you decided to call your Strivacity instance that, and you decided for us to provision it in Europe for you it will be: https://brandtegrity.eu.strivacity.com/admin
Bootstrap credentials
The welcome email also contains a username and password for accessing the admin console. We recommend that you change these credentials as soon as you log in for the first time by following the steps in Changing the Admin Password.
Understanding the menu system
The admin console provides an intuitive administrative experience that takes little time to become acquainted with.
As a quick reference, the table below provides an overview of what each of these menu items can help with:
Menu Name | Description |
---|---|
Dashboard | The dashboard provides real-time insight into how your customers are using your web portals /applications that are under the management of Strivacity. |
Applications | Application policies are the glue that holds all of the configuration together. Create Application policies and assign any other policies to your applications. An Application represents the secure and trusted relationship between your customer-facing portal or application and Strivacity. |
Adaptive MFA | Create and mange Adaptive MFA policies that control login workflow, Multi-Factor Authentication and Risk Analysis. |
Identity verification | Create identity verification policies to confirm the identity of your customers online without getting in the way of usability. Prevent bad actors from accessing your applications by applying risk evaluation steps. Obtain customer information and consent specifically for identity establishment. |
Self-service | Create and manage any Self-Service policies that control self-registration, account recovery, account management, customer invitation, and application access. |
Consent management | Create and manage any optional and mandatory consents that you may wish a customer to accept to use your application |
Branding | Create and manage branding policies to apply your brand’s carefully thought-out identity and visual style to your services. |
External login | Add and configure any social login or enterprise login providers for customer registration and login, and decide how to handle the synchronization of customer data from both those types of Identity Providers. |
Lifecycle event hooks | Use Lifecycle Event Hooks to integrate your customer-facing applications with any other homegrown systems or 3rd-party products that you may own, such as CRM or Marketing Hubs. |
Claim dialects | Use claims to establish and set name/value pairs for customer accounts. |
Accounts and hroups | Manage any aspects of customer accounts such as inviting customers, account creation, deleting, editing profile information, changing the password, and managing Multi-Factor Authentication. |
Identity stores | Create and manage any Identity Stores for customer accounts, setup and assign Password Policies for those identity stores. |
Notifications | View and customize/rebrand the Email and SMS notifications that are sent to your customers. |
Logging | View and search customer and administrative activity for auditing and troubleshooting. |
Configuration | Manage branding and color schemes for any of the login, registration and self-service components, view tenant information such as the hosting region, and manage any Admin accounts. |
Understanding how policies and applications work together
All Strivacity capabilities are based around a simple policy framework and the assignment of policies to an application.
What is a policy?
A policy is simply a group of reusable common settings that can be assigned to an application. This means that you can create a single policy and reuse it by applying it to one or more applications.
Reusing policies and assigning them to multiple applications saves you time and reduces risk through misconfiguration, but be careful when editing a policy when deployed in production. Any changes you save will take effect immediately and will affect all users using those applications (that the policy is assigned to!)
Strivacity has eight major types of policy and each provides a distinct set of capabilities. Each is discussed in depth within this guide.
1) Adaptive MFA Policy
2) Self-Service Policy
3) Identity Verification
4) Social and External Login Providers
5) Lifecycle Event Hooks
6) Consent Management Policy
7) Notification Policy
8) Branding Policy
What is an application?
An Application represents the secure and trusted relationship between your customer-facing portal or application and Strivacity.
Once you have configured your web portal or application to trust Strivacity (more on how to do that later), you then simply assign configuration or policies to that application for your settings to take effect (which they do immediately). It's that easy!
The diagram below illustrates the relationship between your web portal/application, an application and policies.
Updated 16 days ago