Strivacity Login Gateway
The Strivacity Login Gateway modernizes your customer identity strategy while maintaining support for legacy applications. This on-premises component enhances sites that utilize header-based authentication with additional authentication and authorization capabilities.
The Login Gateway functions as a reverse proxy, mediating between the browser and the application’s web server. It applies authentication and authorization policies via HTTP headers, configurable on a per-URL-path basis. For each path, you can specify the necessary authentication, methods, and scopes.
Configuration management is centralized through the Strivacity Admin Console, eliminating the need for direct access to the on-premises component to modify policies.
Capabilities
- Intercept web traffic to enforce authentication and authorization policies for each URL path.
- Specify the required authentication for each URL path.
- Define supported methods for each path (e.g., GET, POST, DELETE, PUT).
- Set custom scopes required for accessing resources.
- Implement custom HTTP security headers.
- Relying Party (RP) triggered logout via URL.
Header-based authentication and its origins
Header-based authentication is a method widely used in Web Access Management (WAM) where user credentials are passed through HTTP headers during a web session. This approach was particularly prevalent in legacy systems and enterprise environments, where integration with web servers and identity management systems like CA Siteminder allowed for secure and straightforward user access control. By leveraging HTTP headers, applications could authenticate users without direct handling of login credentials, thus enhancing security and simplifying the authentication process. Header-based authentication provides a solid foundation for securing web applications but often requires integration with modern identity solutions to meet current security standards and user experience expectations.
Strivacity’s enhancement with OIDC-based federation
Strivacity modernizes traditional header-based authentication systems by transitioning them to OIDC (OpenID Connect)-based federation. By integrating OIDC, Strivacity enables seamless identity verification across different systems and platforms, enhancing both security and user experience.
With the Login Gateway component acting as a reverse proxy, it intercepts HTTP traffic and injects additional headers into the HTTP request after performing OIDC-based authentication, thus controlling authentication and authorization. This allows organizations to upgrade their legacy systems without extensive modifications. This capability not only extends the life of existing applications but also provides a path toward adopting more secure and flexible identity management practices that support a wide range of authentication mechanisms.
Login hint support
URLs redirected to the Login Gateway can include a parameter to pre-populate a user identifier hint. This can be useful because an application may conditionally direct users to a Strivacity experience (behind the Login Gateway) from a legacy one.
The parameter strivacityLoginHint can be passed a login hint which will be correctly forwarded to the Strivacity login flows. This follows all of the same rules of OIDC login hints.
How to set up
On-premises component
The Login Gateway is containerized for deployment in Kubernetes, Docker, or similar environments. Deploying requires a brand to provide the Login Gateway access to a REDIS cluster to facilitate on-premises session storage.
The Login Gateway can either be set up to perform as the reverse proxy or use a brand's existing reverse proxy.
Strivacity Login Gateway as the reverse proxy
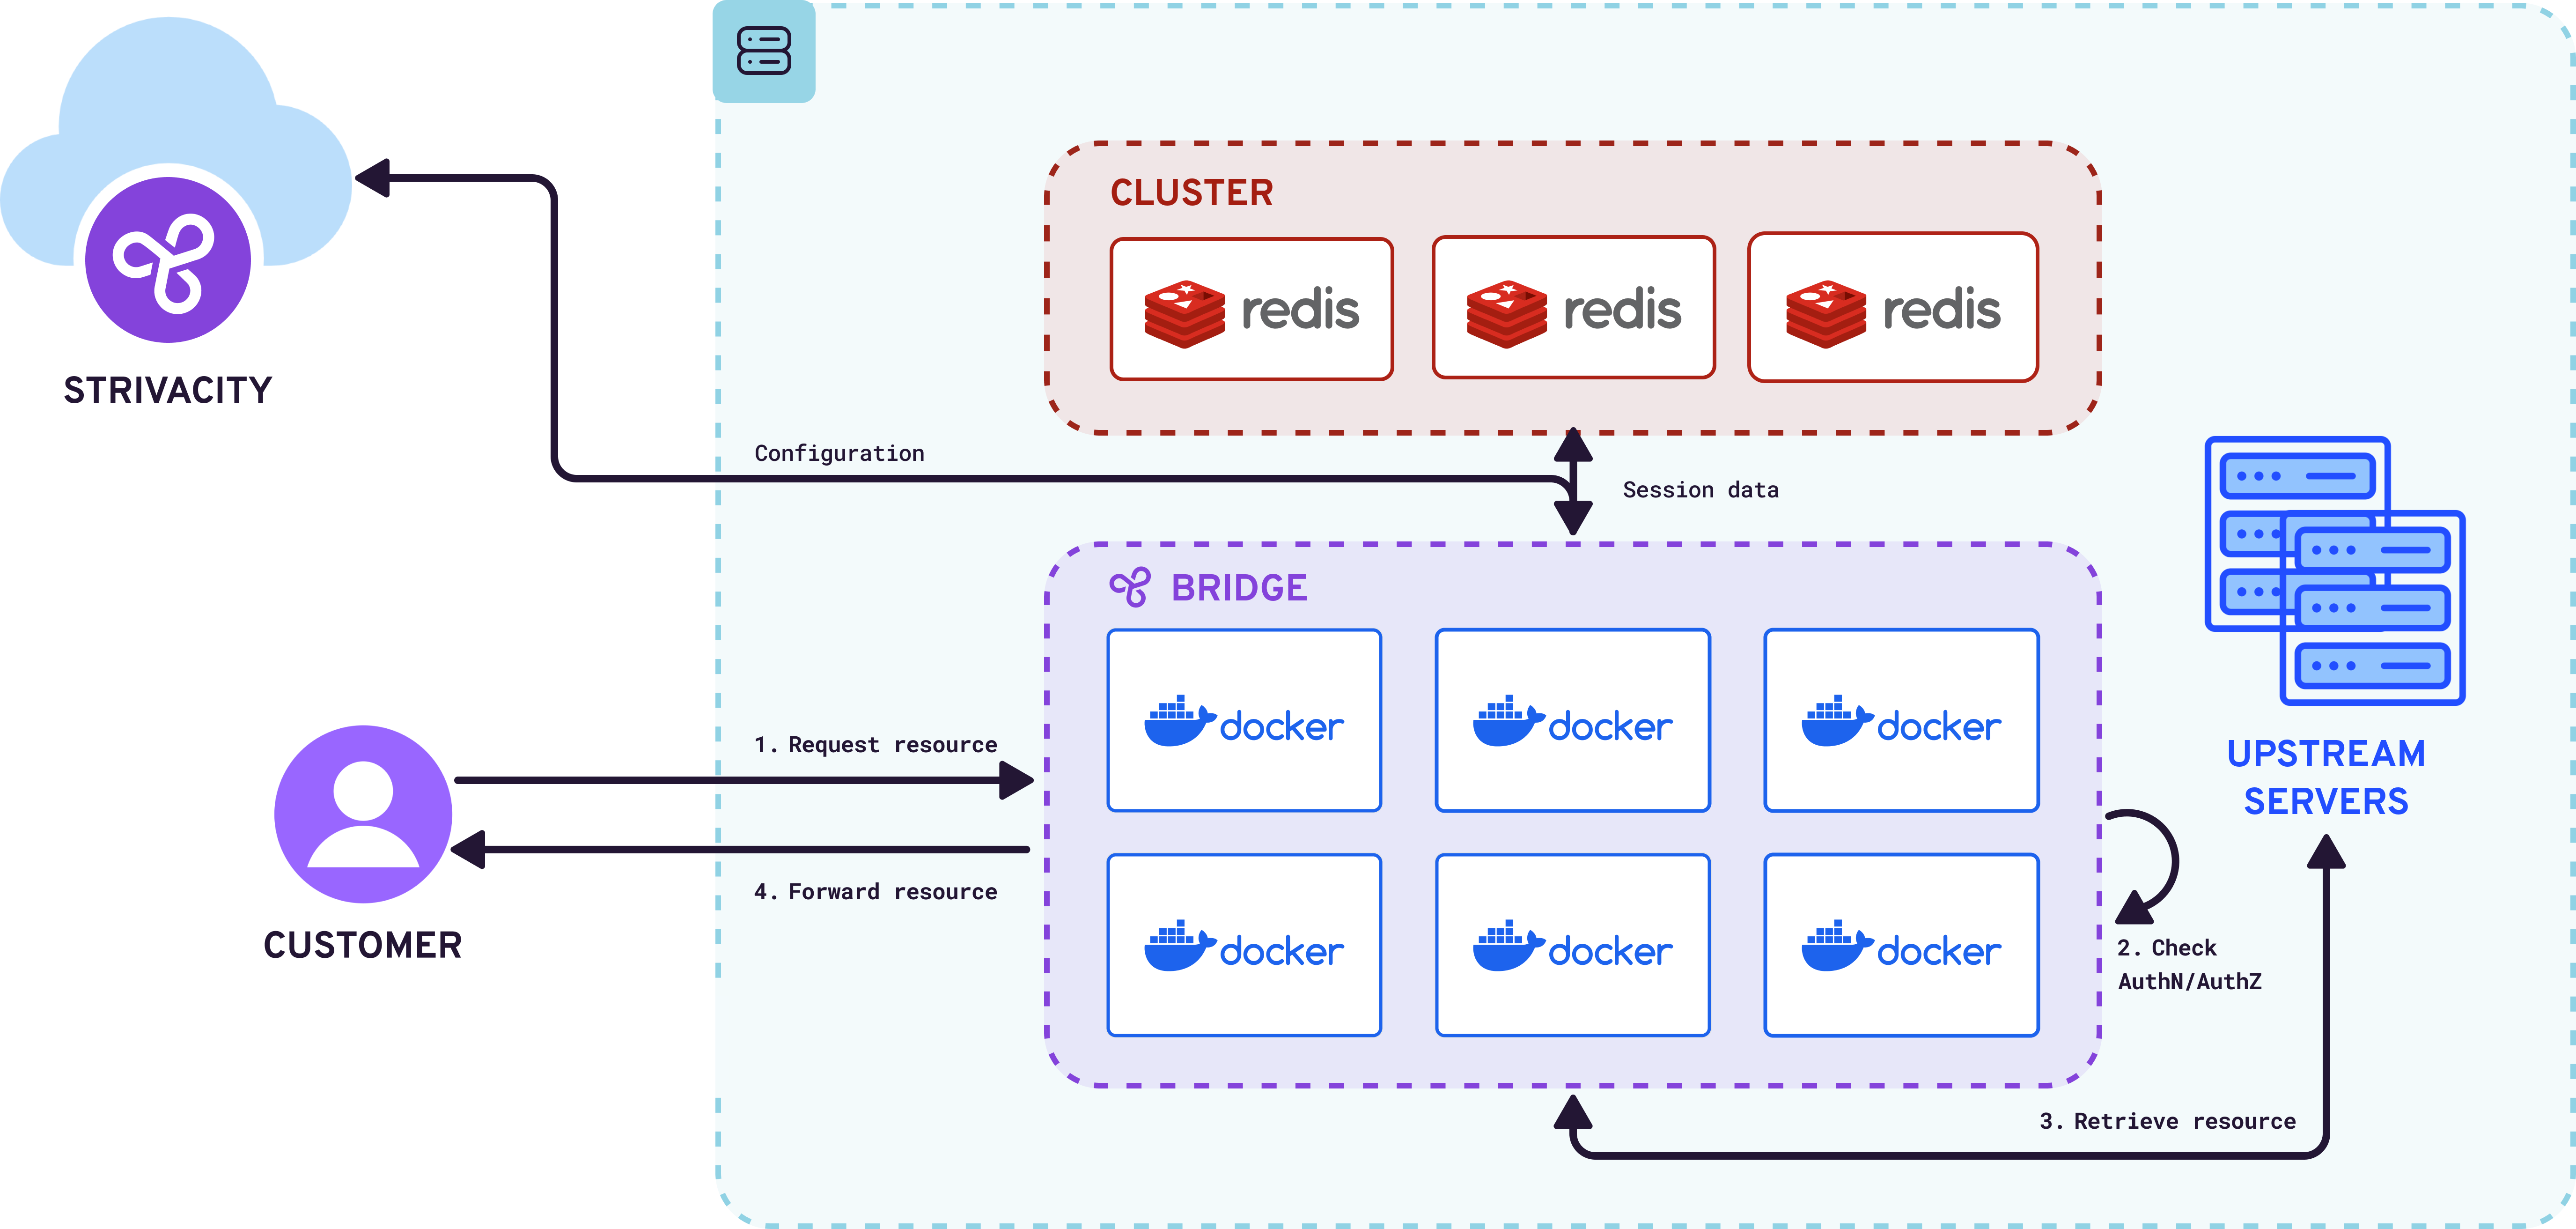
Strivacity Login Gateway as the reverse proxy
Strivacity Login Gateway using a brand's existing reverse proxy
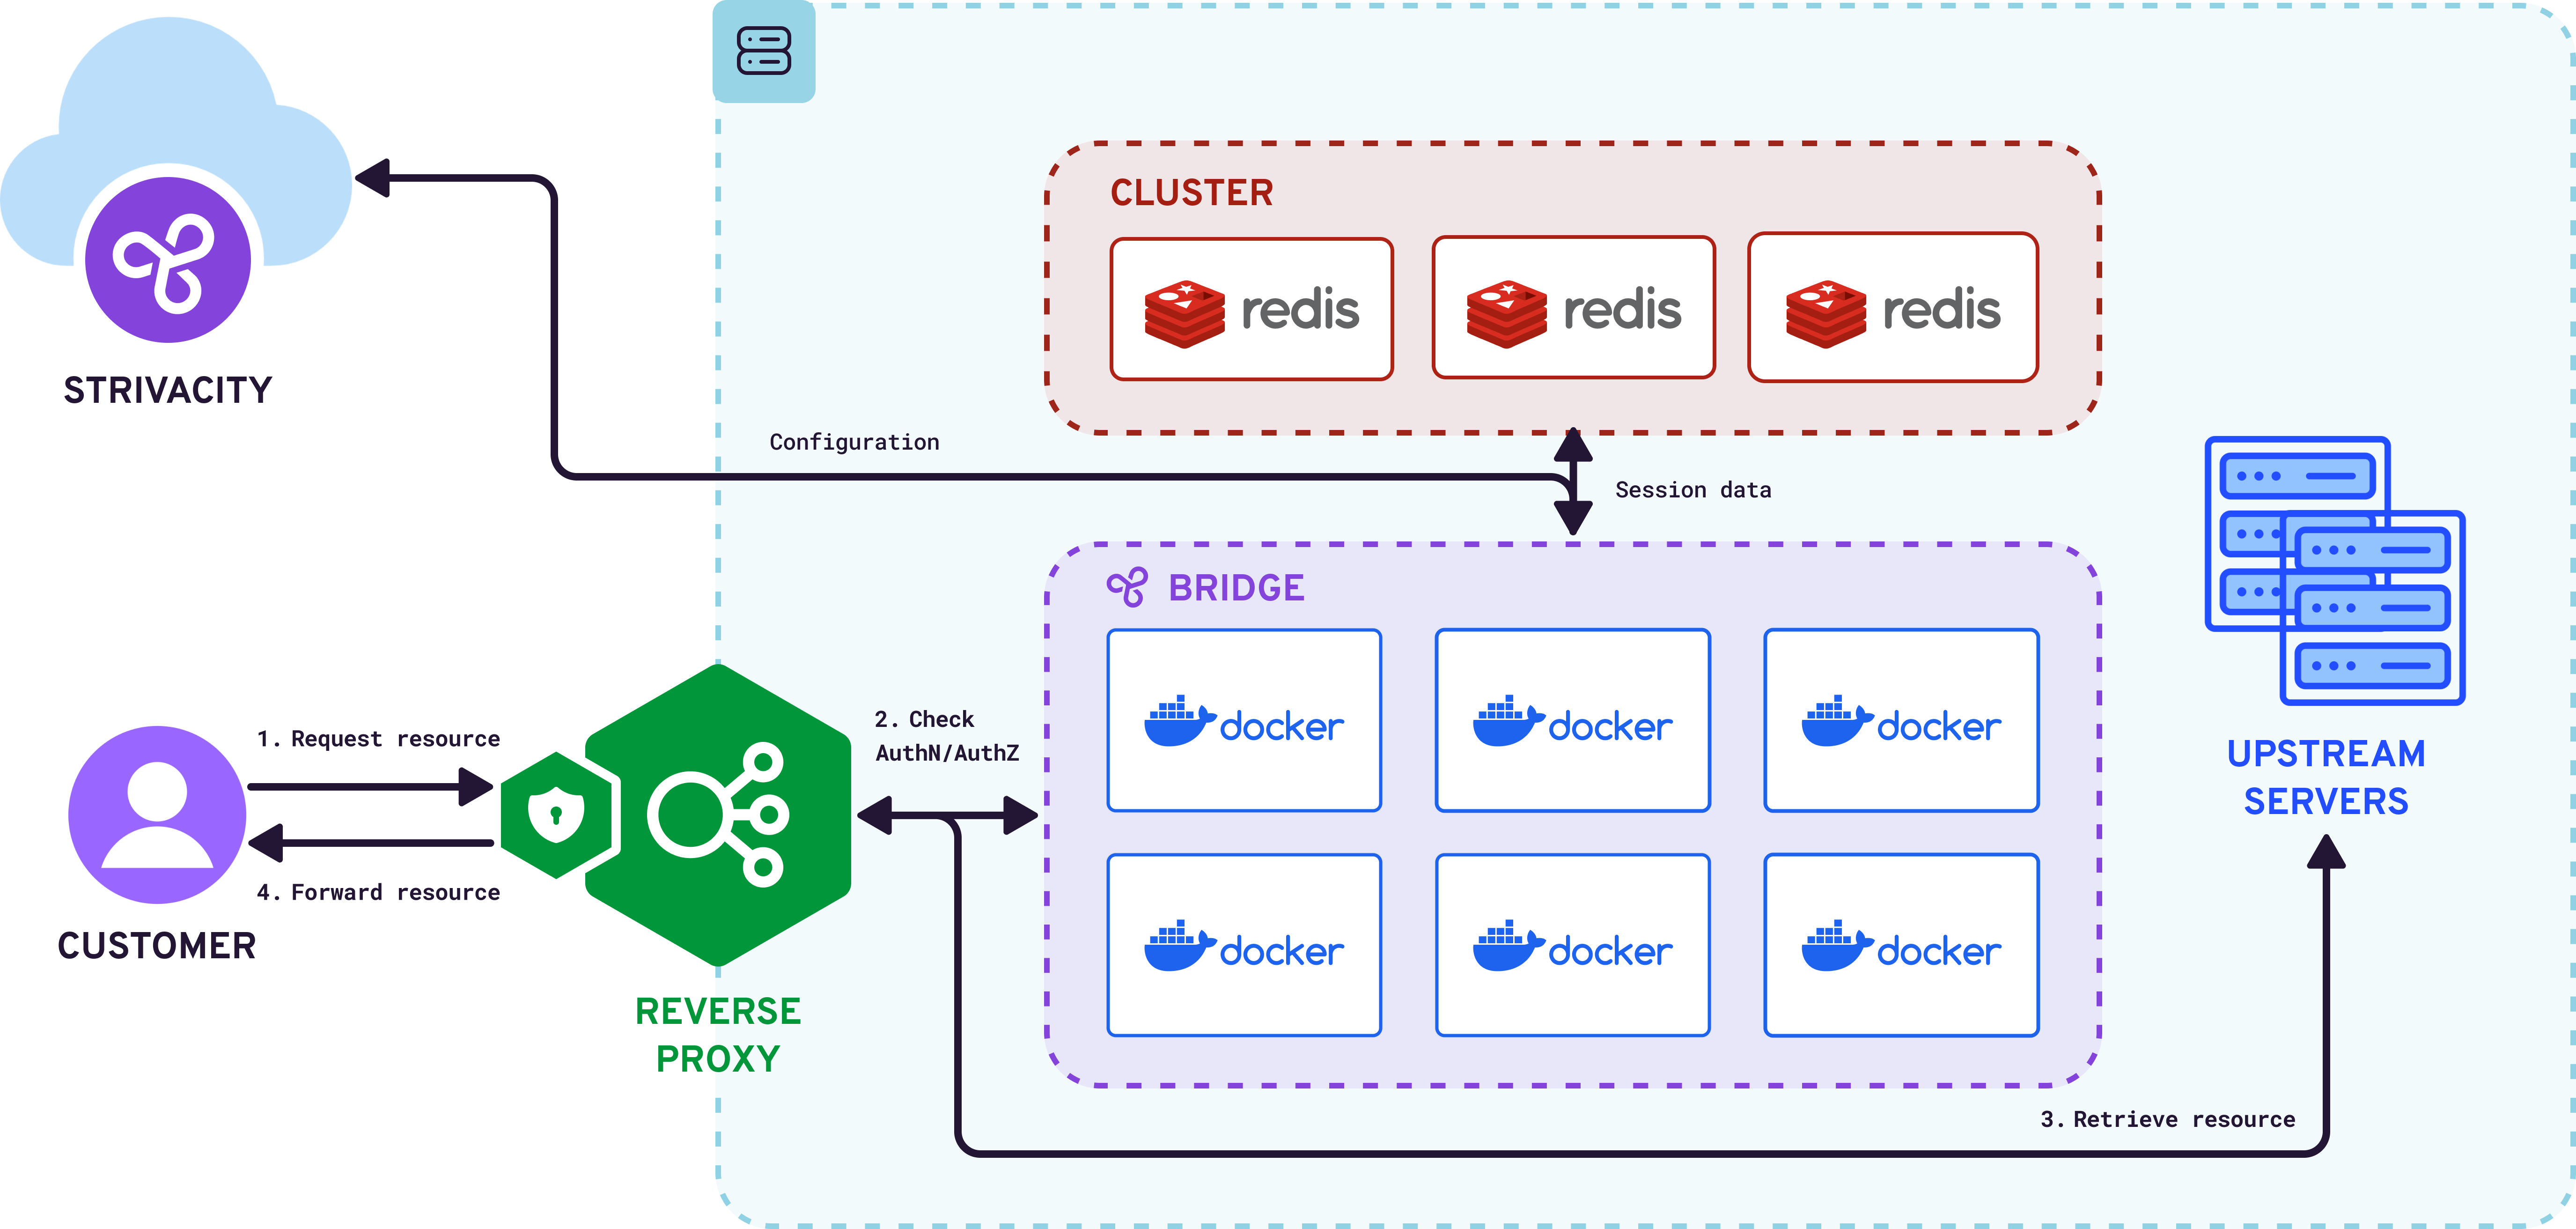
Strivacity Login Gateway deployed using a brand's own reverse proxy
Your technical account manager will deliver and can assist and arrange support for the installation of the on-premises Login Gateway component. Afterward, brand admins can manage access policies directly from the Strivacity Admin Console.
Configure the sites
Once the on-premises component has been successfully configured, you can now begin setting up authorization scopes and policies via the Strivacity admin console. The process is as follows:
- Develop an API security policy for each site/domain
- Set the audience to match the host of the Login Gateway, e.g., for https://shop.saasii.io, use shop.saasii.io.
- Include any necessary scopes, which may be utilized for authorization later.
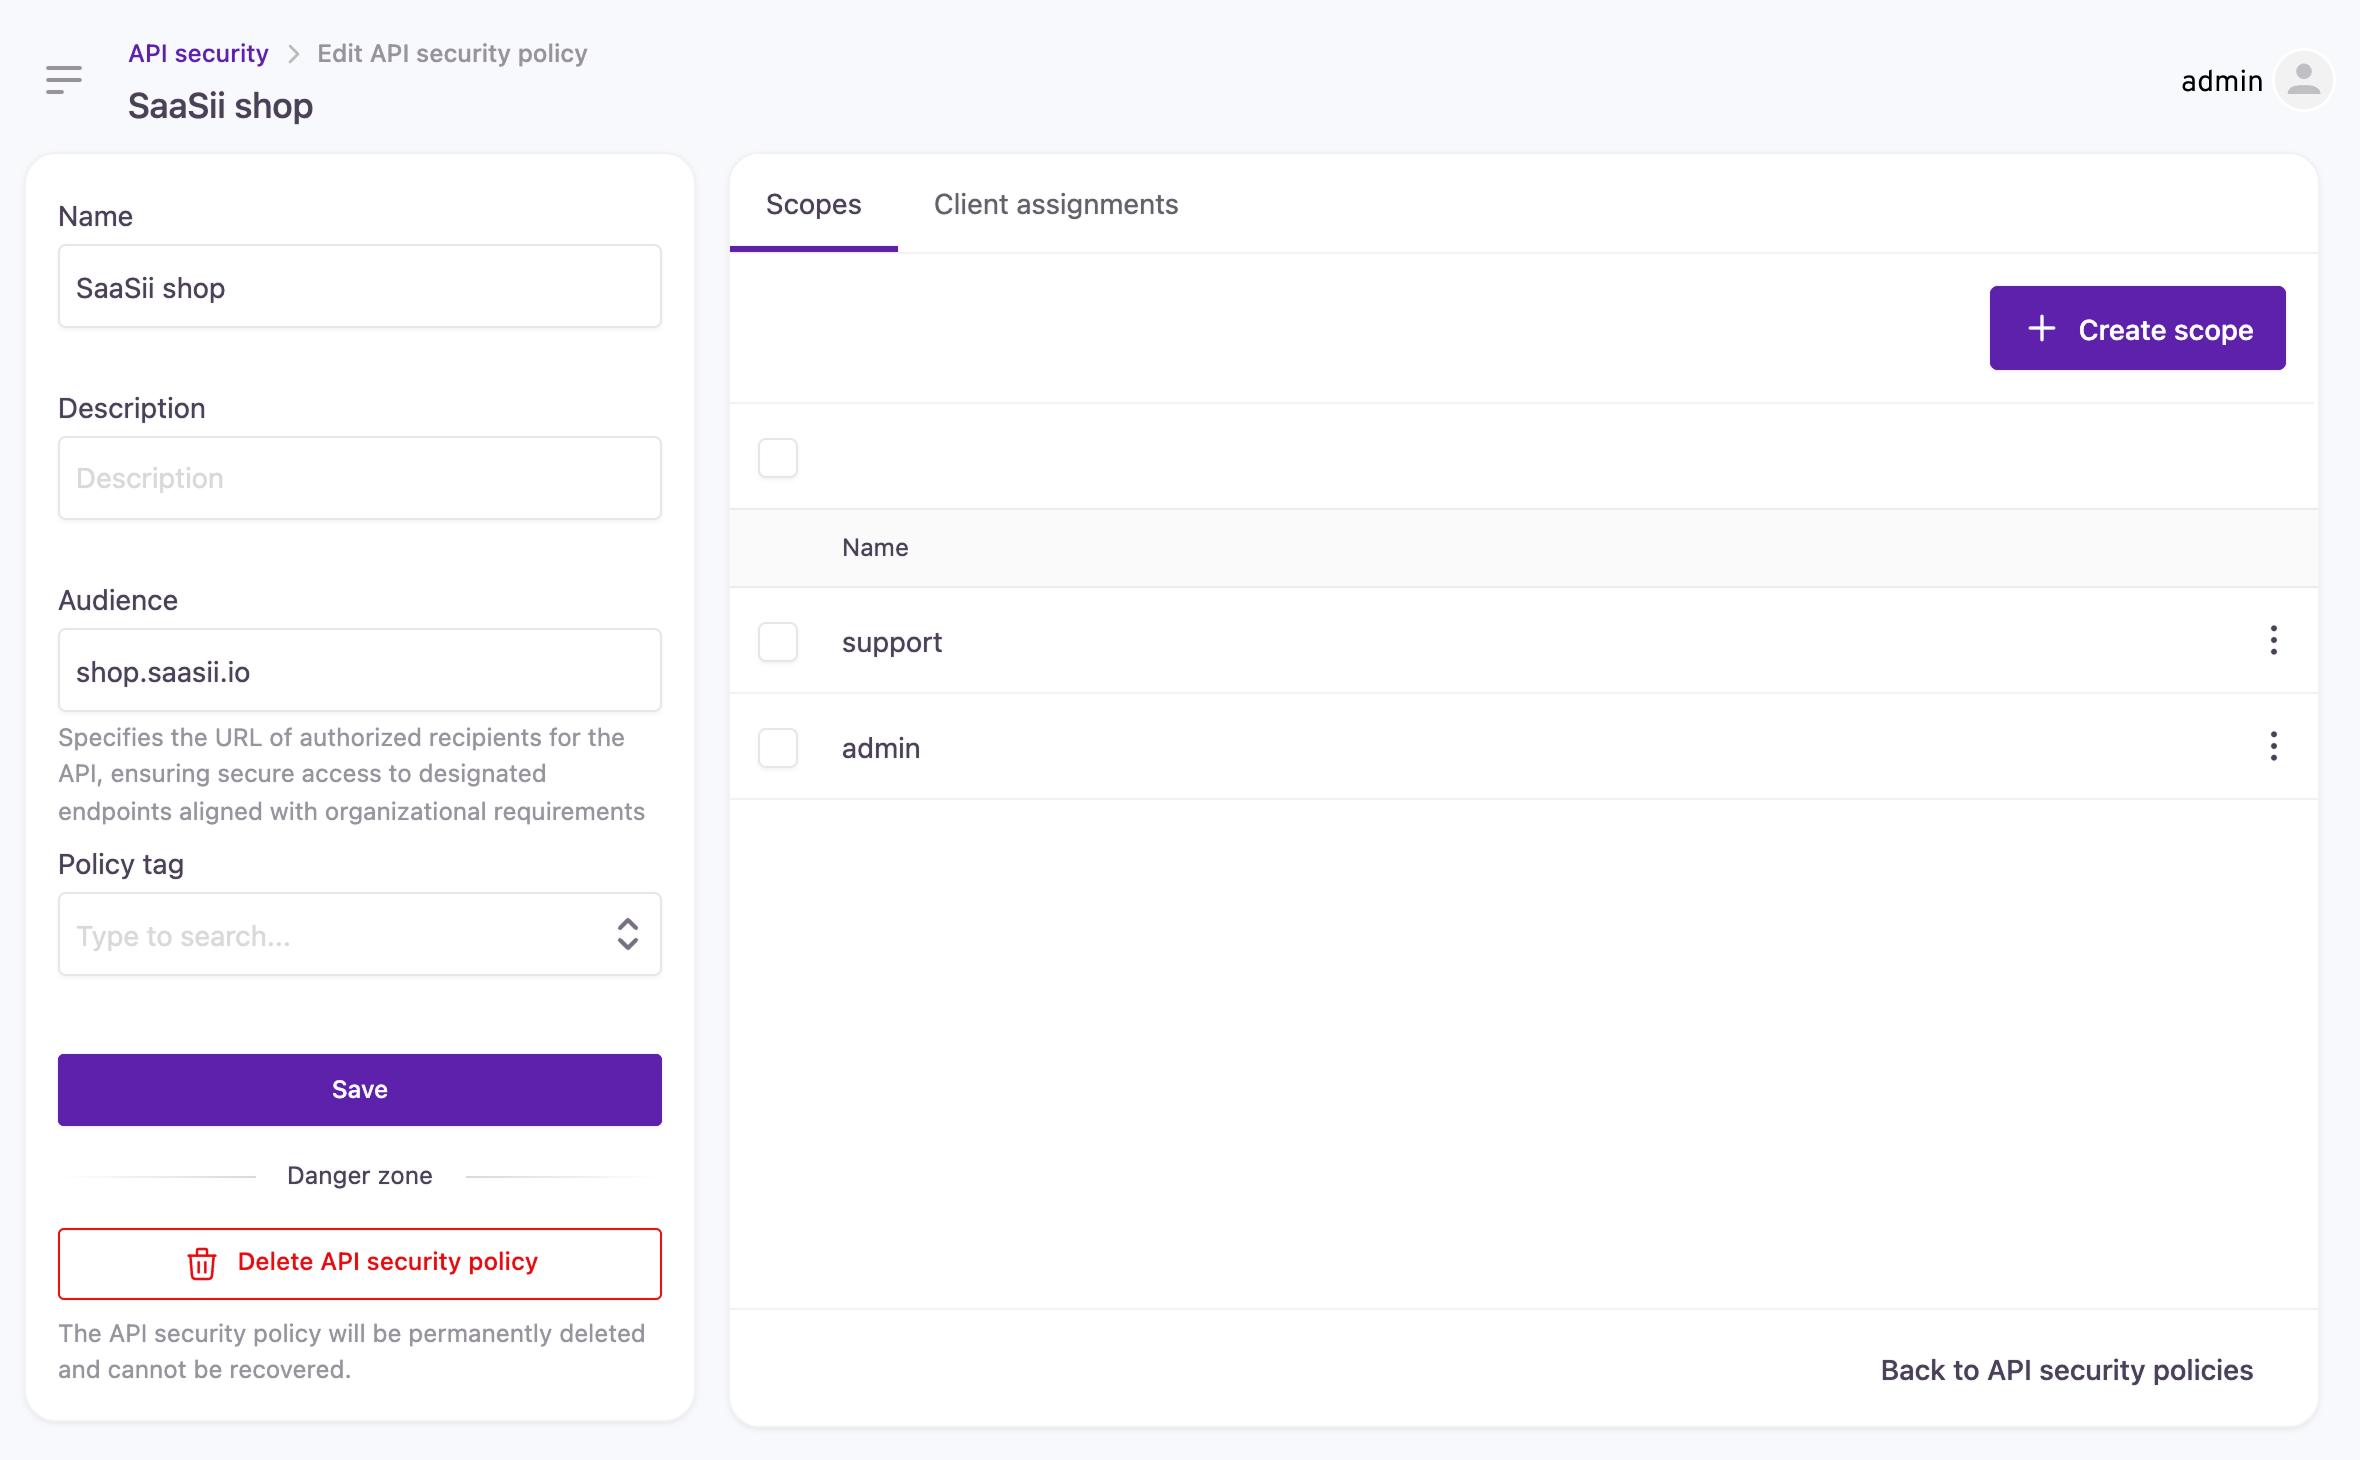
Creating an API security policy
Connection configuration
- Create an Application or reuse an existing one.
- Establish a new Application client with type LOGIN GATEWAY.
- Under Connection Configuration, define the callback URLs for each site managed by the Login Gateway, e.g.,
https://shop.saasii.io/sty-login/code/login-gateway, where 'shop.saasii.io' represents the Login Gateway.
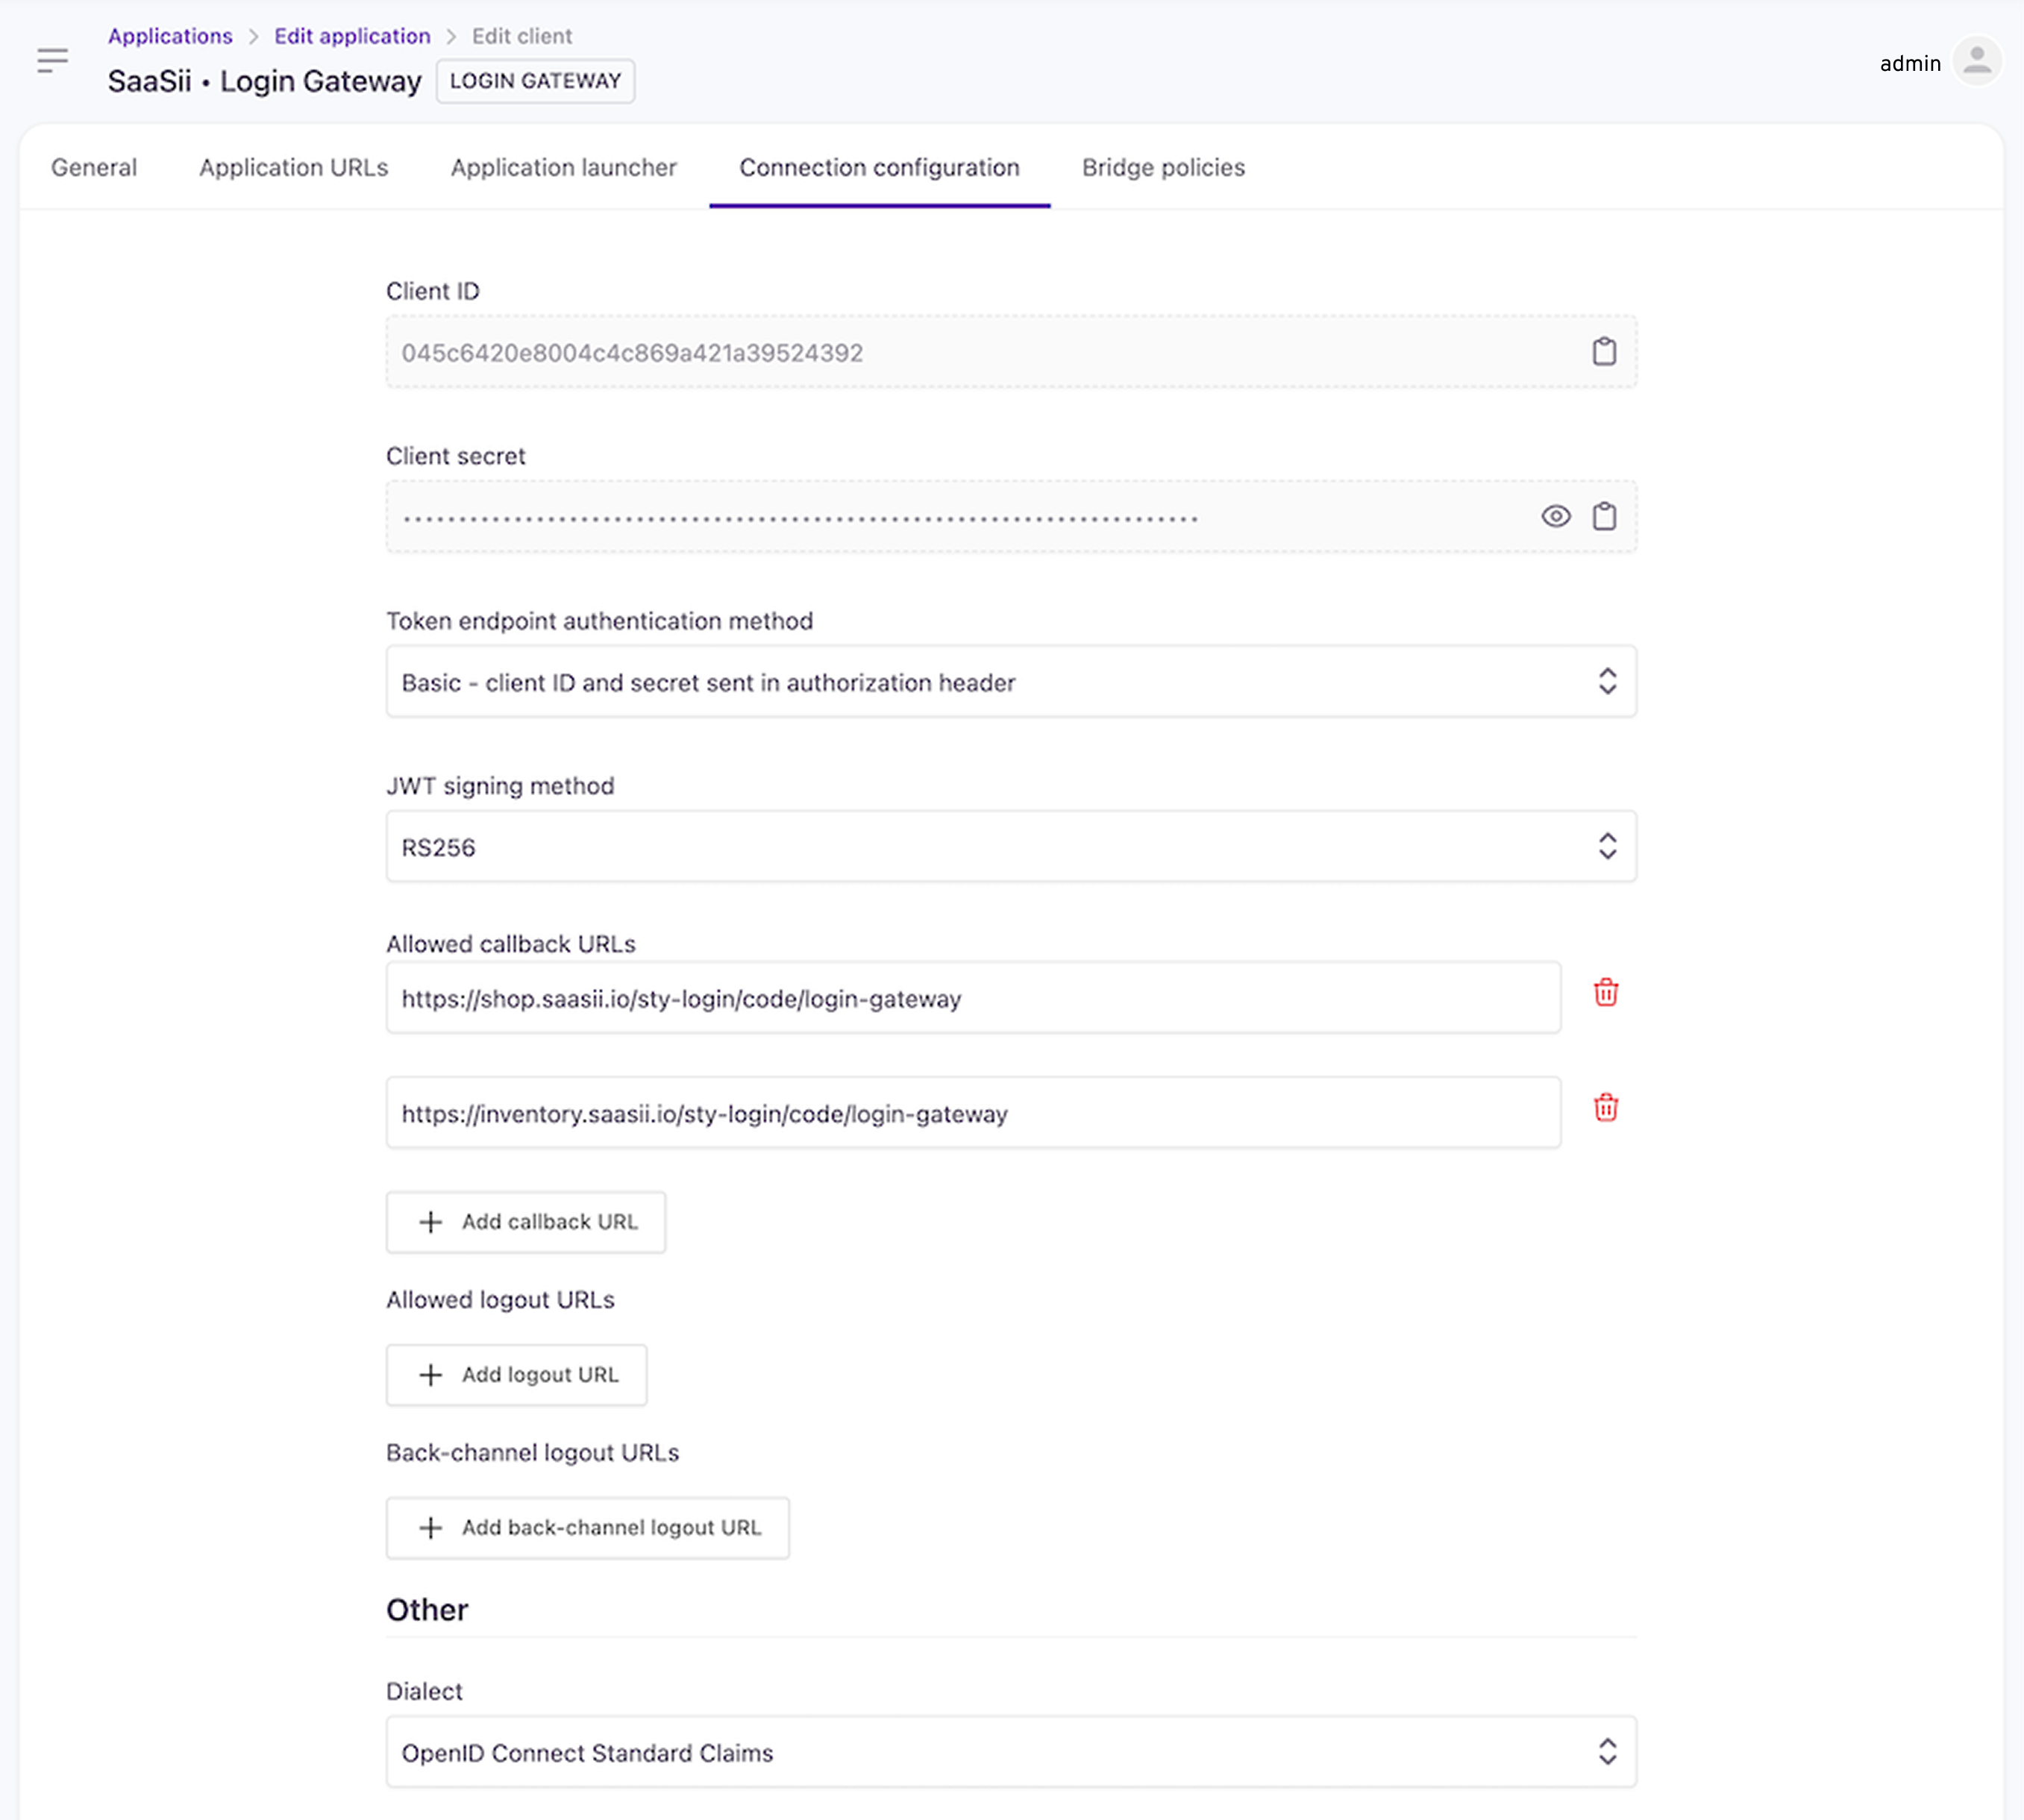
Client connection configuration
Login Gateway policies
Next, link the previously developed API security policies to the Login Gateway client.
Resources
Configure authentication and authorization rules in an ordered list, identifying whether customer authentication is required for a given URL pattern (regex) and HTTP method and, if so, what scopes are necessary.
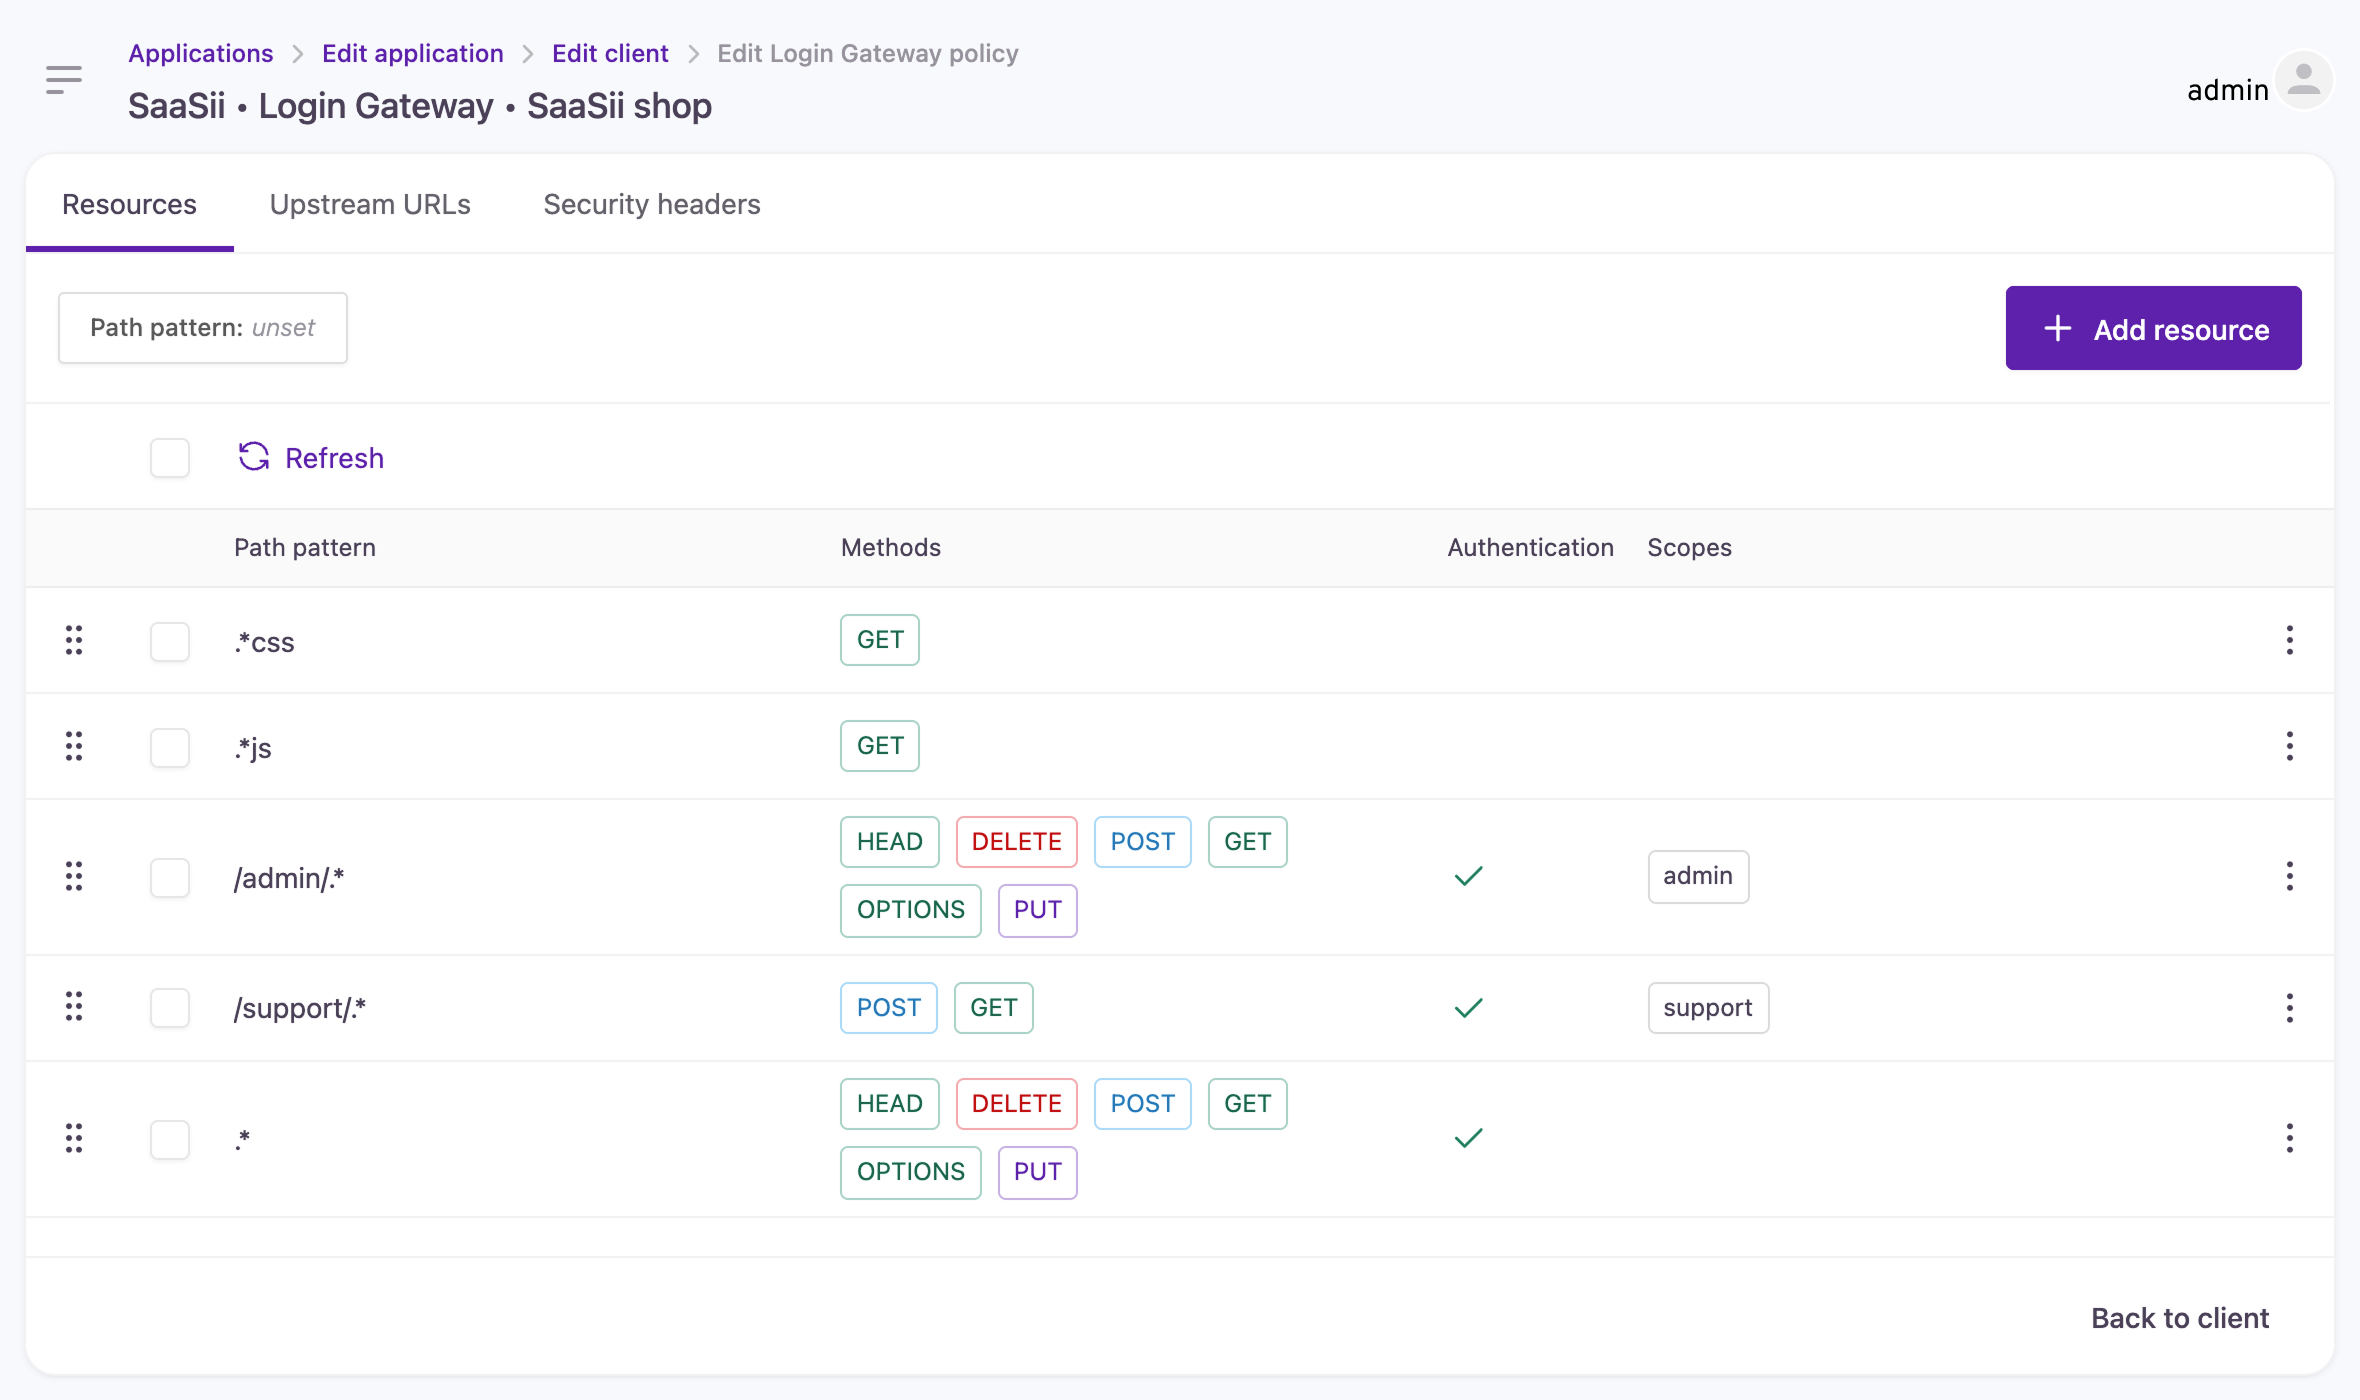
Configuring authentication and authorization rules
In the example provided:
- CSS files are accessible without authentication.
- JS files are accessible without authentication.
- Access to paths under /admin/ requires authentication and an admin scope.
- Access to paths under /support/ requires authentication and a support scope
- All other paths require authentication.
This ordered list prioritizes matching rules, so a request for /admin/css/main.css would not require authentication because it matches the first rule.
A default rule exists to reject any request that does not match any configured rule.
Upstream URLs
You can configure multiple upstream URLs per site. Both HTTP and HTTPS schemes are supported, and a custom port can be specified if necessary.
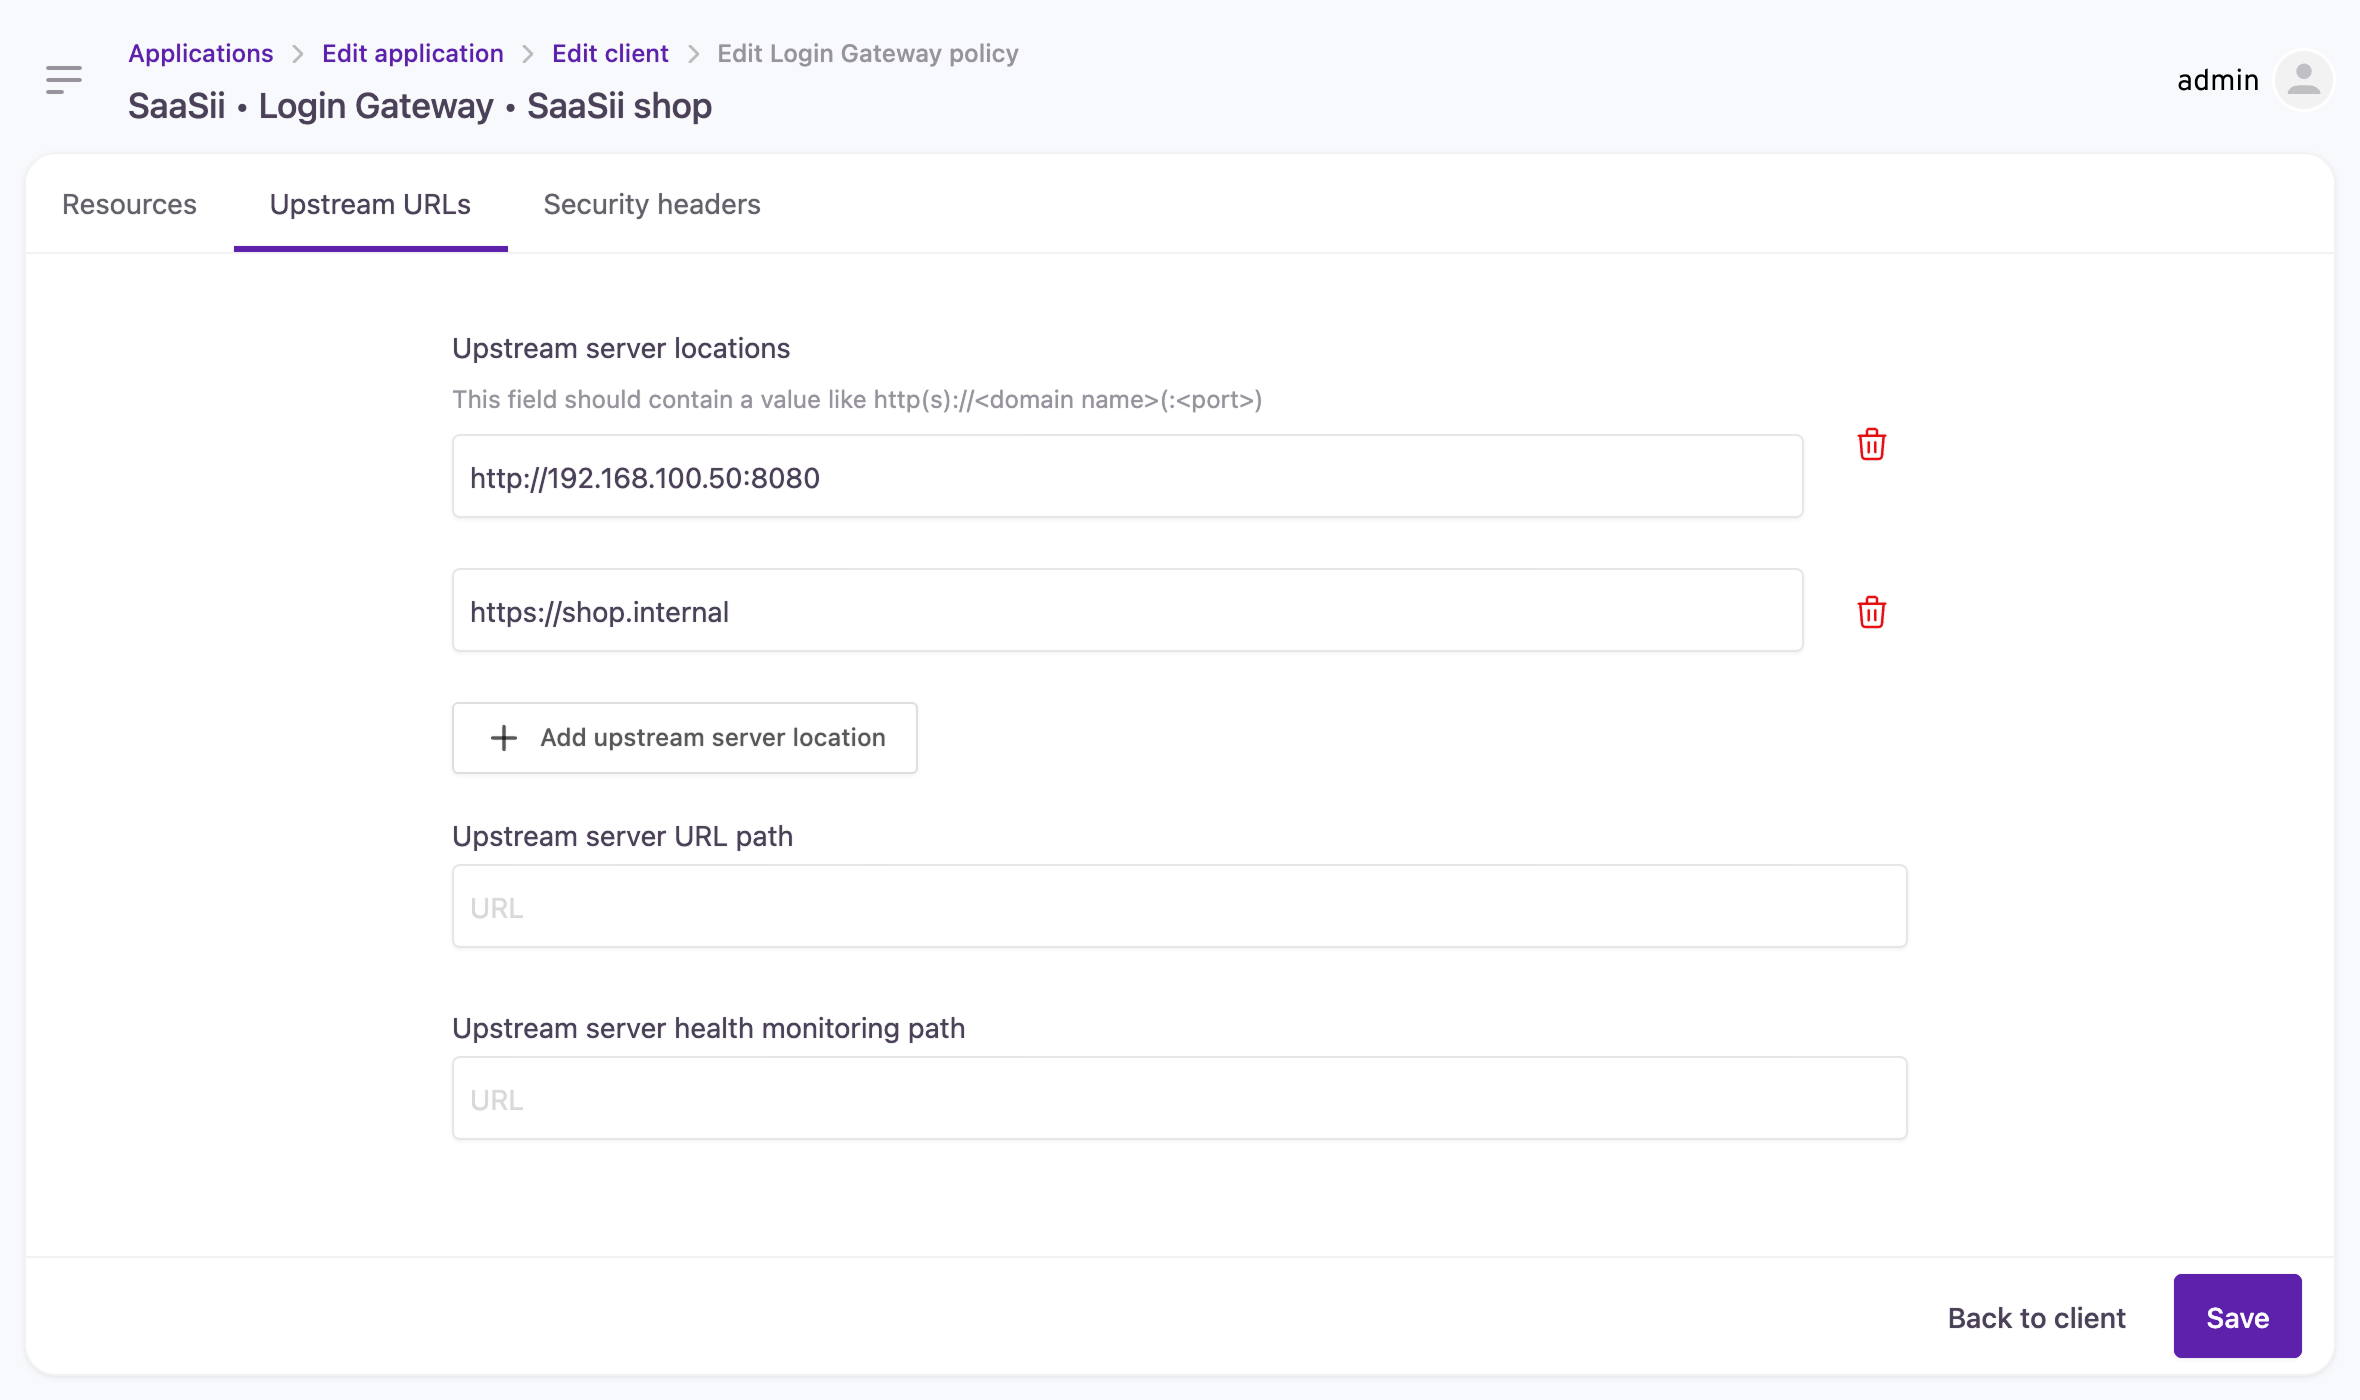
Configuring upstream URLs
Security headers
For each request sent to the upstream servers, the Login Gateway can append custom headers derived from the ID token's claims. This includes claims provided by our dialect or additional values added to the ID token with the Before ID token generation hook.
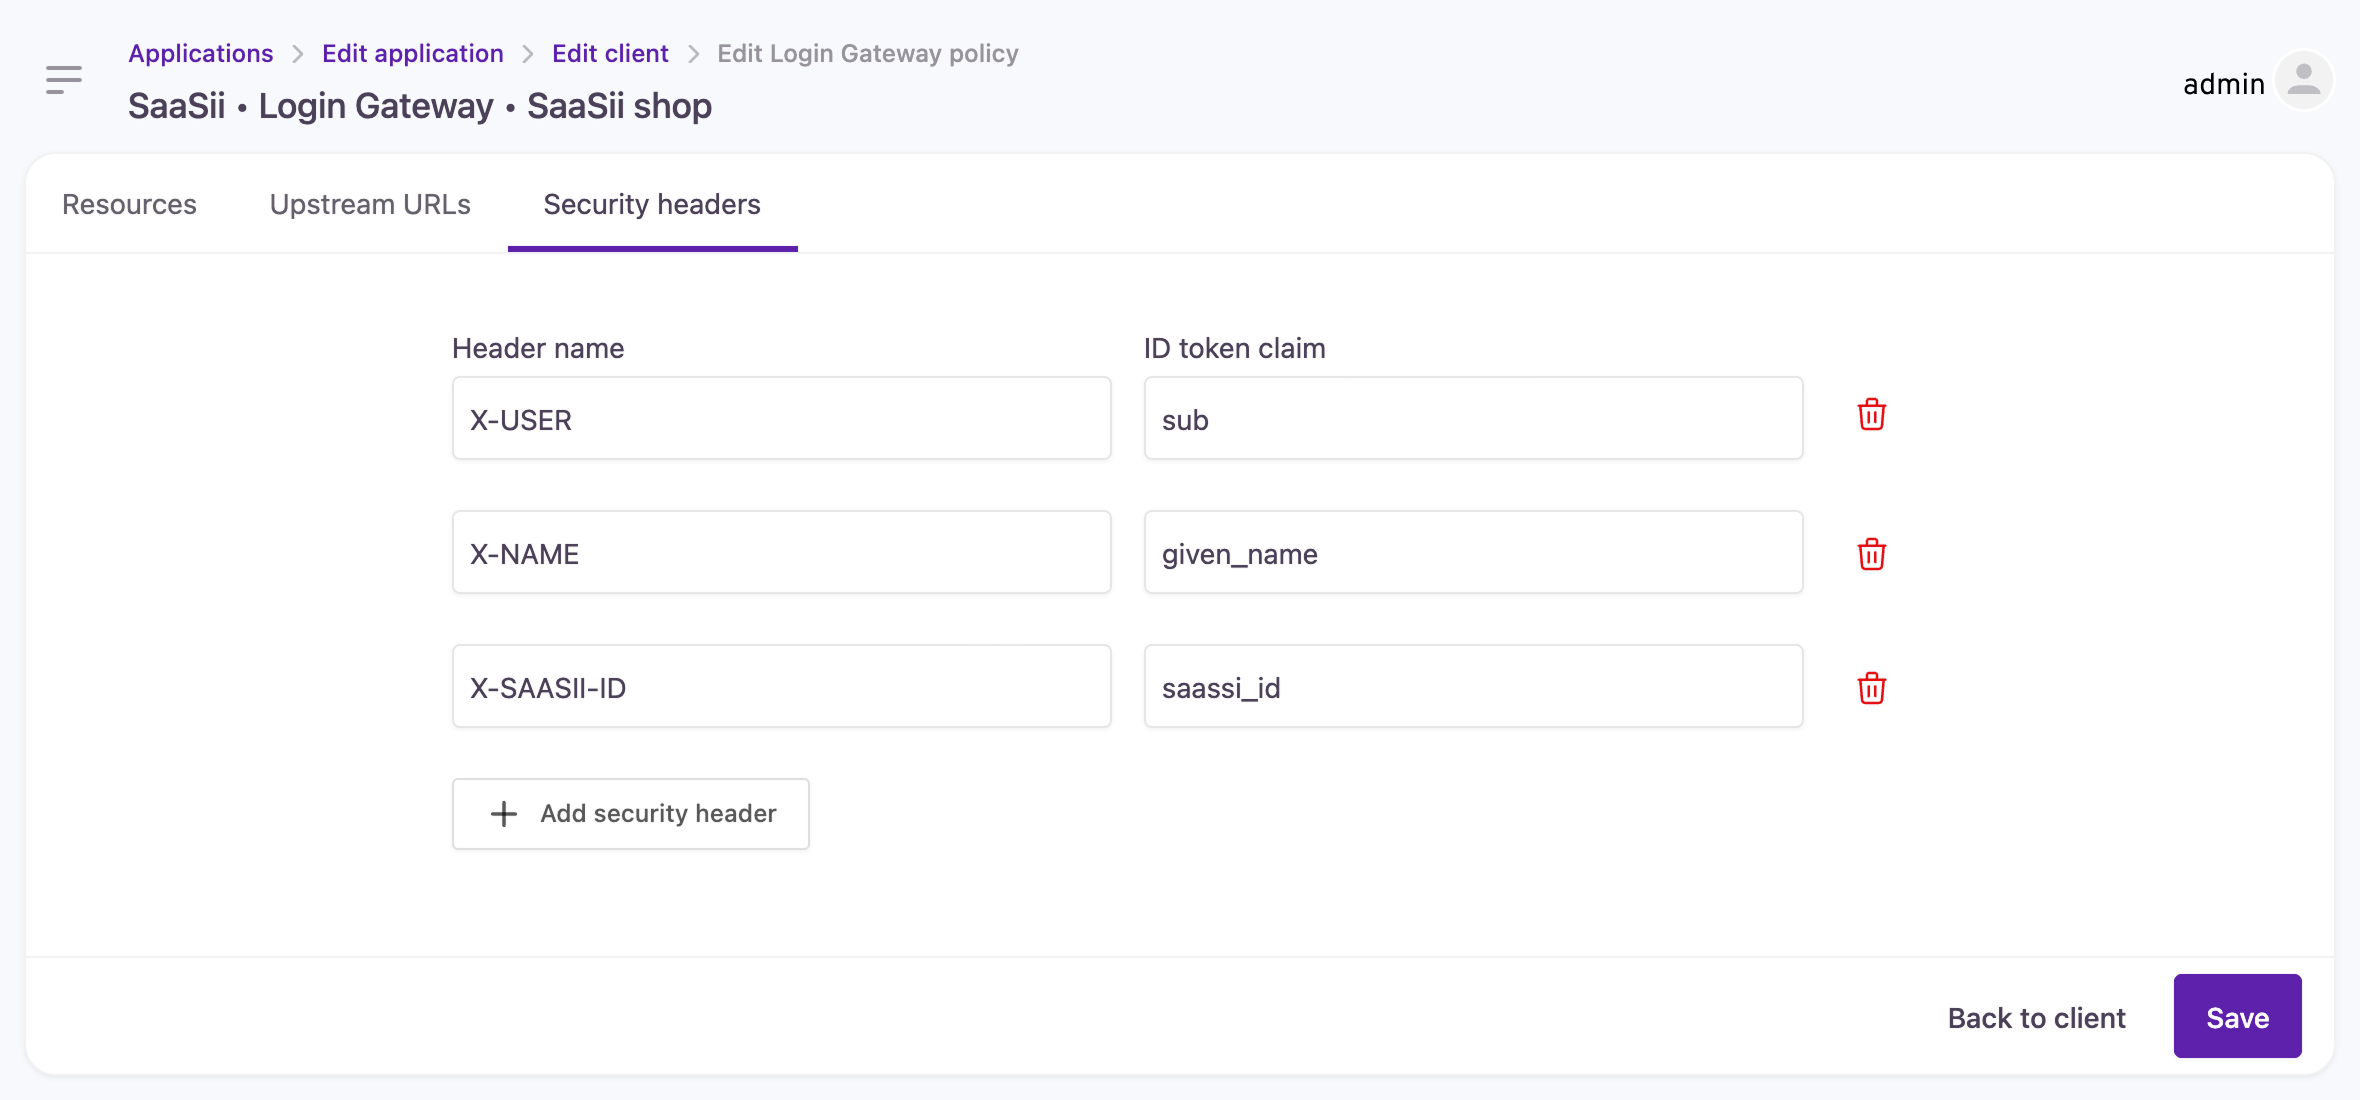
Configuring security headers
Logout
A user or application can trigger a logout of their header-based session by going to the logout URL.
If configured, the logout will then redirect to an allowed URL.
Configuring the logout redirect
By default, a logout will leave you at a hosted page within the Strivacity cloud application. However, it is possible to then redirect to a URL of your choosing after a Login Gateway logout.
The logout URL is defined both in the local configuration as well as in the cloud. The default local logout page is at /sty-login/logout-successbut you can actually redirect to any site you wish.
Once the local configuration is updated with the redirect URL, you must update the configuration in the cloud in two ways. Edit the connection configuration as follows:
- Add the logout URL to the "Allowed callback URLs" e.g.
https://shop.saasii.io/sty-login/logout-success - Also, add the URL to the "Allowed logout URLs" list.
The same URL must be in both locations for redirection to succeed.
The logout redirection URL does not have to be hosted on the Login Gateway. As long as both the local Login Gateway configuration and the cloud reference the same URL, the redirect will succeed after logout.
Trigger a logout
To trigger a logout, simply direct the logged-in user to visit the /sty-login/logout URL on the Login Gateway. For example, visit or redirect to https://shop.saasii.io/sty-login/logout. If there is a valid Strivacity session, this will redirect to Strivacity and clear the session information for the Login Gateway.
If the logout URLs are configured correctly, Strivacity will then redirect to the requested redirect URL.
Updated 10 months ago
